# Beckman System Gold High Performance Liquid Chromatograph


# System Gold™ 126 168 HPLC instrument

### **Qu'est-ce que l'HPLC :** 

L'HPLC (High Performance Liquid Chromatography) est une technique de séparation analytique de molécules présentes dans un échantillon, ce qui permet leur analyse qualitative et quantitative. Dans cette technique, une phase mobile (éluant) et une phase stationnaire (colonne) permettent la séparation des molécules d'un échantillon en fonction de différents critères. Elle est utilisée par de nombreuses industries, comme la pharmacie et la bio-pharmacie, l'alimentation, la cosmétique...

En fonction de la colonne et de l'éluant choisi pour l'analyse, le type de chromatographie peut différer. Voici certains des différents types de chromatographies que nous pouvons réaliser :

- Chromatographie d'adsorption
- Chromatographie de partage (la plus utilisée): 
    - En phase normale. Les phases mobile et stationnaire sont polaires
    - En phase inversée. La phase stationnaire est apolaire mais la phase mobile reste polaire
- Chromatographie par échange d'ions
- Chromatographie d'exclusion stérique (en fonction de la taille des molécules)

Il est important de se renseigner sur la compatibilité des solvants avec les colonnes avant de commencer une manipulation. Il est également nécessaires d'utiliser les bons éluants et colonnes en fonction des espèces pouvant être présentes dans un échantillon.

### **Description générale**

Le chromatographe HPLC que nous utilisons (Beckman Coulter System Gold) est une chaine composé de plusieurs sous blocs, chacun ayant une fonction qui lui est propre.

[![th_Beckmn_Gold_125_166.jpg](https://wiki.fablab.sorbonne-universite.fr/BookStack/uploads/images/gallery/2024-03/scaled-1680-/th-beckmn-gold-125-166.jpg)](https://wiki.fablab.sorbonne-universite.fr/BookStack/uploads/images/gallery/2024-03/th-beckmn-gold-125-166.jpg)<span style="color: rgb(149, 165, 166);">*System GOLD HPLC*</span>


##### 1) Pompe ou "Solvent Module" :

Le rôle de cette pompe est d'envoyer l'éluant (ou les éluants) sélectionné(s) à travers la chaine de chromatographie. Le modèle que nous utilisons est le "Solvent Module 126". Il permet un mélange de plusieurs solvants, afin d'éviter à avoir à préparer nous même des mélanges au préalable.

[![System-Gold-126-Solvent-Module_1.JPG](https://wiki.fablab.sorbonne-universite.fr/BookStack/uploads/images/gallery/2024-03/scaled-1680-/system-gold-126-solvent-module-1.JPG)](https://wiki.fablab.sorbonne-universite.fr/BookStack/uploads/images/gallery/2024-03/system-gold-126-solvent-module-1.JPG)<span style="color: rgb(149, 165, 166);">*Pompe "Solvent Module 126"*</span>

Les flacons de solvant sont placés en haut de la colonne et sont reliés à des pompes A et B, qui permettent un mélange des solvants avec les rapports qui nous intéressent. Le flux débité par la pompe est ensuite envoyé directement vers le deuxième bloc du système HPLC, c'est-à-dire l’échantillonneur automatique (Autosampler). Tous les paramètres permettant de contrôler la pompe (débit, pressions minimale et maximale, choix des solvants pour les pompes A et B, rapport A:B) sont modifiés depuis l’ordinateur.

<p class="callout info">Si on ne veut pas envoyer notre éluant vers le reste du systeme HPLC (échantilloneur et détecteur), il suffit d'ouvrir la valve d'évacuation ("Drain Valve") : elle enverra tous l'éluant dans une bouteille "déchet".</p>


##### 2) Échantillonneur automatique ou "Autosampler 507e"

<p class="callout info">L’échantillonneur est détecté en tant que "Autosampler 507e" par le logiciel 32 Karat, même s'il se nomme en réalité "Autosampler 508".</p>

Le rôle de l'échantillonneur et de prélever automatiquement les différents échantillons préparés et placés au préalable dans des flacons situés sur une plaque tournante. Chaque emplacement est numéroté, et à chaque nouveau programme, l'échantillonneur commencera son prélèvement au premier flacon. Les flacons utilisés sont de petites tailles et sont tous dotés d'un bouchon spécial doté d'un septum, ce qui permet à l’échantillonneur de le percer avec une aiguille.
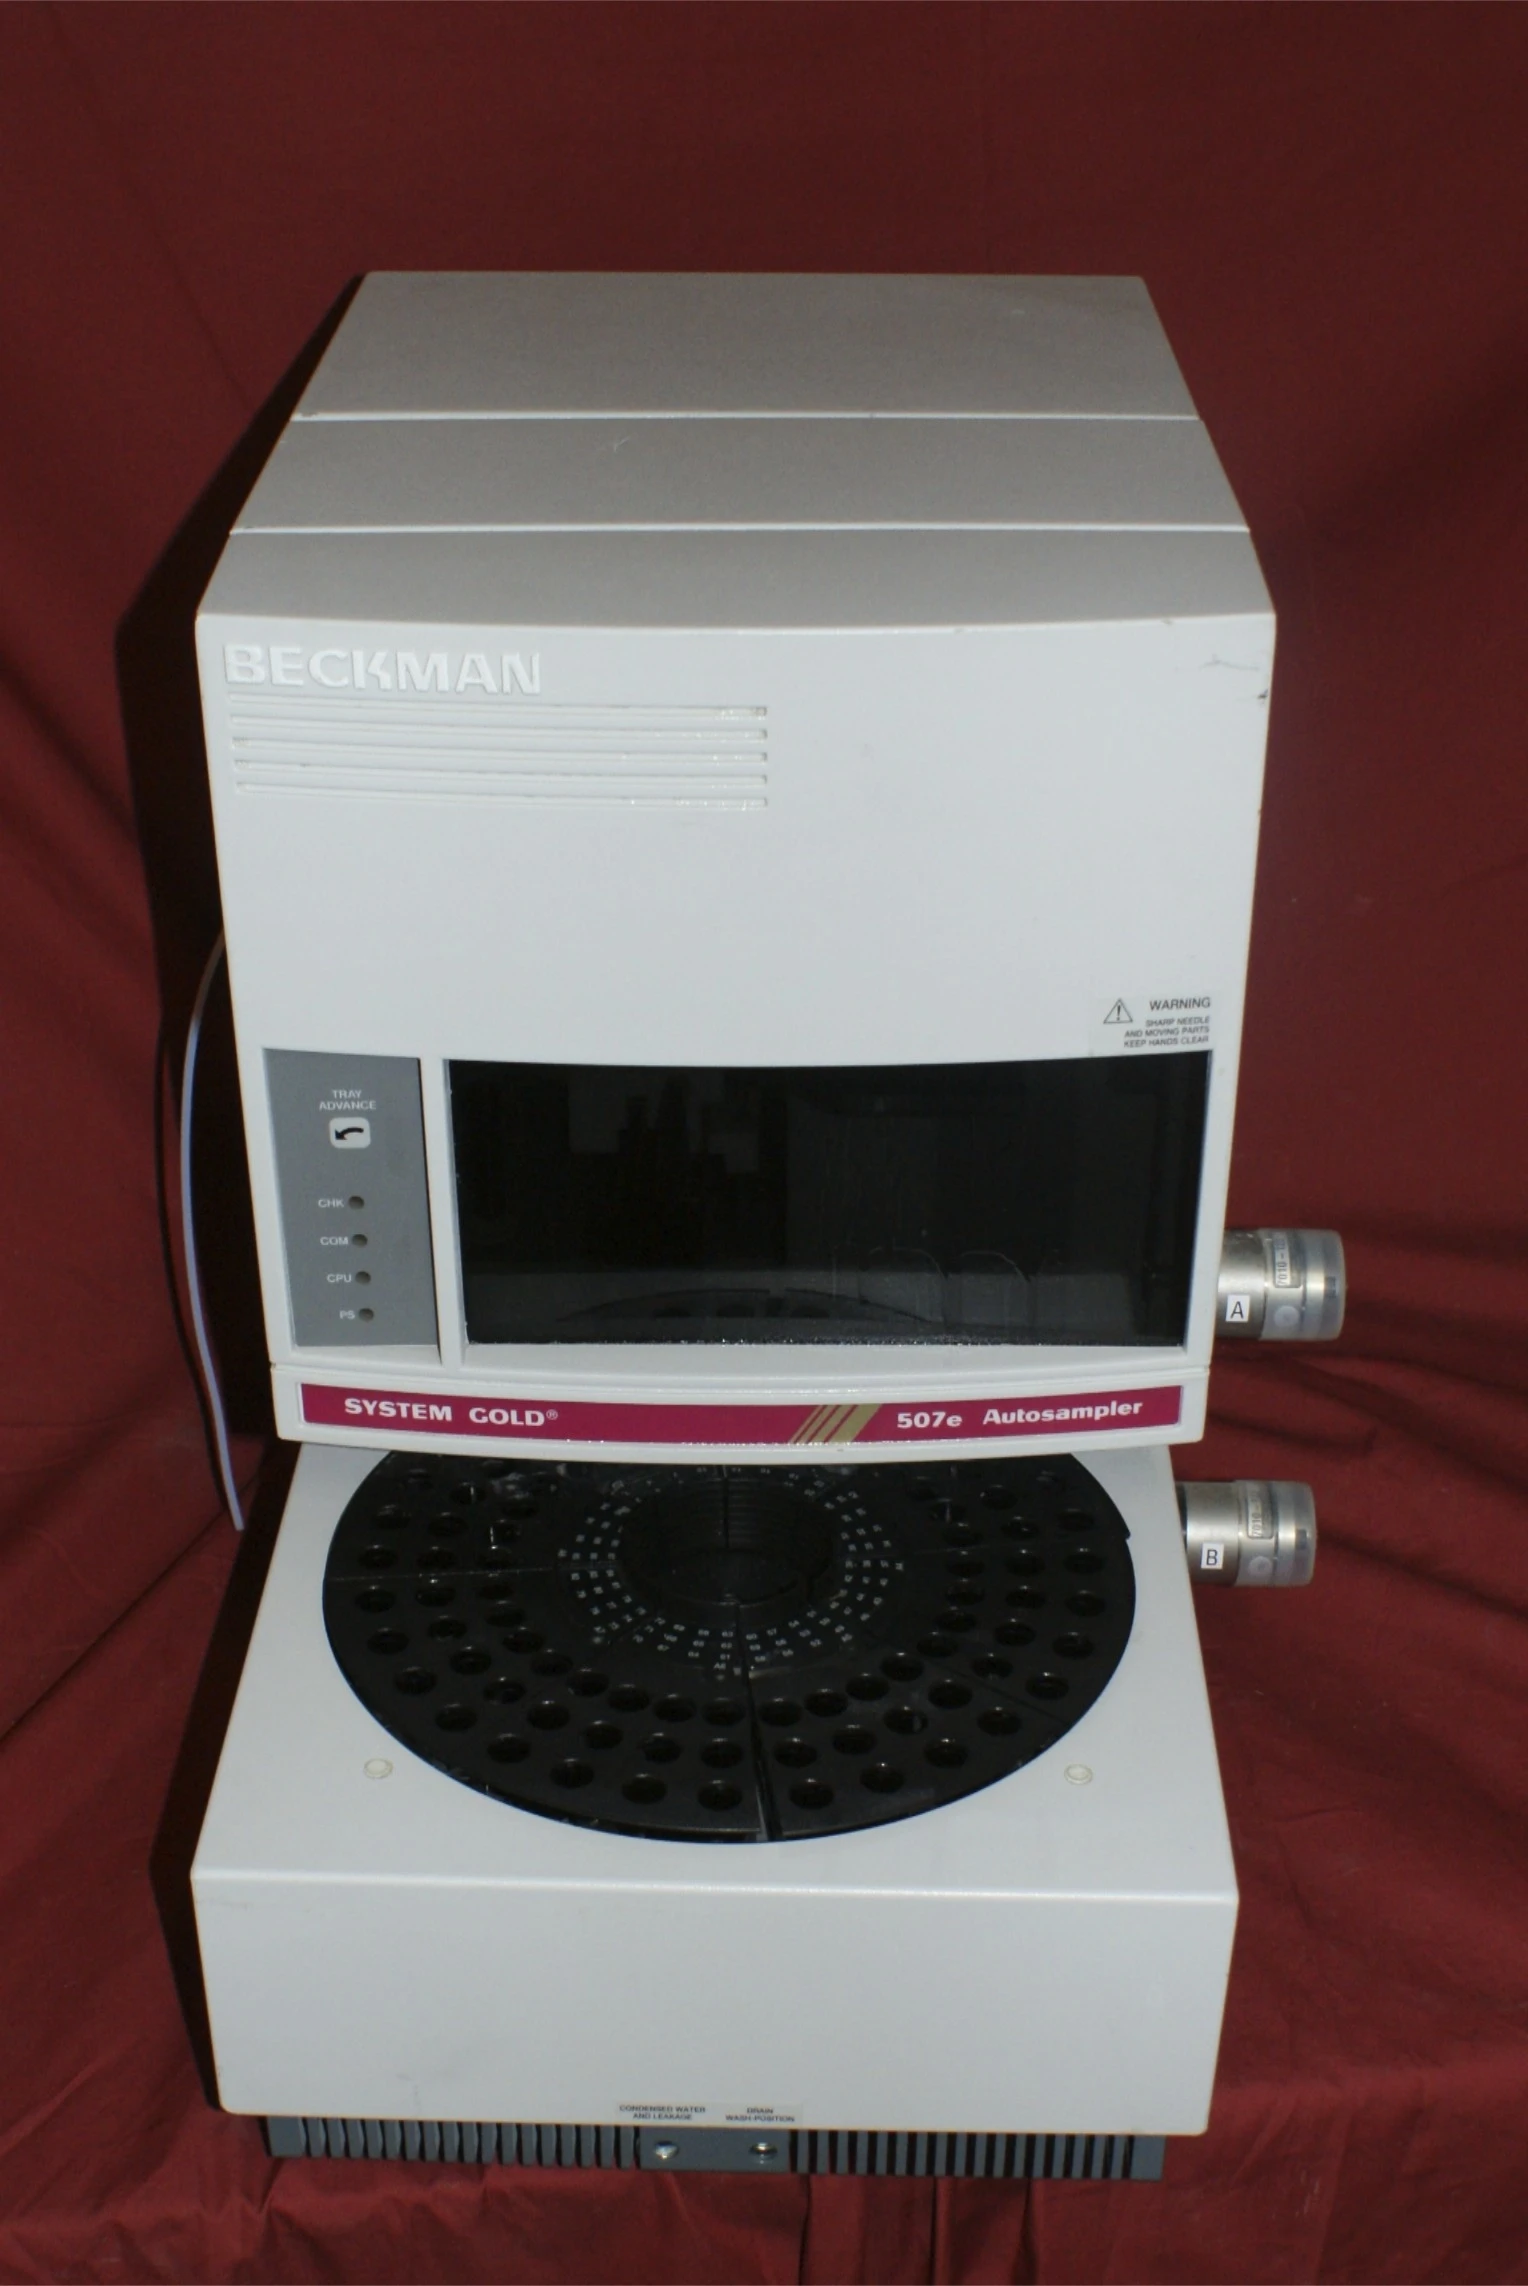
![06c6ff85-bb8b-464e-ad19-ede61ae09780.webp](https://wiki.fablab.sorbonne-universite.fr/BookStack/uploads/images/gallery/2024-03/scaled-1680-/06c6ff85-bb8b-464e-ad19-ede61ae09780.webp)

<span style="color: rgb(149, 165, 166);">*Echantillonneur "Autosampler 507e"*</span>

L'échantillonneur est aussi doté d'une bouteille qui permet le rinçage de la seringue entre chaque injection : elle peut être remplie avec du méthanol ou un mélange d'eau et isopropanol. Elle est ensuite accrochée à la machine, tout en faisant passer le tube de nettoyage par l'ouverture se trouvant sur le bouchon.

Afin d'envoyer notre échantillon vers la colonne et vers le détecteur, l'Autosampler est doté d'un système spécial INJECT/LOAD, ce qui permet d'envoyer une petite quantité d'échantillon vers la colonne : tant que l'échantillon n'est pas envoyé vers la colonne, il est éliminé ou bien il reste à l'intérieur du système INJECT/LOAD, jusqu'à ce qu'il soit envoyé vers la colonne.


##### 3) Colonnes

La colonne est directement rattachée au système INJECT/LOAD de l'échantillonneur et au détecteur. C'est elle qui permet la séparation des différentes molécules d'un échantillon, dont la présence sera ensuite confirmée par le détecteur. Il en existe différents types, chacune ayant des caractéristiques qui lui sont propres, et plus ou moins adaptés à certaines molécules et éluants.

La colonne est directement rattachée à la sortie 6 de l'échantillonneur, grâce à un tube en plastique fin, et est relié de la même manière au détecteur, vers une entrée qui consiste en un fin tube en métal. La colonne est vissée aux entrée et sortie afin d'éviter toute suite possible en dehors du système.


##### 4) Détecteur ou "Detector

Le détecteur (Detector 168) se situe à la fin de la chaine, et il permet de savoir à quel moment une molécule de l'échantillon sort de la colonne. Ce modèle de détecteur fonctionne à l'aide d'une lampa PDA, qui permet une analyse en 3 dimension de notre échantillon (temps, longueur d'onde et absorbance), ce qui permet de limiter le nombre de répétitions de manipulation, contrairement à une analyse UV-vis en 2 dimension, dans laquelle nous sommes limités à une longueur d'onde bien spécifique. Même si cette méthode est simple à utiliser, elle est limitée aux molécules qui absorbe les longueurs d'onde de l'UV ou du visible (complexes métalliques colorés, molécules organiques conjugués, cycles aromatiques...); pour notre détecteur, il s'agit des longueurs d'onde situées entre 190nm et 600nm. C'est pour cela qu'il est préférable d'utiliser comme éluant des composés n'absorbant pas en UV (eau, éthanol...).

Une fois que l'éluant passe à travers la colonne puis le détecteur, il est rejeté par en sortie par un "Back Pressure Regulator", afin d’empêcher à l'éluant de sortir avec une pression trop importante à la fin du circuit.

### **Contrôle depuis l'ordinateur**

Tous les différents blocs de la chaine HPLC peuvent être contrôlés depuis l'ordinateur.

##### Ouverture de la chaine 

<p class="callout info">Aucune connaissance informatique n'est requise. L'ordinateur n'a pas de mot de passe.</p>

Avant toute chose, il faut s'assurer que tous les éléments de la chaine soient allumé. Leurs interrupteurs sont tous placés à l'arrière de chaque bloc (il faut allumer séparément les différents constituants du système HPLC).

Une fois sur le bureau de l’ordinateur, il suffit d'ouvrir le logiciel "32 Karat Software". Une fois lancé, il faut cliquer sur "Chaine fonctionnelle", qui correspond à la chaine qui nous intéresse (le chargement pour l'ouverture de la chaine peut-être long).

##### Contrôle de l'HPLC à l'aide de Direct Control :   


Une fois la chaine ouverte, on peut à présent ouvrir "Direct Control". Pour se faire, il faut cliquer sur "Control" puis sélectionner "Direct Control" dans le menu défilant. A ce moment, une nouvelle fenêtre apparait. Elle permet le contrôle direct de différents réglages sur la pompe, l’échantillonneur et le détecteur.

- La pompe : il est possible de régler le débit de la pompe en appuyant sur Flow Rate, puis en entrant la valeur de débit qui nous intéresse, allant jusqu'à 10 mL/min, et en cochant la checkbox "Flow On". Une fois prêt à lancer la pompe, il suffit d'appuyer sur OK. Si on veut arrêter la pompe, il faut à nouveau cliquer sur Flow Rate, puis décocher la checkbox "Flow ON", et appuyer sur OK. Pour réaliser des mélanges de solvants (A + B), il fut cliquer sur %B, puis choisir le ratio en pourcentage de A et de B en rentrant une valeur pour B, et confirmer notre choix en appuyant sur OK. Il est possible de choisir lequel des 4 solvants possibles les pompes A ou B vont utiliser en cliquant sur les flèches colorés afin qu'elles indiquent la couleur/le chiffre qui nous intéresse pour cette pompe. Enfin, on peut sélectionner les pressions minimales et maximales pour les pompes A et B en cliquant sur les icones de pompes correspondant à A ou à B, puis en choisissant les valeurs qui nous intéressent en kPSI ou en MPa ; on peut confirmer notre choix en cliquant OK.

- Le détecteur : on peut allumer la lampe en cliquant sur l’icône ressemblant à une lampe et en sélectionnant ON ou OFF. On peut également la calibrer en appuyant sur "Calibrate", puis en cliquant sur ON; il est également possible de choisir les longueurs d'onde de travail qui nous intéresse, en sélectionnant "Ch1"/"Ch2", puis en entrant les valeurs voulues.

Créer sa propre méthode

Le logiciel 32 Karat nous permet d'automatiser le processus d’échantillonnage en créant nos propres méthodes. Pour se faire, il faut se rendre dans le menu déroulant "Files", puis sélectionner "Method" et "New", ce qui ouvrira une nouvelle fenetre. Depuis cette fenetre, on peut influencer certains paramètres sur la pompe, le détecteur ou encore l'échantillonneur, et meme programmer des temps pour notre méthode.

Dans l'onglet Pumps, on peut configurer le contenu de chaque solvant (A1, A2, B1...), influencer le débit et sa durée, changer les valeurs de pression minimale ainsi que maximale et les mélanges en pourcentage entre A et B.

Dans l'onglet Detector, on peut choisir la plage de longueur d'onde sur laquelle les mesures seront réalisées, ainsi que l'intervalle de scan (2nm par défaut) si l'on veut réaliser des mesures de données en 3D. Si l'on veut réaliser une analyse 2D (intensité + temps), il suffit de décocher la checkbox 3D Data, puis de régler les paramètres dans la partie Channel Definition.

Dans l'onglet Injector, on peut régler l’échantillonneur afin qu'il nettoie l'aiguille entre chaque injection, qu'il permette ou non le uL Pickup, ou qu'il réalise le Tray Cooling, qui permet de garder les échantillon à des certaines températures (on peut également influencer d'autres paramètres, comme le volume de nettoyage "Wash Volume").

L'onglet Time Program nous permet de programmer directement en fonction du temps les actions que les différents blocs de l'HPLC devront réaliser à travers le temps.

Reglages de la pompe :

Une pompe mal réglée peut amener des bulles d'air dans le système, ce qui risque de fausser nos résultats ; c'est pour cela qu'il est primordial de la régler correctement.

\- Ouvrir la valve de drain en tournant le robinet dans le sens inverse des aiguilles d'une montre.

\- Insérer une seringue dans le port qui nous intéresse (A ou B), tourner l puis retirer le conten

[![image.png](https://wiki.fablab.sorbonne-universite.fr/BookStack/uploads/images/gallery/2024-01/scaled-1680-/c3gimage.png)](https://wiki.fablab.sorbonne-universite.fr/BookStack/uploads/images/gallery/2024-01/c3gimage.png)[![image.png](https://wiki.fablab.sorbonne-universite.fr/BookStack/uploads/images/gallery/2024-01/scaled-1680-/heSimage.png)](https://wiki.fablab.sorbonne-universite.fr/BookStack/uploads/images/gallery/2024-01/heSimage.png)

**<span style="color: rgb(186, 55, 42);">A) LES UNITÉS</span>**

**<span style="color: rgb(186, 55, 42);">1. L'ordinateur : application 32 KARAT SOFTWARE  
</span>**

NB : Aucune connaissance informatique n'est requise. L'ordinateur n'a pas de mot de passe.

[![ordinateur HPLC.jpg](https://wiki.fablab.sorbonne-universite.fr/BookStack/uploads/images/gallery/2024-01/scaled-1680-/ordinateur-hplc.jpg)
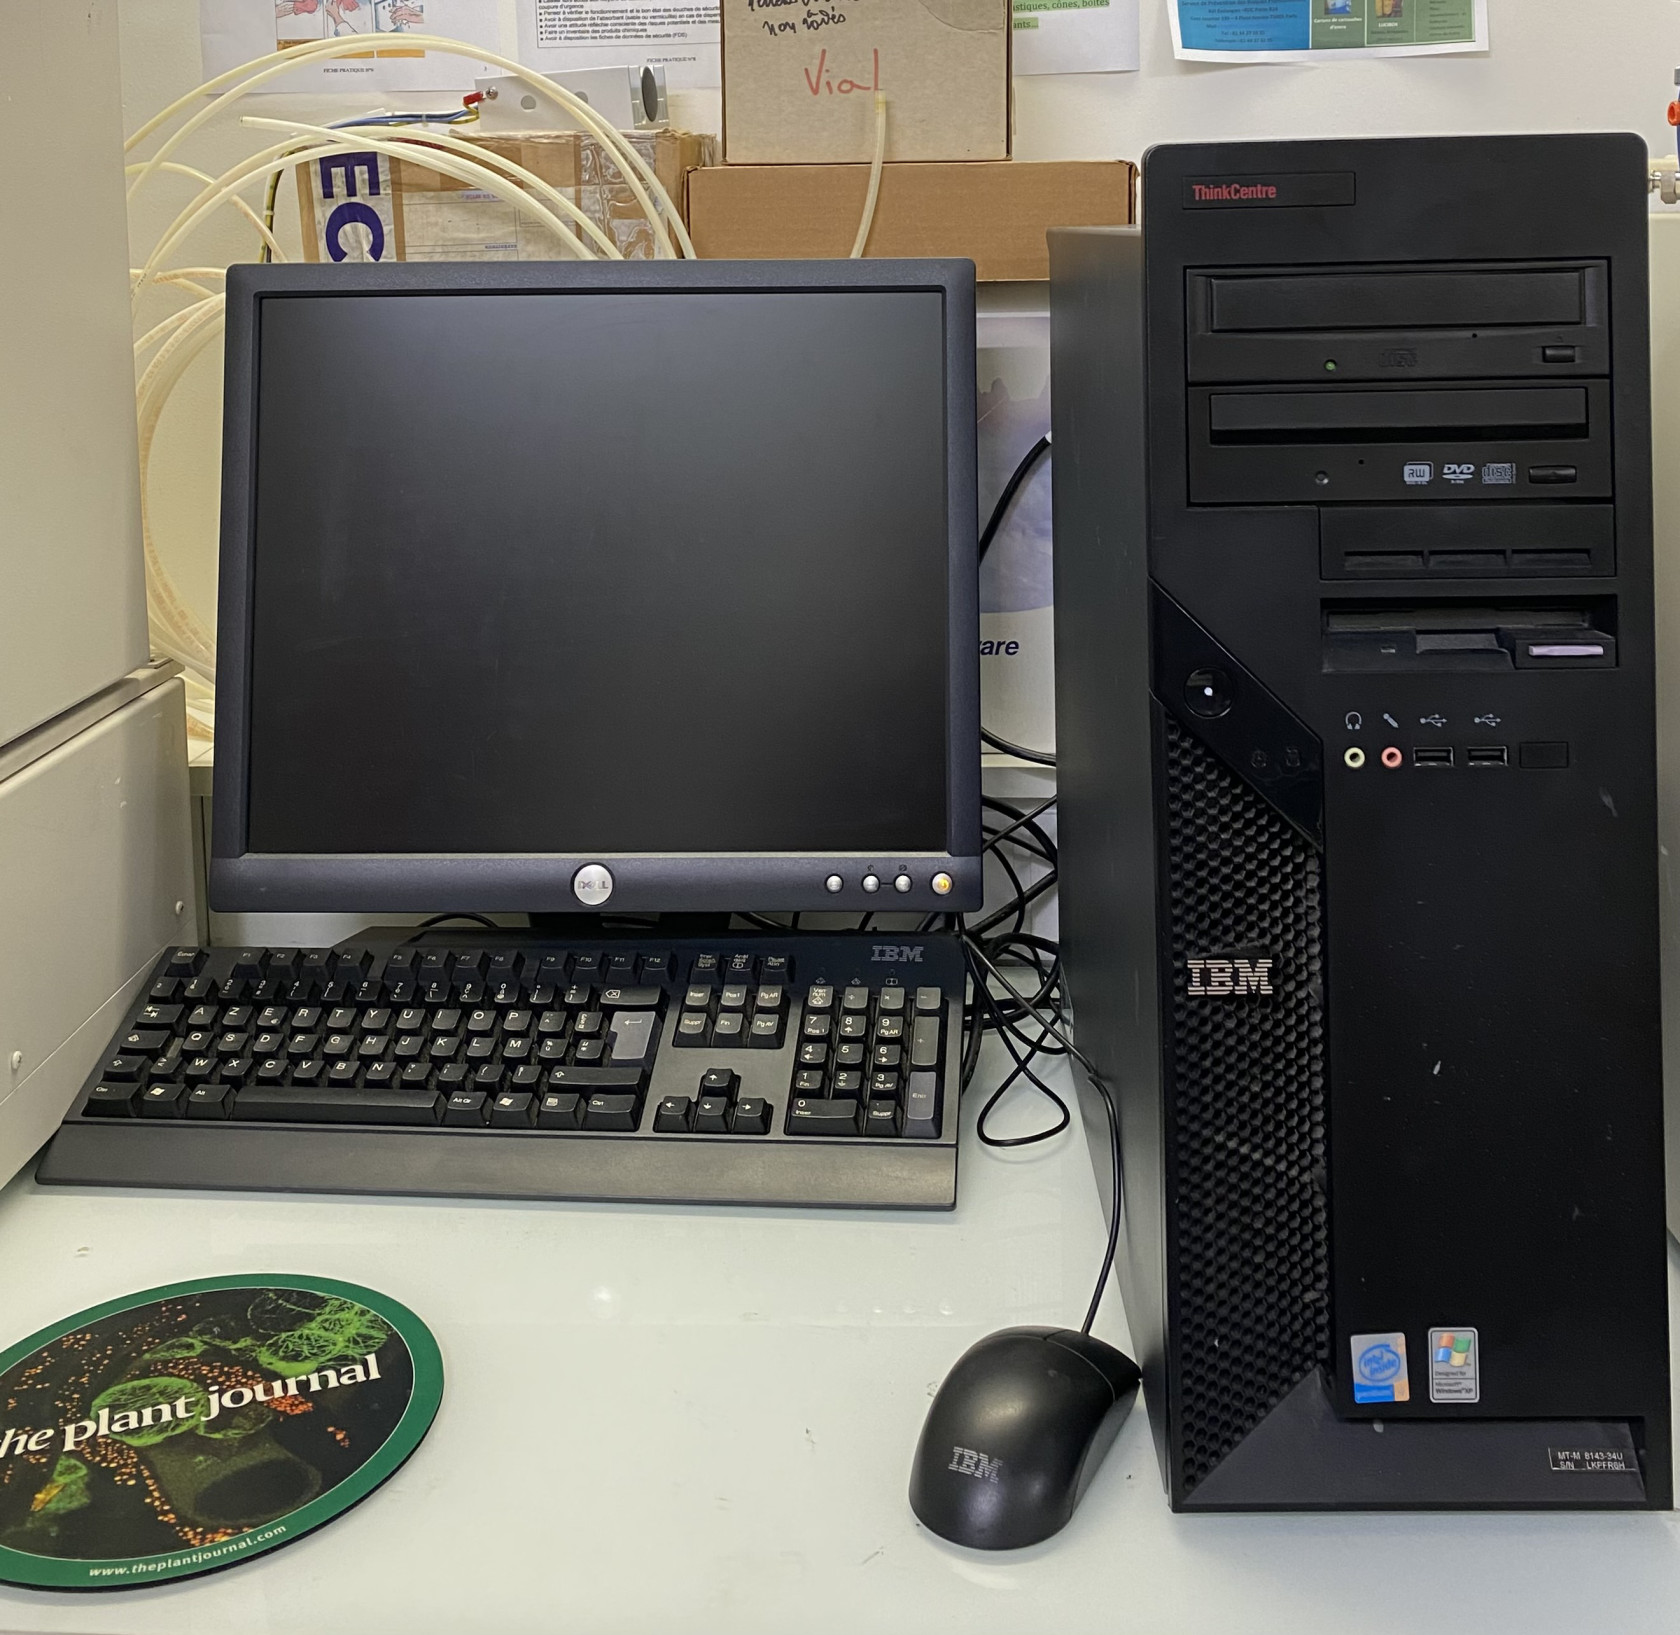
](https://wiki.fablab.sorbonne-universite.fr/BookStack/uploads/images/gallery/2024-01/ordinateur-hplc.jpg)

  
Le logiciel Gold, apporte 3 niveaux d'interaction et de contrôle à la chromatographie haute performance.

1. **Gestionnaire pour 1 ou 2 systèmes HPLC**, repérés SYSTEM1 ( carte PCI1 ) et SYSTEM2 ( carte PCI2 ) , chaque système pouvant contenir jusqu'à 8 modules (pompes, détecteurs, interfaces etc...). Chaque système peut acquérir le résultat à deux longueurs d'onde), ces deux voies étant appelées CHANNEL A et CHANNEL B. En contrôle direct (direct control), ou en automatique au travers de méthodes (edit method), l'ordinateur coordonne le fonctionnement de chacun des modules HPLC. Bien qu'il soit prévu pour un fonctionnement avec des éléments BECKMAN, il peut être connecté à d'autres éléments au travers d'une interface (modèle 405) permettant des contrôles par des contacts de relais et/ou le traitement du signal d'un détecteur.
2. **Collecte les chromatogrammes des analyses effectuées**, les analyse, les transcrit en un rapport final, et/ou les stock, permettant ainsi un retraitement ultérieur. La calibration et les résultats des échantillons analysées sont réalisés facilement, le rapport final apparaît dans le format et avec les informations qui sont le plus appropriées.
3. **Retrait des résultats** (outil très puissant). Chaque donnée étant stockée en mémoire (sur disque dur ou sur disquette), il permet de réanalyser tout échantillon désiré pour corriger des erreurs ou déterminer l'effet de calibrations différentes. La puissance des analyses chromatographiques et des fonctions de balayage en longueurs d'onde permet une étude approfondie des résultats obtenus, non possible jusqu'à présent.

  
<span style="color: rgb(186, 55, 42);">**3. Spectrofluorometric detector : RF-10 Axl**</span>

<table border="1" id="bkmrk-spectrofluorom%C3%A8tre-d" style="border-collapse: collapse; width: 100%;"><colgroup><col style="width: 50.0618%;"></col><col style="width: 50.0618%;"></col></colgroup><tbody><tr><td>[![Devant spectrofluoromètre.jpg](https://wiki.fablab.sorbonne-universite.fr/BookStack/uploads/images/gallery/2024-01/scaled-1680-/devant-spectrofluorometre.jpg)
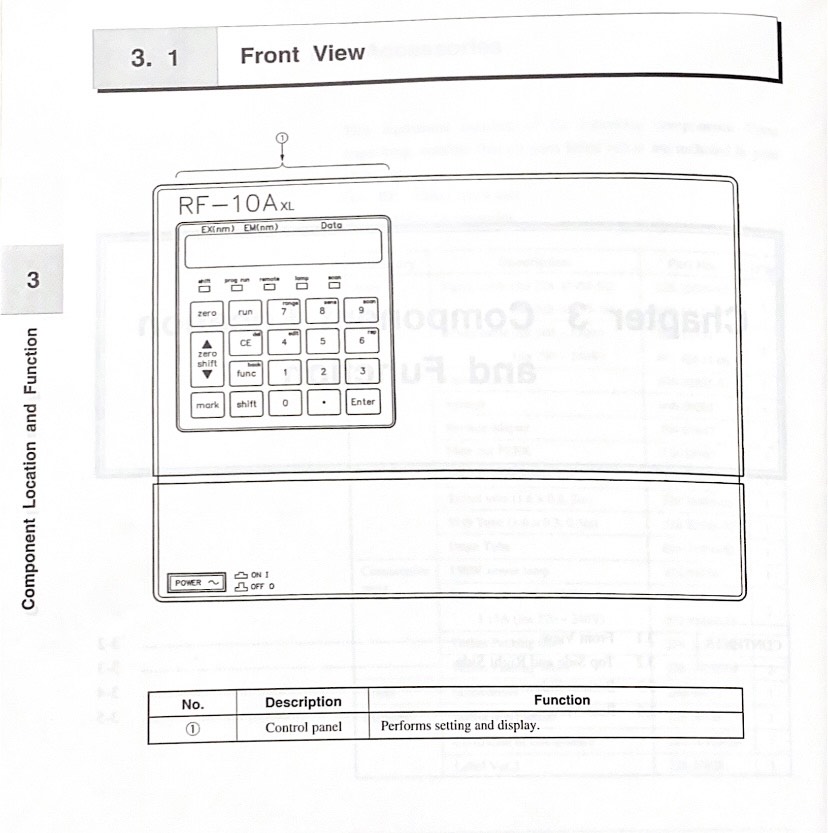
](https://wiki.fablab.sorbonne-universite.fr/BookStack/uploads/images/gallery/2024-01/devant-spectrofluorometre.jpg)

<span style="text-decoration: underline;">Spectrofluoromètre de face</span>

</td><td>[![Arrière spectrofluoromètre.jpg](https://wiki.fablab.sorbonne-universite.fr/BookStack/uploads/images/gallery/2024-01/scaled-1680-/8vRarriere-spectrofluorometre.jpg)
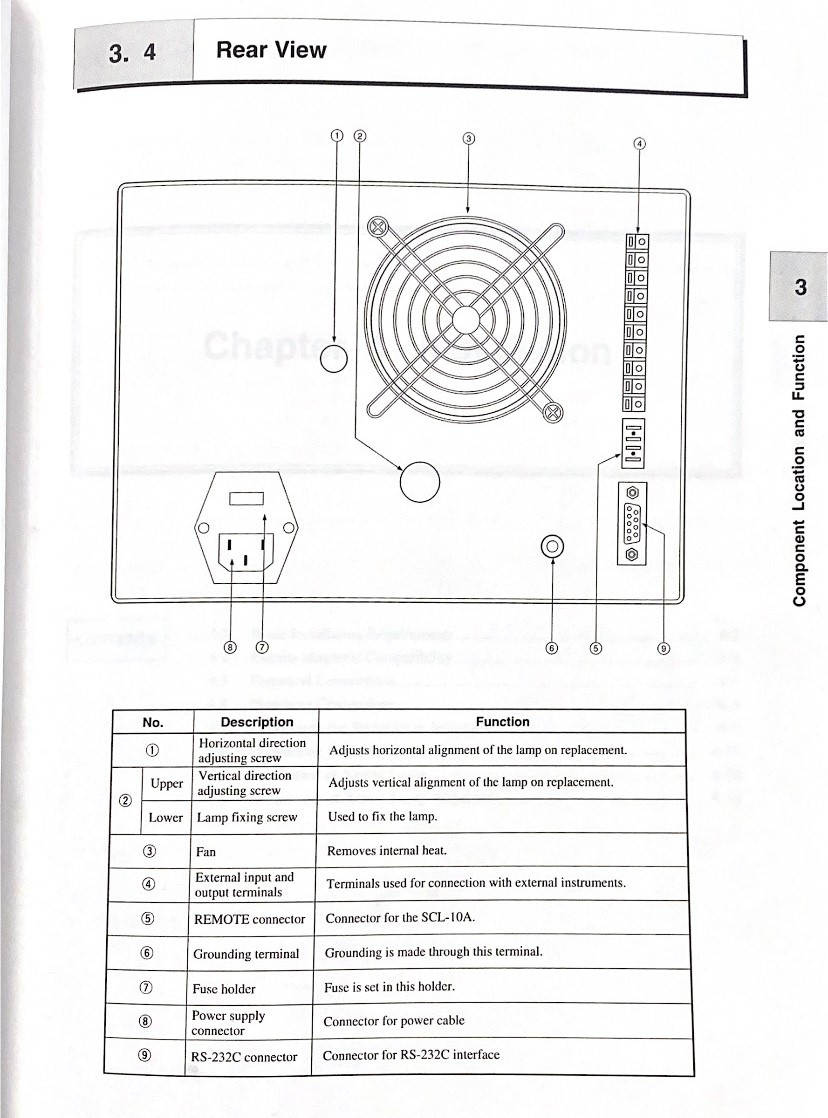
](https://wiki.fablab.sorbonne-universite.fr/BookStack/uploads/images/gallery/2024-01/8vRarriere-spectrofluorometre.jpg)

<span style="text-decoration: underline;">Arrière spectrofluoromètre</span>

</td></tr><tr><td>[![Côtés droit et gauche spectrofluoromètre.jpg](https://wiki.fablab.sorbonne-universite.fr/BookStack/uploads/images/gallery/2024-01/scaled-1680-/rSLcotes-droit-et-gauche-spectrofluorometre.jpg)
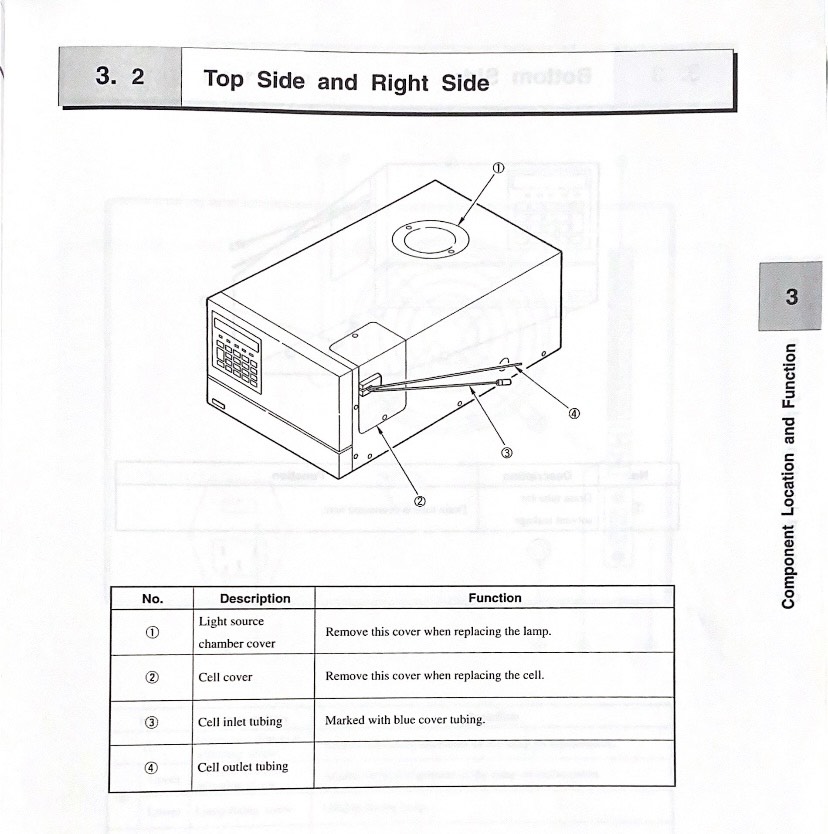
](https://wiki.fablab.sorbonne-universite.fr/BookStack/uploads/images/gallery/2024-01/rSLcotes-droit-et-gauche-spectrofluorometre.jpg)

<span style="text-decoration: underline;">Côtés spectrofluoromètre</span>

</td><td>[![Côté spectrofluoromètre.jpg](https://wiki.fablab.sorbonne-universite.fr/BookStack/uploads/images/gallery/2024-01/scaled-1680-/cote-spectrofluorometre.jpg)
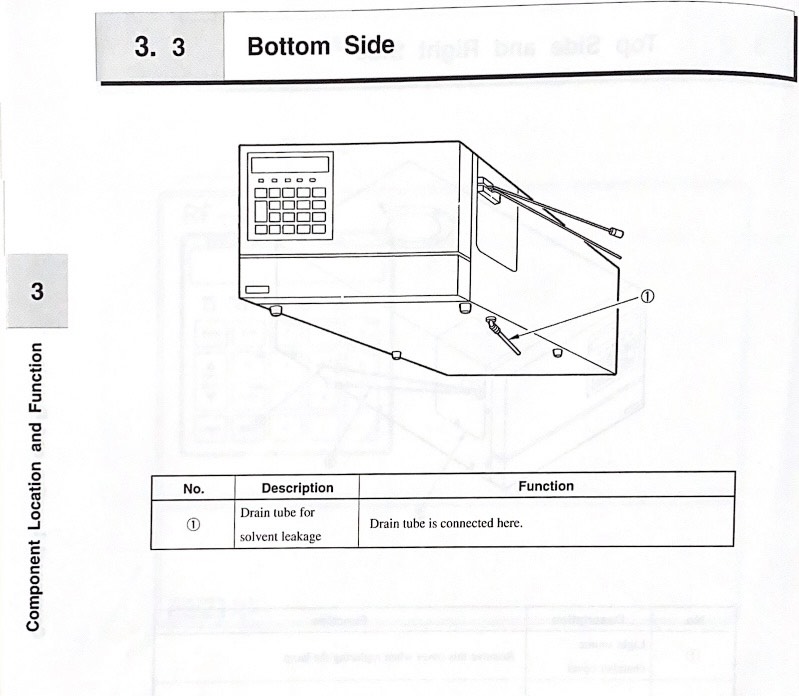
](https://wiki.fablab.sorbonne-universite.fr/BookStack/uploads/images/gallery/2024-01/cote-spectrofluorometre.jpg)

<span style="text-decoration: underline;">Dessous spectrofluoromètre</span>

</td></tr></tbody></table>

**Liens**

1. Manuel HPLC+software [https://www.artisantg.com/info/Beckman\_Coulter\_Model\_166\_Manual.pdf](https://www.artisantg.com/info/Beckman_Coulter_Model_166_Manual.pdf) dispo en papier
2. Manuel Foxy 200 [https://archive-resources.coleparmer.com/Manual\_pdfs/01471-xx.pdf](https://archive-resources.coleparmer.com/Manual_pdfs/01471-xx.pdf) dispo en papier
3. Manuel Sedex Model 80 [https://www.knauer.net/Dokumente/detectors/third\_party/manuals/sedere\_elsd\_80\_manual\_\_rev3.0\_\_release.pdf](https://www.knauer.net/Dokumente/detectors/third_party/manuals/sedere_elsd_80_manual__rev3.0__release.pdf) dispo en papier

Autre manuel papier dispo :

1. Installation &amp; Maintenance Guide HPLC
2. P/ACE MDQ Basic Training Workbook

Un forum de FAQ [https://www.labwrench.com/forums/equipment/155/beckman-coulter-system-gold](https://www.labwrench.com/forums/equipment/155/beckman-coulter-system-gold)

# Guide d'utilisation du système HPLC

# <span style="font-size: 13.999999999999998pt; font-family: Aptos; color: #000000; background-color: transparent; font-weight: bold; font-style: normal; font-variant: normal; text-decoration: underline; -webkit-text-decoration-skip: none; text-decoration-skip-ink: none; vertical-align: baseline; white-space: pre-wrap;">I / Mise en marche du système :</span>

<span style="font-size: 12pt; font-family: Aptos; color: #000000; background-color: transparent; font-weight: 400; font-style: normal; font-variant: normal; text-decoration: none; vertical-align: baseline; white-space: pre-wrap;">Pour mettre en marche la chaîne HPLC, il faut d’abord allumer chaque module. Un interrupteur d’alimentation est présent à l’arrière du détecteur, de la pompe et de l’autosampler. Une fois les trois modules mis en marche, il faut démarrer le PC et appuyer sur « ok » sans insérer de mot de passe sur la page de connexion à la session. </span>

# <span style="font-size: 13.999999999999998pt; font-family: Aptos; color: #000000; background-color: transparent; font-weight: bold; font-style: normal; font-variant: normal; text-decoration: underline; -webkit-text-decoration-skip: none; text-decoration-skip-ink: none; vertical-align: baseline; white-space: pre-wrap;">II / Préparation de l’échantillon et de l’appareil :</span>

<span style="font-size: 12pt; font-family: Aptos; color: #000000; background-color: transparent; font-weight: 400; font-style: normal; font-variant: normal; text-decoration: none; vertical-align: baseline; white-space: pre-wrap;">La configuration du système HPLC présent au Fablab comprend : une pompe </span><span style="font-size: 12pt; font-family: Aptos; color: #000000; background-color: transparent; font-weight: 400; font-style: italic; font-variant: normal; text-decoration: none; vertical-align: baseline; white-space: pre-wrap;">Solvent Module 126</span><span style="font-size: 12pt; font-family: Aptos; color: #000000; background-color: transparent; font-weight: 400; font-style: normal; font-variant: normal; text-decoration: none; vertical-align: baseline; white-space: pre-wrap;">, essentielle pour faire circuler la phase mobile à travers la colonne sous haute pression, généralement entre 1000 et 5000 psi ; un injecteur automatique </span><span style="font-size: 12pt; font-family: Aptos; color: #000000; background-color: transparent; font-weight: 400; font-style: italic; font-variant: normal; text-decoration: none; vertical-align: baseline; white-space: pre-wrap;">Autosampler 508</span><span style="font-size: 12pt; font-family: Aptos; color: #000000; background-color: transparent; font-weight: 400; font-style: normal; font-variant: normal; text-decoration: none; vertical-align: baseline; white-space: pre-wrap;">, qui introduit l'échantillon dans le flux de phase mobile de façon automatique, reproductible et précise ; une colonne C18 en phase inverse de 20 cm de la gamme </span><span style="font-size: 12pt; font-family: Aptos; color: #000000; background-color: transparent; font-weight: 400; font-style: italic; font-variant: normal; text-decoration: none; vertical-align: baseline; white-space: pre-wrap;">Gemini</span><span style="font-size: 12pt; font-family: Aptos; color: #000000; background-color: transparent; font-weight: 400; font-style: normal; font-variant: normal; text-decoration: none; vertical-align: baseline; white-space: pre-wrap;"> de </span><span style="font-size: 12pt; font-family: Aptos; color: #000000; background-color: transparent; font-weight: 400; font-style: italic; font-variant: normal; text-decoration: none; vertical-align: baseline; white-space: pre-wrap;">Phenomenex</span><span style="font-size: 12pt; font-family: Aptos; color: #000000; background-color: transparent; font-weight: 400; font-style: normal; font-variant: normal; text-decoration: none; vertical-align: baseline; white-space: pre-wrap;">, contenant la phase stationnaire en silice, qui est l'élément central où se produit la séparation des composants de l'échantillon ; une phase mobile comprenant de l'eau (solvant A) et de l'acétonitrile (solvant B), stockés dans deux bouteilles distinctes, permettant d'optimiser la séparation des composés; un détecteur DAD (Diode Array Detector) </span><span style="font-size: 12pt; font-family: Aptos; color: #000000; background-color: transparent; font-weight: 400; font-style: italic; font-variant: normal; text-decoration: none; vertical-align: baseline; white-space: pre-wrap;">Detector 168</span><span style="font-size: 12pt; font-family: Aptos; color: #000000; background-color: transparent; font-weight: 400; font-style: normal; font-variant: normal; text-decoration: none; vertical-align: baseline; white-space: pre-wrap;">, qui permet de mesurer l'absorbance de l'échantillon sur une large gamme de longueurs d'onde simultanément ; un système d’acquisition de donnés opérant sous Windows 2000 qui permet d’enregistrer et d’analyser les signaux du détecteur via le logiciel </span><span style="font-size: 12pt; font-family: Aptos; color: #000000; background-color: transparent; font-weight: 400; font-style: italic; font-variant: normal; text-decoration: none; vertical-align: baseline; white-space: pre-wrap;">32 Karat</span><span style="font-size: 12pt; font-family: Aptos; color: #000000; background-color: transparent; font-weight: 400; font-style: normal; font-variant: normal; text-decoration: none; vertical-align: baseline; white-space: pre-wrap;">.</span>

<span style="font-size: 12pt; font-family: Aptos; color: #000000; background-color: transparent; font-weight: 400; font-style: normal; font-variant: normal; text-decoration: none; vertical-align: baseline; white-space: pre-wrap;"><span style="border: none; display: inline-block; overflow: hidden; width: 246px; height: 330px;">![Une image contenant intérieur, machine, Équipement médical, Instrument scientifique

Description générée automatiquement](https://lh7-us.googleusercontent.com/docsz/AD_4nXeKKuUEjxwsXxYxwkrJd0y-vEfuUXKH1CveO2Bjw9se_pm6nDYu5z5Gp4oUVOqsDcOB_UMBd843bIXkb6KA73nDYlkUE-cetb3Q9WQw6VzPoICbu70OVcDw_IlyaJe_YXgZP8YYme_XrRumxYlkdoTMOjky2CmGc3dqzrsU?key=Bh6HJVxnw55dhOaHFSChLA)</span></span>

<span style="font-size: 12pt; font-family: Aptos; color: #000000; background-color: transparent; font-weight: 400; font-style: normal; font-variant: normal; text-decoration: none; vertical-align: baseline; white-space: pre-wrap;">Pour pouvoir analyser un échantillon avec un injecteur automatique, il faut un matériel spécifique. Nous devons utiliser des </span><span style="font-size: 12pt; font-family: Aptos; color: #000000; background-color: transparent; font-weight: bold; font-style: normal; font-variant: normal; text-decoration: none; vertical-align: baseline; white-space: pre-wrap;">vials</span><span style="font-size: 12pt; font-family: Aptos; color: #000000; background-color: transparent; font-weight: 400; font-style: normal; font-variant: normal; text-decoration: none; vertical-align: baseline; white-space: pre-wrap;">, qui sont des petits tubes en verre d’un volume de 2 ml, pour pouvoir stocker l’échantillon à analyser. Un bouchon en caoutchouc, appelé </span><span style="font-size: 12pt; font-family: Aptos; color: #000000; background-color: transparent; font-weight: bold; font-style: normal; font-variant: normal; text-decoration: none; vertical-align: baseline; white-space: pre-wrap;">septum</span><span style="font-size: 12pt; font-family: Aptos; color: #000000; background-color: transparent; font-weight: 400; font-style: normal; font-variant: normal; text-decoration: none; vertical-align: baseline; white-space: pre-wrap;">, viens recouvrir le vial. Le septum est conçu pour être percé par l'aiguille de l'autosampler de l'HPLC, permettant ainsi l'introduction de l'échantillon dans le système sans exposer le contenu du vial à l'air extérieur. Ce vial est ensuite placé dans les compartiments de l’autosampler afin d’être analysé. </span>

<span style="font-size: 12pt; font-family: Aptos; color: #000000; background-color: transparent; font-weight: 400; font-style: normal; font-variant: normal; text-decoration: none; vertical-align: baseline; white-space: pre-wrap;">Si votre solution à analyser n’est pas préalablement filtrée, il ne faut pas oublier d’utiliser les aiguilles et les filtres à seringues de 0,45 µm avant l’introduction de l’échantillon dans le vial.</span>

<span style="font-size: 12pt; font-family: Aptos; color: #000000; background-color: transparent; font-weight: 400; font-style: normal; font-variant: normal; text-decoration: none; vertical-align: baseline; white-space: pre-wrap;"><span style="border: none; display: inline-block; overflow: hidden; width: 285px; height: 274px;">![Une image contenant texte, Équipement médical, aiguille, intérieur

Description générée automatiquement](https://lh7-us.googleusercontent.com/docsz/AD_4nXetHFhWff96lmboVVSGozEIeCLnZSlND_N7t2QTUVy5czR2OqJ_1c-8BHn-v5fLBKutogo_tSIcP3r0PIHd8ob3Yv2xKLroy0Db9Gw0ZMhB2_OSRbUTH6hWzQsb3bJRkK9jZ6aTLZoHdWiqBvXQI72ySsmRRbufsJcfrlLl?key=Bh6HJVxnw55dhOaHFSChLA)</span></span>

<span style="font-size: 12pt; font-family: Aptos; color: #000000; background-color: transparent; font-weight: 400; font-style: normal; font-variant: normal; text-decoration: none; vertical-align: baseline; white-space: pre-wrap;">Avant de commencer une analyse, il est essentiel de vérifier qu'il n'y a pas de bulles d'air dans la tuyauterie des pompes A et B au risque d’endommager la colonne et les pompes. S’il y a présences de bulles d’air, veuillez-vous référez à la partie </span><span style="font-size: 12pt; font-family: Aptos; color: #000000; background-color: transparent; font-weight: bold; font-style: normal; font-variant: normal; text-decoration: none; vertical-align: baseline; white-space: pre-wrap;">Maintenance de l’appareil</span><span style="font-size: 12pt; font-family: Aptos; color: #000000; background-color: transparent; font-weight: 400; font-style: normal; font-variant: normal; text-decoration: none; vertical-align: baseline; white-space: pre-wrap;"> en fin de notice afin d’effectuer l’amorçage des pompes.</span>

<span style="font-size: 12pt; font-family: Aptos; color: #000000; background-color: #ffff00; font-weight: 400; font-style: normal; font-variant: normal; text-decoration: none; vertical-align: baseline; white-space: pre-wrap;">Attention, Il est crucial d'adapter la phase mobile en fonction des caractéristiques spécifiques de l'échantillon à analyser pour obtenir des résultats précis et reproductibles en HPLC.</span><span style="font-size: 12pt; font-family: Aptos; color: #000000; background-color: transparent; font-weight: 400; font-style: normal; font-variant: normal; text-decoration: none; vertical-align: baseline; white-space: pre-wrap;"> </span>

- <span style="font-size: 12pt; font-family: Aptos; color: #000000; background-color: transparent; font-weight: bold; font-style: normal; font-variant: normal; text-decoration: none; vertical-align: baseline; white-space: pre-wrap;">Échantillons Acides ou Basique</span><span style="font-size: 12pt; font-family: Aptos; color: #000000; background-color: transparent; font-weight: 400; font-style: normal; font-variant: normal; text-decoration: none; vertical-align: baseline; white-space: pre-wrap;"> : Pour les échantillons qui présentent des propriétés acides ou basiques, il est souvent nécessaire d'utiliser des </span><span style="font-size: 12pt; font-family: Aptos; color: #000000; background-color: transparent; font-weight: bold; font-style: normal; font-variant: normal; text-decoration: none; vertical-align: baseline; white-space: pre-wrap;">solutions tampons</span><span style="font-size: 12pt; font-family: Aptos; color: #000000; background-color: transparent; font-weight: 400; font-style: normal; font-variant: normal; text-decoration: none; vertical-align: baseline; white-space: pre-wrap;"> dans la phase mobile. Les tampons maintiennent un pH constant, ce qui est essentiel pour stabiliser la rétention et la séparation des analytes sensibles au pH. Par exemple, un tampon phosphate peut être utilisé pour des échantillons à pH neutre à légèrement basique, tandis qu'un tampon acétate peut convenir pour des échantillons légèrement acides.</span><span style="font-size: 12pt; font-family: Aptos; color: #000000; background-color: transparent; font-weight: 400; font-style: normal; font-variant: normal; text-decoration: none; vertical-align: baseline; white-space: pre-wrap;">  
      
    </span>
- <span style="font-size: 12pt; font-family: Aptos; color: #000000; background-color: transparent; font-weight: bold; font-style: normal; font-variant: normal; text-decoration: none; vertical-align: baseline; white-space: pre-wrap;">Analytes Neutres</span><span style="font-size: 12pt; font-family: Aptos; color: #000000; background-color: transparent; font-weight: 400; font-style: normal; font-variant: normal; text-decoration: none; vertical-align: baseline; white-space: pre-wrap;"> : Pour les analytes neutres, un simple mélange de solvants organiques comme l'eau/acétonitrile ou eau/méthanol peut suffire.</span>

<span style="font-size: 12pt; font-family: Aptos; color: #000000; background-color: transparent; font-weight: 400; font-style: normal; font-variant: normal; text-decoration: none; vertical-align: baseline; white-space: pre-wrap;">Lorsque des solutions tampons sont utilisées dans la phase mobile, il est impératif de rincer la colonne après chaque utilisation. Les tampons peuvent précipiter et s'accumuler dans la colonne, entraînant des obstructions, une perte de performance de la colonne et des problèmes de reproductibilité.</span>

# <span style="font-size: 13.999999999999998pt; font-family: Aptos; color: #000000; background-color: transparent; font-weight: bold; font-style: normal; font-variant: normal; text-decoration: underline; -webkit-text-decoration-skip: none; text-decoration-skip-ink: none; vertical-align: baseline; white-space: pre-wrap;">III / Configuration via le logiciel 32 Karat :</span>

<span style="font-size: 12pt; font-family: Aptos; color: #000000; background-color: #ffff00; font-weight: bold; font-style: normal; font-variant: normal; text-decoration: none; vertical-align: baseline; white-space: pre-wrap;">Attention, la partie suivante suppose que tous les matériels ont été installés et allumés.</span>

<span style="font-size: 12pt; font-family: Aptos; color: #000000; background-color: transparent; font-weight: 400; font-style: normal; font-variant: normal; text-decoration: none; vertical-align: baseline; white-space: pre-wrap;">Le système HPLC fonctionne sous le logiciel </span><span style="font-size: 12pt; font-family: Aptos; color: #000000; background-color: transparent; font-weight: bold; font-style: normal; font-variant: normal; text-decoration: none; vertical-align: baseline; white-space: pre-wrap;">32 Karat Software</span><span style="font-size: 12pt; font-family: Aptos; color: #000000; background-color: transparent; font-weight: 400; font-style: normal; font-variant: normal; text-decoration: none; vertical-align: baseline; white-space: pre-wrap;">. Il est possible de le lancer en cliquant directement sur son icône depuis le bureau. Ce logiciel permet d’acquérir les données provenant du détecteur mais également de configurer certains paramètres avant l’analyse d’échantillons, notamment le pourcentage eau/acétonitrile, le débit d’élution, le temps d’analyses, etc.</span>

<span style="font-size: 12pt; font-family: Aptos; color: #000000; background-color: transparent; font-weight: 400; font-style: normal; font-variant: normal; text-decoration: none; vertical-align: baseline; white-space: pre-wrap;">Une fois le logiciel lancé, une fenêtre avec les instruments configurés apparaît. Le terme </span><span style="font-size: 12pt; font-family: Aptos; color: #000000; background-color: transparent; font-weight: bold; font-style: normal; font-variant: normal; text-decoration: none; vertical-align: baseline; white-space: pre-wrap;">instrument</span><span style="font-size: 12pt; font-family: Aptos; color: #000000; background-color: transparent; font-weight: 400; font-style: normal; font-variant: normal; text-decoration: none; vertical-align: baseline; white-space: pre-wrap;"> fait référence au système HPLC connecté à l’ordinateur. Le fait de configurer un instrument permet donc de choisir le système sur lequel on souhaite travailler. La chaîne HPLC présente au Fablab a déjà été configurée et est reconnu par l’instrument </span><span style="font-size: 12pt; font-family: Aptos; color: #000000; background-color: transparent; font-weight: bold; font-style: normal; font-variant: normal; text-decoration: none; vertical-align: baseline; white-space: pre-wrap;">Chaine\_fonctionnelle</span><span style="font-size: 12pt; font-family: Aptos; color: #000000; background-color: transparent; font-weight: 400; font-style: normal; font-variant: normal; text-decoration: none; vertical-align: baseline; white-space: pre-wrap;">. Il faut donc cliquer sur cet instrument. </span>

<span style="font-size: 12pt; font-family: Aptos; color: #000000; background-color: transparent; font-weight: 400; font-style: normal; font-variant: normal; text-decoration: none; vertical-align: baseline; white-space: pre-wrap;">Lorsque l’on accède à l’instrument, une petite fenêtre </span><span style="font-size: 12pt; font-family: Aptos; color: #000000; background-color: transparent; font-weight: bold; font-style: normal; font-variant: normal; text-decoration: none; vertical-align: baseline; white-space: pre-wrap;">Instrument Wizard</span><span style="font-size: 12pt; font-family: Aptos; color: #000000; background-color: transparent; font-weight: 400; font-style: normal; font-variant: normal; text-decoration: none; vertical-align: baseline; white-space: pre-wrap;"> apparaît, on peut la fermer. On tombe ensuite sur le chromatogramme du précédent test réalisé avec cet instrument, il ne faut pas en tenir compte. </span>

1. ## <span style="font-size: 12pt; font-family: Aptos; color: #000000; background-color: transparent; font-weight: bold; font-style: normal; font-variant: normal; text-decoration: underline; -webkit-text-decoration-skip: none; text-decoration-skip-ink: none; vertical-align: baseline; white-space: pre-wrap;">Direct Control</span>

<span style="font-size: 12pt; font-family: Aptos; color: #000000; background-color: transparent; font-weight: 400; font-style: normal; font-variant: normal; text-decoration: none; vertical-align: baseline; white-space: pre-wrap;">Afin de pouvoir contrôler le système HPLC depuis le logiciel, il faut accéder au panneau de contrôle </span><span style="font-size: 12pt; font-family: Aptos; color: #000000; background-color: transparent; font-weight: bold; font-style: normal; font-variant: normal; text-decoration: none; vertical-align: baseline; white-space: pre-wrap;">Direct Control</span><span style="font-size: 12pt; font-family: Aptos; color: #000000; background-color: transparent; font-weight: 400; font-style: normal; font-variant: normal; text-decoration: none; vertical-align: baseline; white-space: pre-wrap;">. Pour cela, il faut cliquer sur l’onglet </span><span style="font-size: 12pt; font-family: Aptos; color: #000000; background-color: transparent; font-weight: bold; font-style: normal; font-variant: normal; text-decoration: none; vertical-align: baseline; white-space: pre-wrap;">Control</span><span style="font-size: 12pt; font-family: Aptos; color: #000000; background-color: transparent; font-weight: 400; font-style: normal; font-variant: normal; text-decoration: none; vertical-align: baseline; white-space: pre-wrap;"> puis sélectionner </span><span style="font-size: 12pt; font-family: Aptos; color: #000000; background-color: transparent; font-weight: bold; font-style: normal; font-variant: normal; text-decoration: none; vertical-align: baseline; white-space: pre-wrap;">Direct Control </span><span style="font-size: 12pt; font-family: Aptos; color: #000000; background-color: transparent; font-weight: 400; font-style: normal; font-variant: normal; text-decoration: none; vertical-align: baseline; white-space: pre-wrap;">dans le menu défilant. </span>

<span style="font-size: 12pt; font-family: Aptos; color: #000000; background-color: transparent; font-weight: 400; font-style: normal; font-variant: normal; text-decoration: none; vertical-align: baseline; white-space: pre-wrap;">L’interface Direct Control permet de sélectionner et de modifier immédiatement les paramètres de fonctionnement du système HPLC. L'écran Direct Control est utilisé pour contrôler l'instrument en cliquant avec la souris sur les zones interactives de la fenêtre. Ces zones activent soit la boîte de dialogue associée, permettant de modifier les paramètres de l'instrument, soit la tâche correspondante directement. L'écran Direct Control affiche également des messages de service indiquant l'activité actuelle de l'instrument et son état en temps réel.</span>

<span style="font-size: 12pt; font-family: Aptos; color: #000000; background-color: transparent; font-weight: 400; font-style: normal; font-variant: normal; text-decoration: none; vertical-align: baseline; white-space: pre-wrap;">On observe trois sous fenêtre dans l’interface de contrôle, chacune permettant de contrôler un module du système. </span>

[![image.png](https://wiki.fablab.sorbonne-universite.fr/BookStack/uploads/images/gallery/2024-06/scaled-1680-/2A0image.png)](https://wiki.fablab.sorbonne-universite.fr/BookStack/uploads/images/gallery/2024-06/2A0image.png)

<span style="font-size: 12pt; font-family: Aptos; color: #000000; background-color: transparent; font-weight: 400; font-style: normal; font-variant: normal; text-decoration: none; vertical-align: baseline; white-space: pre-wrap;">La sous fenêtre à gauche permet de contrôler les pompes et la phase mobile. On peut y définir le pourcentage d’eau et de solvent dans la phase mobile à l’état initial. Pour cela, il faut cliquer sur </span><span style="font-size: 12pt; font-family: Aptos; color: #000000; background-color: transparent; font-weight: bold; font-style: normal; font-variant: normal; text-decoration: none; vertical-align: baseline; white-space: pre-wrap;">%B</span><span style="font-size: 12pt; font-family: Aptos; color: #000000; background-color: transparent; font-weight: 400; font-style: normal; font-variant: normal; text-decoration: none; vertical-align: baseline; white-space: pre-wrap;"> et régler le pourcentage de solvant (pompe B) que l’on souhaite depuis la boîte de dialogue qui apparaît. Le pourcentage d’eau (pompe A) se réglera automatiquement en fonction de ce que l’on met pour </span><span style="font-size: 12pt; font-family: Aptos; color: #000000; background-color: transparent; font-weight: bold; font-style: normal; font-variant: normal; text-decoration: none; vertical-align: baseline; white-space: pre-wrap;">%B</span><span style="font-size: 12pt; font-family: Aptos; color: #000000; background-color: transparent; font-weight: 400; font-style: normal; font-variant: normal; text-decoration: none; vertical-align: baseline; white-space: pre-wrap;">. On peut également choisir la valve de sélection du solvant en cliquant sur l’une des 4 flèches en dessous de </span><span style="font-size: 12pt; font-family: Aptos; color: #000000; background-color: transparent; font-weight: bold; font-style: normal; font-variant: normal; text-decoration: none; vertical-align: baseline; white-space: pre-wrap;">%B</span><span style="font-size: 12pt; font-family: Aptos; color: #000000; background-color: transparent; font-weight: 400; font-style: normal; font-variant: normal; text-decoration: none; vertical-align: baseline; white-space: pre-wrap;"> et </span><span style="font-size: 12pt; font-family: Aptos; color: #000000; background-color: transparent; font-weight: bold; font-style: normal; font-variant: normal; text-decoration: none; vertical-align: baseline; white-space: pre-wrap;">%A</span><span style="font-size: 12pt; font-family: Aptos; color: #000000; background-color: transparent; font-weight: 400; font-style: normal; font-variant: normal; text-decoration: none; vertical-align: baseline; white-space: pre-wrap;">. Cela permet de choisir le chemin de tuyauterie que dois emprunter le solvant depuis la bouteille pour rejoindre les pompes. Par exemple, si c’est le tuyau </span><span style="font-size: 12pt; font-family: Aptos; color: #000000; background-color: transparent; font-weight: bold; font-style: normal; font-variant: normal; text-decoration: none; vertical-align: baseline; white-space: pre-wrap;">B1</span><span style="font-size: 12pt; font-family: Aptos; color: #000000; background-color: transparent; font-weight: 400; font-style: normal; font-variant: normal; text-decoration: none; vertical-align: baseline; white-space: pre-wrap;"> que l’on utilise dans la bouteille de solvant B, il faudra régler la valve de sélection sur la </span><span style="font-size: 12pt; font-family: Aptos; color: #000000; background-color: transparent; font-weight: bold; font-style: normal; font-variant: normal; text-decoration: none; vertical-align: baseline; white-space: pre-wrap;">position 1</span><span style="font-size: 12pt; font-family: Aptos; color: #000000; background-color: transparent; font-weight: 400; font-style: normal; font-variant: normal; text-decoration: none; vertical-align: baseline; white-space: pre-wrap;"> (flèche pointant vers le haut). La tuyauterie utilisée sur ce système correspond normalement aux tuyaux </span><span style="font-size: 12pt; font-family: Aptos; color: #000000; background-color: transparent; font-weight: bold; font-style: normal; font-variant: normal; text-decoration: none; vertical-align: baseline; white-space: pre-wrap;">A1</span><span style="font-size: 12pt; font-family: Aptos; color: #000000; background-color: transparent; font-weight: 400; font-style: normal; font-variant: normal; text-decoration: none; vertical-align: baseline; white-space: pre-wrap;"> et </span><span style="font-size: 12pt; font-family: Aptos; color: #000000; background-color: transparent; font-weight: bold; font-style: normal; font-variant: normal; text-decoration: none; vertical-align: baseline; white-space: pre-wrap;">B1</span><span style="font-size: 12pt; font-family: Aptos; color: #000000; background-color: transparent; font-weight: 400; font-style: normal; font-variant: normal; text-decoration: none; vertical-align: baseline; white-space: pre-wrap;">, les valves de sélection sont normalement déjà réglées sur ces positions, il n’y a donc pas besoin de modifier ce paramètre. Ensuite, il est possible de régler le débit d’élution de la phase mobile. Pour cela, il faut cliquer sur </span><span style="font-size: 12pt; font-family: Aptos; color: #000000; background-color: transparent; font-weight: bold; font-style: normal; font-variant: normal; text-decoration: none; vertical-align: baseline; white-space: pre-wrap;">Flow Rate</span><span style="font-size: 12pt; font-family: Aptos; color: #000000; background-color: transparent; font-weight: 400; font-style: normal; font-variant: normal; text-decoration: none; vertical-align: baseline; white-space: pre-wrap;">, cocher la case </span><span style="font-size: 12pt; font-family: Aptos; color: #000000; background-color: transparent; font-weight: bold; font-style: normal; font-variant: normal; text-decoration: none; vertical-align: baseline; white-space: pre-wrap;">Flow ON</span><span style="font-size: 12pt; font-family: Aptos; color: #000000; background-color: transparent; font-weight: 400; font-style: normal; font-variant: normal; text-decoration: none; vertical-align: baseline; white-space: pre-wrap;"> si ce n’est pas déjà fait et indiquer le débit sous lequel on souhaite travailler en face de </span><span style="font-size: 12pt; font-family: Aptos; color: #000000; background-color: transparent; font-weight: bold; font-style: normal; font-variant: normal; text-decoration: none; vertical-align: baseline; white-space: pre-wrap;">Flow rate</span><span style="font-size: 12pt; font-family: Aptos; color: #000000; background-color: transparent; font-weight: 400; font-style: normal; font-variant: normal; text-decoration: none; vertical-align: baseline; white-space: pre-wrap;">. Généralement, on travaille à </span><span style="font-size: 12pt; font-family: Aptos; color: #000000; background-color: transparent; font-weight: bold; font-style: normal; font-variant: normal; text-decoration: none; vertical-align: baseline; white-space: pre-wrap;">1 ml/min</span><span style="font-size: 12pt; font-family: Aptos; color: #000000; background-color: transparent; font-weight: 400; font-style: normal; font-variant: normal; text-decoration: none; vertical-align: baseline; white-space: pre-wrap;">. </span>

<span style="font-size: 12pt; font-family: Aptos; color: #000000; background-color: #ffff00; font-weight: bold; font-style: normal; font-variant: normal; text-decoration: none; vertical-align: baseline; white-space: pre-wrap;">Attention, il faut faire attention à ne JAMAIS dépasser 2 ml/min, par risque d’endommager considérablement les pompes, la tuyauterie et la colonne.</span>

<span style="font-size: 12pt; font-family: Aptos; color: #000000; background-color: transparent; font-weight: 400; font-style: normal; font-variant: normal; text-decoration: none; vertical-align: baseline; white-space: pre-wrap;">Enfin, il est possible de vérifier la pression des pompes et de régler les pressions minimales ou maximales en cliquant directement sur l’icône de chaque pompe.</span>

<span style="font-size: 12pt; font-family: Aptos; color: #000000; background-color: transparent; font-weight: 400; font-style: normal; font-variant: normal; text-decoration: none; vertical-align: baseline; white-space: pre-wrap;">La sous fenêtre au milieu permet de contrôler l’autosampler. Il est possible de nettoyer l’aiguille de l’autosampler en appuyant sur la grande icône d’aiguille. Cela permet de nettoyer l’aiguille avec l’isopropanol contenu dans la bouteille de lavage fixé sur l’autosampler. Il est recommandé de nettoyer l’aiguille lorsque l’on change d’échantillon. Le volume de nettoyage doit être trois fois supérieur au volume de la boucle (300 µl pour une boucle de 100 µl). Cela permet de s'assurer que tout résidu de l'échantillon précédent est complètement éliminé. Si plusieurs prélèvements sont effectués dans le même échantillon, il n’y a pas besoin de nettoyer l’aiguille entre les tests. Il est également possible d’activer l’option </span><span style="font-size: 12pt; font-family: Aptos; color: #000000; background-color: transparent; font-weight: bold; font-style: normal; font-variant: normal; text-decoration: none; vertical-align: baseline; white-space: pre-wrap;">Tray Cooling</span><span style="font-size: 12pt; font-family: Aptos; color: #000000; background-color: transparent; font-weight: 400; font-style: normal; font-variant: normal; text-decoration: none; vertical-align: baseline; white-space: pre-wrap;"> en cliquant sur l’icône de thermomètre, si l’on souhaite régler une température spécifique pour le plateau de l’autosampler.</span>

<span style="font-size: 12pt; font-family: Aptos; color: #000000; background-color: transparent; font-weight: 400; font-style: normal; font-variant: normal; text-decoration: none; vertical-align: baseline; white-space: pre-wrap;">La petite sous-fenêtre à droite correspond au détecteur. L’option </span><span style="font-size: 12pt; font-family: Aptos; color: #000000; background-color: transparent; font-weight: bold; font-style: normal; font-variant: normal; text-decoration: none; vertical-align: baseline; white-space: pre-wrap;">Calibrate</span><span style="font-size: 12pt; font-family: Aptos; color: #000000; background-color: transparent; font-weight: 400; font-style: normal; font-variant: normal; text-decoration: none; vertical-align: baseline; white-space: pre-wrap;">, permet d’initier la procédure de calibration du détecteur. Pour cela, il faut cliquer sur </span><span style="font-size: 12pt; font-family: Aptos; color: #000000; background-color: transparent; font-weight: bold; font-style: normal; font-variant: normal; text-decoration: none; vertical-align: baseline; white-space: pre-wrap;">Calibrate</span><span style="font-size: 12pt; font-family: Aptos; color: #000000; background-color: transparent; font-weight: 400; font-style: normal; font-variant: normal; text-decoration: none; vertical-align: baseline; white-space: pre-wrap;"> et cocher la case </span><span style="font-size: 12pt; font-family: Aptos; color: #000000; background-color: transparent; font-weight: bold; font-style: normal; font-variant: normal; text-decoration: none; vertical-align: baseline; white-space: pre-wrap;">ON</span><span style="font-size: 12pt; font-family: Aptos; color: #000000; background-color: transparent; font-weight: 400; font-style: normal; font-variant: normal; text-decoration: none; vertical-align: baseline; white-space: pre-wrap;"> dans la boîte de dialogue apparaissant. En cliquant sur l’icône de la lampe, on peut allumer ou éteindre la lampe UV du détecteur. Si l’icône est rose, cela signifie que la lampe est allumée. Le détecteur 168 est un détecteur à barrette de diodes (DAD), cela signifie que l’on peut se placer sur deux longueurs d’ondes distinctes simultanément, contrairement à un détecteur UV classique. En cliquant sur </span><span style="font-size: 12pt; font-family: Aptos; color: #000000; background-color: transparent; font-weight: bold; font-style: normal; font-variant: normal; text-decoration: none; vertical-align: baseline; white-space: pre-wrap;">Ch1</span><span style="font-size: 12pt; font-family: Aptos; color: #000000; background-color: transparent; font-weight: 400; font-style: normal; font-variant: normal; text-decoration: none; vertical-align: baseline; white-space: pre-wrap;"> en dessous de l’option de calibration, une boite de dialogue apparaît. Le detecteur 168 possède deux </span><span style="font-size: 12pt; font-family: Aptos; color: #000000; background-color: transparent; font-weight: bold; font-style: normal; font-variant: normal; text-decoration: none; vertical-align: baseline; white-space: pre-wrap;">channel</span><span style="font-size: 12pt; font-family: Aptos; color: #000000; background-color: transparent; font-weight: 400; font-style: normal; font-variant: normal; text-decoration: none; vertical-align: baseline; white-space: pre-wrap;">. On peut définir la longueur d’onde de notre choix pour chaque </span><span style="font-size: 12pt; font-family: Aptos; color: #000000; background-color: transparent; font-weight: bold; font-style: normal; font-variant: normal; text-decoration: none; vertical-align: baseline; white-space: pre-wrap;">channel</span><span style="font-size: 12pt; font-family: Aptos; color: #000000; background-color: transparent; font-weight: 400; font-style: normal; font-variant: normal; text-decoration: none; vertical-align: baseline; white-space: pre-wrap;"> en face de </span><span style="font-size: 12pt; font-family: Aptos; color: #000000; background-color: transparent; font-weight: bold; font-style: normal; font-variant: normal; text-decoration: none; vertical-align: baseline; white-space: pre-wrap;">Wavelength</span><span style="font-size: 12pt; font-family: Aptos; color: #000000; background-color: transparent; font-weight: 400; font-style: normal; font-variant: normal; text-decoration: none; vertical-align: baseline; white-space: pre-wrap;"> ainsi que la bande passante en face de </span><span style="font-size: 12pt; font-family: Aptos; color: #000000; background-color: transparent; font-weight: bold; font-style: normal; font-variant: normal; text-decoration: none; vertical-align: baseline; white-space: pre-wrap;">Bandwith</span><span style="font-size: 12pt; font-family: Aptos; color: #000000; background-color: transparent; font-weight: 400; font-style: normal; font-variant: normal; text-decoration: none; vertical-align: baseline; white-space: pre-wrap;">. L’appareil est initialement réglé sur </span><span style="font-size: 12pt; font-family: Aptos; color: #000000; background-color: transparent; font-weight: bold; font-style: normal; font-variant: normal; text-decoration: none; vertical-align: baseline; white-space: pre-wrap;">254 nm et 280 nm</span><span style="font-size: 12pt; font-family: Aptos; color: #000000; background-color: transparent; font-weight: 400; font-style: normal; font-variant: normal; text-decoration: none; vertical-align: baseline; white-space: pre-wrap;"> mais cela peut être ajusté en fonction de vos échantillons. Enfin, en dessous de la sous-fenêtre du détecteur se trouve un bouton </span><span style="font-size: 12pt; font-family: Aptos; color: #000000; background-color: transparent; font-weight: bold; font-style: normal; font-variant: normal; text-decoration: none; vertical-align: baseline; white-space: pre-wrap;">AutoZero</span><span style="font-size: 12pt; font-family: Aptos; color: #000000; background-color: transparent; font-weight: 400; font-style: normal; font-variant: normal; text-decoration: none; vertical-align: baseline; white-space: pre-wrap;">. Cela permet d’ajuster le détecteur à zéro, ce qui est nécessaire avant chaque analyse.</span>

<span style="font-size: 12pt; font-family: Aptos; color: #ff0000; background-color: transparent; font-weight: bold; font-style: normal; font-variant: normal; text-decoration: none; vertical-align: baseline; white-space: pre-wrap;">Suivez ces étapes à chaque lancement du logiciel :</span>

<span style="font-size: 12pt; font-family: Aptos; color: #000000; background-color: transparent; font-weight: bold; font-style: normal; font-variant: normal; text-decoration: none; vertical-align: baseline; white-space: pre-wrap;">Préparation initiale</span>

- <span style="font-size: 12pt; font-family: Aptos; color: #000000; background-color: transparent; font-weight: 400; font-style: normal; font-variant: normal; text-decoration: none; vertical-align: baseline; white-space: pre-wrap;">Depuis le panneau de contrôle, commencez par effectuer le zéro du détecteur en cliquant sur le bouton </span><span style="font-size: 12pt; font-family: Aptos; color: #000000; background-color: transparent; font-weight: bold; font-style: normal; font-variant: normal; text-decoration: none; vertical-align: baseline; white-space: pre-wrap;">AutoZero</span><span style="font-size: 12pt; font-family: Aptos; color: #000000; background-color: transparent; font-weight: 400; font-style: normal; font-variant: normal; text-decoration: none; vertical-align: baseline; white-space: pre-wrap;">.</span>
- <span style="font-size: 12pt; font-family: Aptos; color: #000000; background-color: transparent; font-weight: 400; font-style: normal; font-variant: normal; text-decoration: none; vertical-align: baseline; white-space: pre-wrap;">Ensuite, réalisez la calibration en cochant la case </span><span style="font-size: 12pt; font-family: Aptos; color: #000000; background-color: transparent; font-weight: bold; font-style: normal; font-variant: normal; text-decoration: none; vertical-align: baseline; white-space: pre-wrap;">ON</span><span style="font-size: 12pt; font-family: Aptos; color: #000000; background-color: transparent; font-weight: 400; font-style: normal; font-variant: normal; text-decoration: none; vertical-align: baseline; white-space: pre-wrap;"> dans la boîte de dialogue correspondante. Attendez que le message </span><span style="font-size: 12pt; font-family: Aptos; color: #000000; background-color: transparent; font-weight: bold; font-style: normal; font-variant: normal; text-decoration: none; vertical-align: baseline; white-space: pre-wrap;">DONE</span><span style="font-size: 12pt; font-family: Aptos; color: #000000; background-color: transparent; font-weight: 400; font-style: normal; font-variant: normal; text-decoration: none; vertical-align: baseline; white-space: pre-wrap;"> apparaisse en face de </span><span style="font-size: 12pt; font-family: Aptos; color: #000000; background-color: transparent; font-weight: bold; font-style: normal; font-variant: normal; text-decoration: none; vertical-align: baseline; white-space: pre-wrap;">Calibrate</span><span style="font-size: 12pt; font-family: Aptos; color: #000000; background-color: transparent; font-weight: 400; font-style: normal; font-variant: normal; text-decoration: none; vertical-align: baseline; white-space: pre-wrap;">.</span>

<span style="font-size: 12pt; font-family: Aptos; color: #000000; background-color: transparent; font-weight: bold; font-style: normal; font-variant: normal; text-decoration: none; vertical-align: baseline; white-space: pre-wrap;">Réglage des paramètres </span>

- <span style="font-size: 12pt; font-family: Aptos; color: #000000; background-color: transparent; font-weight: 400; font-style: normal; font-variant: normal; text-decoration: none; vertical-align: baseline; white-space: pre-wrap;">Réglez le pourcentage eau/acétonitrile que vous souhaitez utiliser.</span>
- <span style="font-size: 12pt; font-family: Aptos; color: #000000; background-color: transparent; font-weight: 400; font-style: normal; font-variant: normal; text-decoration: none; vertical-align: baseline; white-space: pre-wrap;">Activez le débit d’élution et réglez-le sur </span><span style="font-size: 12pt; font-family: Aptos; color: #000000; background-color: transparent; font-weight: bold; font-style: normal; font-variant: normal; text-decoration: none; vertical-align: baseline; white-space: pre-wrap;">1 ml/min</span><span style="font-size: 12pt; font-family: Aptos; color: #000000; background-color: transparent; font-weight: 400; font-style: normal; font-variant: normal; text-decoration: none; vertical-align: baseline; white-space: pre-wrap;">. </span><span style="font-size: 12pt; font-family: Aptos; color: #000000; background-color: #ffff00; font-weight: bold; font-style: normal; font-variant: normal; text-decoration: none; vertical-align: baseline; white-space: pre-wrap;">Attention, ne JAMAIS dépasser 2 ml/min</span><span style="font-size: 12pt; font-family: Aptos; color: #000000; background-color: transparent; font-weight: 400; font-style: normal; font-variant: normal; text-decoration: none; vertical-align: baseline; white-space: pre-wrap;">.</span>
- <span style="font-size: 12pt; font-family: Aptos; color: #000000; background-color: transparent; font-weight: 400; font-style: normal; font-variant: normal; text-decoration: none; vertical-align: baseline; white-space: pre-wrap;">Attendez que la pression des pompes A et B se stabilise, c’est-à-dire jusqu’à ce que la pression des deux pompes ne varie plus ou très peu.</span>

<span style="font-size: 12pt; font-family: Aptos; color: #000000; background-color: transparent; font-weight: bold; font-style: normal; font-variant: normal; text-decoration: none; vertical-align: baseline; white-space: pre-wrap;">Nettoyage de l’aiguille</span>

- <span style="font-size: 12pt; font-family: Aptos; color: #000000; background-color: transparent; font-weight: 400; font-style: normal; font-variant: normal; text-decoration: none; vertical-align: baseline; white-space: pre-wrap;">Si c’est votre première analyse ou si vous changez d’échantillon, nettoyez l’aiguille en cliquant sur la grande icône d’aiguille.</span>

<span style="font-size: 12pt; font-family: Aptos; color: #000000; background-color: transparent; font-weight: bold; font-style: normal; font-variant: normal; text-decoration: none; vertical-align: baseline; white-space: pre-wrap;">Vérification finale</span>

- <span style="font-size: 12pt; font-family: Aptos; color: #000000; background-color: transparent; font-weight: 400; font-style: normal; font-variant: normal; text-decoration: none; vertical-align: baseline; white-space: pre-wrap;">Assurez-vous que l’autozero et la calibration sont effectués, que le débit d’élution et le pourcentage de solvant sont réglés, que la pression des pompes est stable et que l’aiguille est propre.</span>

<span style="font-size: 12pt; font-family: Aptos; color: #000000; background-color: transparent; font-weight: 400; font-style: normal; font-variant: normal; text-decoration: none; vertical-align: baseline; white-space: pre-wrap;">Une fois ces étapes réalisées, le système HPLC sera bien préparé mais pas encore prêt à analyser l’échantillon. Il est crucial de rappeler que le panneau de contrôle permet de régler votre système en temps réel, mais ces paramètres peuvent changer lors d’une analyse si une méthode précise a été définie. Avant de lancer une analyse, il est donc essentiel de savoir créer et paramétrer une méthode appropriée.</span>

2. ## <span style="font-size: 12pt; font-family: Aptos; color: #000000; background-color: transparent; font-weight: bold; font-style: normal; font-variant: normal; text-decoration: underline; -webkit-text-decoration-skip: none; text-decoration-skip-ink: none; vertical-align: baseline; white-space: pre-wrap;">Créer une méthode : </span>

<span style="font-size: 12pt; font-family: Aptos; color: #000000; background-color: transparent; font-weight: 400; font-style: normal; font-variant: normal; text-decoration: none; vertical-align: baseline; white-space: pre-wrap;">Le fait de créer une méthode va permettre d’attribuer à chaque module les paramètres qu’ils devront utiliser une fois l’analyse lancé mais également de définir le temps d’analyse total. Il est possible de créer plusieurs méthodes et de les enregistrer. Cela va donc permettre d’automatiser le processus d’échantillonnage. </span>

<span style="font-size: 12pt; font-family: Aptos; color: #000000; background-color: transparent; font-weight: 400; font-style: normal; font-variant: normal; text-decoration: none; vertical-align: baseline; white-space: pre-wrap;">Pour créer une méthode, il faut se rendre dans l’onglet </span><span style="font-size: 12pt; font-family: Aptos; color: #000000; background-color: transparent; font-weight: bold; font-style: normal; font-variant: normal; text-decoration: none; vertical-align: baseline; white-space: pre-wrap;">Files / Method / New</span><span style="font-size: 12pt; font-family: Aptos; color: #000000; background-color: transparent; font-weight: 400; font-style: normal; font-variant: normal; text-decoration: none; vertical-align: baseline; white-space: pre-wrap;">, ce qui ouvrira une nouvelle fenêtre appelée </span><span style="font-size: 12pt; font-family: Aptos; color: #000000; background-color: transparent; font-weight: bold; font-style: normal; font-variant: normal; text-decoration: none; vertical-align: baseline; white-space: pre-wrap;">Instrument Setup</span><span style="font-size: 12pt; font-family: Aptos; color: #000000; background-color: transparent; font-weight: 400; font-style: normal; font-variant: normal; text-decoration: none; vertical-align: baseline; white-space: pre-wrap;">. Il faut maintenant régler les paramètres de chaque module qui seront utilisés lors de l’analyse. </span>

<span style="font-size: 12pt; font-family: Aptos; color: #000000; background-color: transparent; font-weight: 400; font-style: normal; font-variant: normal; text-decoration: none; vertical-align: baseline; white-space: pre-wrap;"><span style="border: none; display: inline-block; overflow: hidden; width: 605px; height: 284px;">![Une image contenant texte, capture d’écran, logiciel, Logiciel multimédia

Description générée automatiquement](https://lh7-us.googleusercontent.com/docsz/AD_4nXc6n9MUoWuqrXokjDolYBvdrDSyQJzY7d0FLVKRzPxf-uhLDVYP10C5Mlxh-IObvHIwula7TqfFk45R-1yGQtN2edbwu-Tj68t99U4HpuNm9I5V76580_dODNXXPVfPRaz4alhfxEuhKbSB_oplzoUWVpLVXJ-bZjg4SRpkzw?key=Bh6HJVxnw55dhOaHFSChLA)</span></span>

<span style="font-size: 12pt; font-family: Aptos; color: #000000; background-color: #ffff00; font-weight: 400; font-style: normal; font-variant: normal; text-decoration: none; vertical-align: baseline; white-space: pre-wrap;">Attention, les paramètres réglés dans </span><span style="font-size: 12pt; font-family: Aptos; color: #000000; background-color: #ffff00; font-weight: bold; font-style: normal; font-variant: normal; text-decoration: none; vertical-align: baseline; white-space: pre-wrap;">Instrument Setup</span><span style="font-size: 12pt; font-family: Aptos; color: #000000; background-color: #ffff00; font-weight: 400; font-style: normal; font-variant: normal; text-decoration: none; vertical-align: baseline; white-space: pre-wrap;"> ne seront appliqués que lorsqu’une analyse sera lancée. Si vous souhaitez changer un des paramètres pour une autre analyse (ex : %B), il faut absolument rouvrir </span><span style="font-size: 12pt; font-family: Aptos; color: #000000; background-color: #ffff00; font-weight: bold; font-style: normal; font-variant: normal; text-decoration: none; vertical-align: baseline; white-space: pre-wrap;">Instrument Setup</span><span style="font-size: 12pt; font-family: Aptos; color: #000000; background-color: #ffff00; font-weight: 400; font-style: normal; font-variant: normal; text-decoration: none; vertical-align: baseline; white-space: pre-wrap;"> et effectuer vos changements. Le fait de modifier les paramètres depuis le panneau </span><span style="font-size: 12pt; font-family: Aptos; color: #000000; background-color: #ffff00; font-weight: bold; font-style: normal; font-variant: normal; text-decoration: none; vertical-align: baseline; white-space: pre-wrap;">Direct Control</span><span style="font-size: 12pt; font-family: Aptos; color: #000000; background-color: #ffff00; font-weight: 400; font-style: normal; font-variant: normal; text-decoration: none; vertical-align: baseline; white-space: pre-wrap;"> n’aura aucun impact lorsque vous relancerez une analyse.</span>

<span style="font-size: 12pt; font-family: Aptos; color: #000000; background-color: transparent; font-weight: 400; font-style: normal; font-variant: normal; text-decoration: none; vertical-align: baseline; white-space: pre-wrap;">Après avoir cliqué sur l’onglet </span><span style="font-size: 12pt; font-family: Aptos; color: #000000; background-color: transparent; font-weight: bold; font-style: normal; font-variant: normal; text-decoration: none; vertical-align: baseline; white-space: pre-wrap;">Pumps</span><span style="font-size: 12pt; font-family: Aptos; color: #000000; background-color: transparent; font-weight: 400; font-style: normal; font-variant: normal; text-decoration: none; vertical-align: baseline; white-space: pre-wrap;">, commencez par régler le débit d’élution en entrant </span><span style="font-size: 12pt; font-family: Aptos; color: #000000; background-color: transparent; font-weight: bold; font-style: normal; font-variant: normal; text-decoration: none; vertical-align: baseline; white-space: pre-wrap;">1 ml/mn</span><span style="font-size: 12pt; font-family: Aptos; color: #000000; background-color: transparent; font-weight: 400; font-style: normal; font-variant: normal; text-decoration: none; vertical-align: baseline; white-space: pre-wrap;"> en face de </span><span style="font-size: 12pt; font-family: Aptos; color: #000000; background-color: transparent; font-weight: bold; font-style: normal; font-variant: normal; text-decoration: none; vertical-align: baseline; white-space: pre-wrap;">Flow Rate</span><span style="font-size: 12pt; font-family: Aptos; color: #000000; background-color: transparent; font-weight: 400; font-style: normal; font-variant: normal; text-decoration: none; vertical-align: baseline; white-space: pre-wrap;"> et </span><span style="font-size: 12pt; font-family: Aptos; color: #000000; background-color: transparent; font-weight: bold; font-style: normal; font-variant: normal; text-decoration: none; vertical-align: baseline; white-space: pre-wrap;">0.50 mi</span><span style="font-size: 12pt; font-family: Aptos; color: #000000; background-color: transparent; font-weight: 400; font-style: normal; font-variant: normal; text-decoration: none; vertical-align: baseline; white-space: pre-wrap;">n en face de </span><span style="font-size: 12pt; font-family: Aptos; color: #000000; background-color: transparent; font-weight: bold; font-style: normal; font-variant: normal; text-decoration: none; vertical-align: baseline; white-space: pre-wrap;">Duration</span><span style="font-size: 12pt; font-family: Aptos; color: #000000; background-color: transparent; font-weight: 400; font-style: normal; font-variant: normal; text-decoration: none; vertical-align: baseline; white-space: pre-wrap;">. Vous pouvez nommer vos solvant dans les champs d’écriture à côté de </span><span style="font-size: 12pt; font-family: Aptos; color: #000000; background-color: transparent; font-weight: bold; font-style: normal; font-variant: normal; text-decoration: none; vertical-align: baseline; white-space: pre-wrap;">A1</span><span style="font-size: 12pt; font-family: Aptos; color: #000000; background-color: transparent; font-weight: 400; font-style: normal; font-variant: normal; text-decoration: none; vertical-align: baseline; white-space: pre-wrap;"> et </span><span style="font-size: 12pt; font-family: Aptos; color: #000000; background-color: transparent; font-weight: bold; font-style: normal; font-variant: normal; text-decoration: none; vertical-align: baseline; white-space: pre-wrap;">B1</span><span style="font-size: 12pt; font-family: Aptos; color: #000000; background-color: transparent; font-weight: 400; font-style: normal; font-variant: normal; text-decoration: none; vertical-align: baseline; white-space: pre-wrap;">. Réglez ensuite le pourcentage de solvant en face de </span><span style="font-size: 12pt; font-family: Aptos; color: #000000; background-color: transparent; font-weight: bold; font-style: normal; font-variant: normal; text-decoration: none; vertical-align: baseline; white-space: pre-wrap;">%B</span><span style="font-size: 12pt; font-family: Aptos; color: #000000; background-color: transparent; font-weight: 400; font-style: normal; font-variant: normal; text-decoration: none; vertical-align: baseline; white-space: pre-wrap;"> (idéalement 50%) ainsi que la pression maximale sur </span><span style="font-size: 12pt; font-family: Aptos; color: #000000; background-color: transparent; font-weight: bold; font-style: normal; font-variant: normal; text-decoration: none; vertical-align: baseline; white-space: pre-wrap;">4.000 KPSI</span><span style="font-size: 12pt; font-family: Aptos; color: #000000; background-color: transparent; font-weight: 400; font-style: normal; font-variant: normal; text-decoration: none; vertical-align: baseline; white-space: pre-wrap;">.</span>

[![image.png](https://wiki.fablab.sorbonne-universite.fr/BookStack/uploads/images/gallery/2024-06/scaled-1680-/fDuimage.png)](https://wiki.fablab.sorbonne-universite.fr/BookStack/uploads/images/gallery/2024-06/fDuimage.png)

<span style="font-size: 12pt; font-family: Aptos; color: #000000; background-color: transparent; font-weight: 400; font-style: normal; font-variant: normal; text-decoration: none; vertical-align: baseline; white-space: pre-wrap;">Dans l’onglet </span><span style="font-size: 12pt; font-family: Aptos; color: #000000; background-color: transparent; font-weight: bold; font-style: normal; font-variant: normal; text-decoration: none; vertical-align: baseline; white-space: pre-wrap;">Det 168</span><span style="font-size: 12pt; font-family: Aptos; color: #000000; background-color: transparent; font-weight: 400; font-style: normal; font-variant: normal; text-decoration: none; vertical-align: baseline; white-space: pre-wrap;">, cochez l’option </span><span style="font-size: 12pt; font-family: Aptos; color: #000000; background-color: transparent; font-weight: bold; font-style: normal; font-variant: normal; text-decoration: none; vertical-align: baseline; white-space: pre-wrap;">Acquisition Enabled</span><span style="font-size: 12pt; font-family: Aptos; color: #000000; background-color: transparent; font-weight: 400; font-style: normal; font-variant: normal; text-decoration: none; vertical-align: baseline; white-space: pre-wrap;"> et </span><span style="font-size: 12pt; font-family: Aptos; color: #000000; background-color: transparent; font-weight: bold; font-style: normal; font-variant: normal; text-decoration: none; vertical-align: baseline; white-space: pre-wrap;">3D Data</span><span style="font-size: 12pt; font-family: Aptos; color: #000000; background-color: transparent; font-weight: 400; font-style: normal; font-variant: normal; text-decoration: none; vertical-align: baseline; white-space: pre-wrap;"> si ce n’est pas déjà fait. Cochez également </span><span style="font-size: 12pt; font-family: Aptos; color: #000000; background-color: transparent; font-weight: bold; font-style: normal; font-variant: normal; text-decoration: none; vertical-align: baseline; white-space: pre-wrap;">Channel 1</span><span style="font-size: 12pt; font-family: Aptos; color: #000000; background-color: transparent; font-weight: 400; font-style: normal; font-variant: normal; text-decoration: none; vertical-align: baseline; white-space: pre-wrap;"> et </span><span style="font-size: 12pt; font-family: Aptos; color: #000000; background-color: transparent; font-weight: bold; font-style: normal; font-variant: normal; text-decoration: none; vertical-align: baseline; white-space: pre-wrap;">Channel 2</span><span style="font-size: 12pt; font-family: Aptos; color: #000000; background-color: transparent; font-weight: 400; font-style: normal; font-variant: normal; text-decoration: none; vertical-align: baseline; white-space: pre-wrap;"> et définissez les longueurs d’ondes sur lesquels vous souhaitez travailler. Ne pas toucher aux autres paramètres. </span>

[![image.png](https://wiki.fablab.sorbonne-universite.fr/BookStack/uploads/images/gallery/2024-06/scaled-1680-/JTYimage.png)](https://wiki.fablab.sorbonne-universite.fr/BookStack/uploads/images/gallery/2024-06/JTYimage.png)

<span style="font-size: 12pt; font-family: Aptos; color: #000000; background-color: transparent; font-weight: 400; font-style: normal; font-variant: normal; text-decoration: none; vertical-align: baseline; white-space: pre-wrap;">Dans l’onglet </span><span style="font-size: 12pt; font-family: Aptos; color: #000000; background-color: transparent; font-weight: bold; font-style: normal; font-variant: normal; text-decoration: none; vertical-align: baseline; white-space: pre-wrap;">Injector 507e</span><span style="font-size: 12pt; font-family: Aptos; color: #000000; background-color: transparent; font-weight: 400; font-style: normal; font-variant: normal; text-decoration: none; vertical-align: baseline; white-space: pre-wrap;">, cochez l’option </span><span style="font-size: 12pt; font-family: Aptos; color: #000000; background-color: transparent; font-weight: bold; font-style: normal; font-variant: normal; text-decoration: none; vertical-align: baseline; white-space: pre-wrap;">Wash Between Vials</span><span style="font-size: 12pt; font-family: Aptos; color: #000000; background-color: transparent; font-weight: 400; font-style: normal; font-variant: normal; text-decoration: none; vertical-align: baseline; white-space: pre-wrap;"> et sélectionnez </span><span style="font-size: 12pt; font-family: Aptos; color: #000000; background-color: transparent; font-weight: bold; font-style: normal; font-variant: normal; text-decoration: none; vertical-align: baseline; white-space: pre-wrap;">External</span><span style="font-size: 12pt; font-family: Aptos; color: #000000; background-color: transparent; font-weight: 400; font-style: normal; font-variant: normal; text-decoration: none; vertical-align: baseline; white-space: pre-wrap;"> en face de </span><span style="font-size: 12pt; font-family: Aptos; color: #000000; background-color: transparent; font-weight: bold; font-style: normal; font-variant: normal; text-decoration: none; vertical-align: baseline; white-space: pre-wrap;">Trigger Type</span><span style="font-size: 12pt; font-family: Aptos; color: #000000; background-color: transparent; font-weight: 400; font-style: normal; font-variant: normal; text-decoration: none; vertical-align: baseline; white-space: pre-wrap;">.</span>

[![image.png](https://wiki.fablab.sorbonne-universite.fr/BookStack/uploads/images/gallery/2024-06/scaled-1680-/cfkimage.png)](https://wiki.fablab.sorbonne-universite.fr/BookStack/uploads/images/gallery/2024-06/cfkimage.png)

<span style="font-size: 12pt; font-family: Aptos; color: #000000; background-color: transparent; font-weight: 400; font-style: normal; font-variant: normal; text-decoration: none; vertical-align: baseline; white-space: pre-wrap;">Une fois les réglages des modules effectués, nous allons pouvoir régler le mode et le temps d’analyse dans l’onglet </span><span style="font-size: 12pt; font-family: Aptos; color: #000000; background-color: transparent; font-weight: bold; font-style: normal; font-variant: normal; text-decoration: none; vertical-align: baseline; white-space: pre-wrap;">Time Program</span><span style="font-size: 12pt; font-family: Aptos; color: #000000; background-color: transparent; font-weight: 400; font-style: normal; font-variant: normal; text-decoration: none; vertical-align: baseline; white-space: pre-wrap;">.</span>

<span style="font-size: 12pt; font-family: Aptos; color: #000000; background-color: transparent; font-weight: 400; font-style: normal; font-variant: normal; text-decoration: none; vertical-align: baseline; white-space: pre-wrap;">Avant d’aborder une analyse, il faut savoir si vous souhaitez travailler en mode </span><span style="font-size: 12pt; font-family: Aptos; color: #000000; background-color: transparent; font-weight: bold; font-style: normal; font-variant: normal; text-decoration: none; vertical-align: baseline; white-space: pre-wrap;">isocratique</span><span style="font-size: 12pt; font-family: Aptos; color: #000000; background-color: transparent; font-weight: 400; font-style: normal; font-variant: normal; text-decoration: none; vertical-align: baseline; white-space: pre-wrap;"> ou en mode </span><span style="font-size: 12pt; font-family: Aptos; color: #000000; background-color: transparent; font-weight: bold; font-style: normal; font-variant: normal; text-decoration: none; vertical-align: baseline; white-space: pre-wrap;">gradient</span><span style="font-size: 12pt; font-family: Aptos; color: #000000; background-color: transparent; font-weight: 400; font-style: normal; font-variant: normal; text-decoration: none; vertical-align: baseline; white-space: pre-wrap;">. Le mode isocratique utilise une composition de phase mobile constante tout au long de l’analyse. Cela signifie que le ratio des solvants reste inchangé, ce qui simplifie la méthode et peut être suffisant pour des échantillons simples où les composés ont des propriétés similaires. En revanche, le mode gradient implique une variation progressive de la composition de la phase mobile au cours de l’analyse. Cette variation peut être linéaire ou non-linéaire et est utilisée pour améliorer la séparation des composés dans des mélanges complexes. Le mode gradient est particulièrement utile pour les échantillons contenant des analytes avec des polarités très différentes ou des temps de rétention variés, permettant ainsi d'obtenir une meilleure résolution et des temps d’analyse plus courts.</span>

1. ### <span style="font-size: 12pt; font-family: Aptos; color: #ff0000; background-color: transparent; font-weight: bold; font-style: normal; font-variant: normal; text-decoration: none; vertical-align: baseline; white-space: pre-wrap;">Réglages mode isocratique</span>

<span style="font-size: 12pt; font-family: Aptos; color: #000000; background-color: transparent; font-weight: 400; font-style: normal; font-variant: normal; text-decoration: none; vertical-align: baseline; white-space: pre-wrap;">Pour une analyse en mode isocratique, vous aurez juste à paramétrer le moment d’arrêt de l’analyse ainsi que l’autozero. Dans </span><span style="font-size: 12pt; font-family: Aptos; color: #000000; background-color: transparent; font-weight: bold; font-style: normal; font-variant: normal; text-decoration: none; vertical-align: baseline; white-space: pre-wrap;">Time</span><span style="font-size: 12pt; font-family: Aptos; color: #000000; background-color: transparent; font-weight: 400; font-style: normal; font-variant: normal; text-decoration: none; vertical-align: baseline; white-space: pre-wrap;">, il faut entrer 0,50 min, dans </span><span style="font-size: 12pt; font-family: Aptos; color: #000000; background-color: transparent; font-weight: bold; font-style: normal; font-variant: normal; text-decoration: none; vertical-align: baseline; white-space: pre-wrap;">Module</span><span style="font-size: 12pt; font-family: Aptos; color: #000000; background-color: transparent; font-weight: 400; font-style: normal; font-variant: normal; text-decoration: none; vertical-align: baseline; white-space: pre-wrap;"> sélectionner </span><span style="font-size: 12pt; font-family: Aptos; color: #000000; background-color: transparent; font-weight: bold; font-style: normal; font-variant: normal; text-decoration: none; vertical-align: baseline; white-space: pre-wrap;">DET 168</span><span style="font-size: 12pt; font-family: Aptos; color: #000000; background-color: transparent; font-weight: 400; font-style: normal; font-variant: normal; text-decoration: none; vertical-align: baseline; white-space: pre-wrap;"> et dans </span><span style="font-size: 12pt; font-family: Aptos; color: #000000; background-color: transparent; font-weight: bold; font-style: normal; font-variant: normal; text-decoration: none; vertical-align: baseline; white-space: pre-wrap;">Function</span><span style="font-size: 12pt; font-family: Aptos; color: #000000; background-color: transparent; font-weight: 400; font-style: normal; font-variant: normal; text-decoration: none; vertical-align: baseline; white-space: pre-wrap;"> sélectionner </span><span style="font-size: 12pt; font-family: Aptos; color: #000000; background-color: transparent; font-weight: bold; font-style: normal; font-variant: normal; text-decoration: none; vertical-align: baseline; white-space: pre-wrap;">Autozero</span><span style="font-size: 12pt; font-family: Aptos; color: #000000; background-color: transparent; font-weight: 400; font-style: normal; font-variant: normal; text-decoration: none; vertical-align: baseline; white-space: pre-wrap;">. Il faut ensuite sélectionner la deuxième ligne et entrer le temps d’analyse total souhaité (par exemple 10.00 min) dans </span><span style="font-size: 12pt; font-family: Aptos; color: #000000; background-color: transparent; font-weight: bold; font-style: normal; font-variant: normal; text-decoration: none; vertical-align: baseline; white-space: pre-wrap;">Time</span><span style="font-size: 12pt; font-family: Aptos; color: #000000; background-color: transparent; font-weight: 400; font-style: normal; font-variant: normal; text-decoration: none; vertical-align: baseline; white-space: pre-wrap;">, sélectionner le même détecteur et choisir </span><span style="font-size: 12pt; font-family: Aptos; color: #000000; background-color: transparent; font-weight: bold; font-style: normal; font-variant: normal; text-decoration: none; vertical-align: baseline; white-space: pre-wrap;">Stop Data</span><span style="font-size: 12pt; font-family: Aptos; color: #000000; background-color: transparent; font-weight: 400; font-style: normal; font-variant: normal; text-decoration: none; vertical-align: baseline; white-space: pre-wrap;"> dans </span><span style="font-size: 12pt; font-family: Aptos; color: #000000; background-color: transparent; font-weight: bold; font-style: normal; font-variant: normal; text-decoration: none; vertical-align: baseline; white-space: pre-wrap;">Function</span><span style="font-size: 12pt; font-family: Aptos; color: #000000; background-color: transparent; font-weight: 400; font-style: normal; font-variant: normal; text-decoration: none; vertical-align: baseline; white-space: pre-wrap;">. </span>

[![image.png](https://wiki.fablab.sorbonne-universite.fr/BookStack/uploads/images/gallery/2024-06/scaled-1680-/QnUimage.png)](https://wiki.fablab.sorbonne-universite.fr/BookStack/uploads/images/gallery/2024-06/QnUimage.png)

2. ### <span style="font-size: 12pt; font-family: Aptos; color: #ff0000; background-color: transparent; font-weight: bold; font-style: normal; font-variant: normal; text-decoration: none; vertical-align: baseline; white-space: pre-wrap;">Réglages mode gradient</span>

<span style="font-size: 12pt; font-family: Aptos; color: #000000; background-color: transparent; font-weight: 400; font-style: normal; font-variant: normal; text-decoration: none; vertical-align: baseline; white-space: pre-wrap;">Pour une analyse en mode gradient, il faut d’abord appliquer les paramètres du mode isocratique. Afin de faire varier la composition de la phase mobile au bout d’un certain moment, il faut sélectionner </span><span style="font-size: 12pt; font-family: Aptos; color: #000000; background-color: transparent; font-weight: bold; font-style: normal; font-variant: normal; text-decoration: none; vertical-align: baseline; white-space: pre-wrap;">Pump</span><span style="font-size: 12pt; font-family: Aptos; color: #000000; background-color: transparent; font-weight: 400; font-style: normal; font-variant: normal; text-decoration: none; vertical-align: baseline; white-space: pre-wrap;"> dans les modules, choisir </span><span style="font-size: 12pt; font-family: Aptos; color: #000000; background-color: transparent; font-weight: bold; font-style: normal; font-variant: normal; text-decoration: none; vertical-align: baseline; white-space: pre-wrap;">%B</span><span style="font-size: 12pt; font-family: Aptos; color: #000000; background-color: transparent; font-weight: 400; font-style: normal; font-variant: normal; text-decoration: none; vertical-align: baseline; white-space: pre-wrap;"> dans les fonctions, définir le pourcentage souhaité dans </span><span style="font-size: 12pt; font-family: Aptos; color: #000000; background-color: transparent; font-weight: bold; font-style: normal; font-variant: normal; text-decoration: none; vertical-align: baseline; white-space: pre-wrap;">Value</span><span style="font-size: 12pt; font-family: Aptos; color: #000000; background-color: transparent; font-weight: 400; font-style: normal; font-variant: normal; text-decoration: none; vertical-align: baseline; white-space: pre-wrap;"> et le temps durant lequel ce pourcentage sera appliqué dans </span><span style="font-size: 12pt; font-family: Aptos; color: #000000; background-color: transparent; font-weight: bold; font-style: normal; font-variant: normal; text-decoration: none; vertical-align: baseline; white-space: pre-wrap;">Duration</span><span style="font-size: 12pt; font-family: Aptos; color: #000000; background-color: transparent; font-weight: 400; font-style: normal; font-variant: normal; text-decoration: none; vertical-align: baseline; white-space: pre-wrap;">. Il faut également définir le moment où cette variation va avoir lieu dans </span><span style="font-size: 12pt; font-family: Aptos; color: #000000; background-color: transparent; font-weight: bold; font-style: normal; font-variant: normal; text-decoration: none; vertical-align: baseline; white-space: pre-wrap;">Time</span><span style="font-size: 12pt; font-family: Aptos; color: #000000; background-color: transparent; font-weight: 400; font-style: normal; font-variant: normal; text-decoration: none; vertical-align: baseline; white-space: pre-wrap;">.</span>

[![image.png](https://wiki.fablab.sorbonne-universite.fr/BookStack/uploads/images/gallery/2024-06/scaled-1680-/ZZqimage.png)](https://wiki.fablab.sorbonne-universite.fr/BookStack/uploads/images/gallery/2024-06/ZZqimage.png)

<span style="font-size: 12pt; font-family: Aptos; color: #000000; background-color: transparent; font-weight: 400; font-style: normal; font-variant: normal; text-decoration: none; vertical-align: baseline; white-space: pre-wrap;">Il ne faut pas oublier d’enregistrer sa méthode pour pouvoir la réutiliser une prochaine fois. Pour cela, il faut sélectionner </span><span style="font-size: 12pt; font-family: Aptos; color: #000000; background-color: transparent; font-weight: bold; font-style: normal; font-variant: normal; text-decoration: none; vertical-align: baseline; white-space: pre-wrap;">File/Method/Save as</span><span style="font-size: 12pt; font-family: Aptos; color: #000000; background-color: transparent; font-weight: 400; font-style: normal; font-variant: normal; text-decoration: none; vertical-align: baseline; white-space: pre-wrap;">.</span>

<span style="font-size: 12pt; font-family: Aptos; color: #000000; background-color: transparent; font-weight: 400; font-style: normal; font-variant: normal; text-decoration: none; vertical-align: baseline; white-space: pre-wrap;">Une fois la méthode crée, il est possible de passer à l’analyse de notre échantillon.</span>

3. ## <span style="font-size: 12pt; font-family: Aptos; color: #000000; background-color: transparent; font-weight: bold; font-style: normal; font-variant: normal; text-decoration: underline; -webkit-text-decoration-skip: none; text-decoration-skip-ink: none; vertical-align: baseline; white-space: pre-wrap;">Lancer une analyse :</span>

<span style="font-size: 12pt; font-family: Aptos; color: #000000; background-color: transparent; font-weight: 400; font-style: normal; font-variant: normal; text-decoration: none; vertical-align: baseline; white-space: pre-wrap;">Avec le système HPLC du Fablab, il est possible de choisir entre deux modes d’analyse en fonction de vos besoins expérimentaux. Après avoir placé votre échantillon à analyser dans l’autosampler, vous pouvez opter pour une </span><span style="font-size: 12pt; font-family: Aptos; color: #000000; background-color: transparent; font-weight: bold; font-style: normal; font-variant: normal; text-decoration: none; vertical-align: baseline; white-space: pre-wrap;">analyse unique</span><span style="font-size: 12pt; font-family: Aptos; color: #000000; background-color: transparent; font-weight: 400; font-style: normal; font-variant: normal; text-decoration: none; vertical-align: baseline; white-space: pre-wrap;">, où un seul échantillon est injecté dans le système, permettant ainsi une évaluation précise et individuelle de cet échantillon. Alternativement, vous avez la possibilité de lancer une </span><span style="font-size: 12pt; font-family: Aptos; color: #000000; background-color: transparent; font-weight: bold; font-style: normal; font-variant: normal; text-decoration: none; vertical-align: baseline; white-space: pre-wrap;">séquence d'analyses</span><span style="font-size: 12pt; font-family: Aptos; color: #000000; background-color: transparent; font-weight: 400; font-style: normal; font-variant: normal; text-decoration: none; vertical-align: baseline; white-space: pre-wrap;">, où plusieurs échantillons sont injectés successivement. Cette approche est particulièrement avantageuse pour les études comparatives ou les séries d'échantillons, car elle permet une gestion automatisée et efficace de plusieurs analyses, réduisant ainsi le temps de manipulation et augmentant la productivité globale du processus d'analyse.</span>

3. ### <span style="font-size: 12pt; font-family: Aptos; color: #ff0000; background-color: transparent; font-weight: bold; font-style: normal; font-variant: normal; text-decoration: none; vertical-align: baseline; white-space: pre-wrap;">Pour lancer une analyse unique :</span>

<span style="font-size: 12pt; font-family: Aptos; color: #000000; background-color: transparent; font-weight: bold; font-style: normal; font-variant: normal; text-decoration: none; vertical-align: baseline; white-space: pre-wrap;">Préparation de l'échantillon : </span>

- <span style="font-size: 12pt; font-family: Aptos; color: #000000; background-color: transparent; font-weight: 400; font-style: normal; font-variant: normal; text-decoration: none; vertical-align: baseline; white-space: pre-wrap;">Placez votre vial contenant l’échantillon en position 1 dans l’autosampler et assurez-vous qu’il est bien fermé avec son septum.</span>

<span style="font-size: 12pt; font-family: Aptos; color: #000000; background-color: transparent; font-weight: bold; font-style: normal; font-variant: normal; text-decoration: none; vertical-align: baseline; white-space: pre-wrap;">Configuration de l'analyse :</span>

- <span style="font-size: 12pt; font-family: Aptos; color: #000000; background-color: transparent; font-weight: 400; font-style: normal; font-variant: normal; text-decoration: none; vertical-align: baseline; white-space: pre-wrap;">Rendez-vous dans l’onglet </span><span style="font-size: 12pt; font-family: Aptos; color: #000000; background-color: transparent; font-weight: bold; font-style: normal; font-variant: normal; text-decoration: none; vertical-align: baseline; white-space: pre-wrap;">Control</span><span style="font-size: 12pt; font-family: Aptos; color: #000000; background-color: transparent; font-weight: 400; font-style: normal; font-variant: normal; text-decoration: none; vertical-align: baseline; white-space: pre-wrap;"> et sélectionnez </span><span style="font-size: 12pt; font-family: Aptos; color: #000000; background-color: transparent; font-weight: bold; font-style: normal; font-variant: normal; text-decoration: none; vertical-align: baseline; white-space: pre-wrap;">Single Run</span><span style="font-size: 12pt; font-family: Aptos; color: #000000; background-color: transparent; font-weight: 400; font-style: normal; font-variant: normal; text-decoration: none; vertical-align: baseline; white-space: pre-wrap;">, ou cliquez directement sur la flèche bleue dans la barre d’outils. La fenêtre </span><span style="font-size: 12pt; font-family: Aptos; color: #000000; background-color: transparent; font-weight: bold; font-style: normal; font-variant: normal; text-decoration: none; vertical-align: baseline; white-space: pre-wrap;">Single Run Acquisition</span><span style="font-size: 12pt; font-family: Aptos; color: #000000; background-color: transparent; font-weight: 400; font-style: normal; font-variant: normal; text-decoration: none; vertical-align: baseline; white-space: pre-wrap;"> apparaît.</span>

[![image.png](https://wiki.fablab.sorbonne-universite.fr/BookStack/uploads/images/gallery/2024-06/scaled-1680-/5PWimage.png)](https://wiki.fablab.sorbonne-universite.fr/BookStack/uploads/images/gallery/2024-06/5PWimage.png)

- <span style="font-size: 12pt; font-family: Aptos; color: #000000; background-color: transparent; font-weight: 400; font-style: normal; font-variant: normal; text-decoration: none; vertical-align: baseline; white-space: pre-wrap;">Vérifiez que la méthode précédemment créée est bien sélectionnée en face de </span><span style="font-size: 12pt; font-family: Aptos; color: #000000; background-color: transparent; font-weight: bold; font-style: normal; font-variant: normal; text-decoration: none; vertical-align: baseline; white-space: pre-wrap;">Method</span><span style="font-size: 12pt; font-family: Aptos; color: #000000; background-color: transparent; font-weight: 400; font-style: normal; font-variant: normal; text-decoration: none; vertical-align: baseline; white-space: pre-wrap;">.</span>
- <span style="font-size: 12pt; font-family: Aptos; color: #000000; background-color: transparent; font-weight: 400; font-style: normal; font-variant: normal; text-decoration: none; vertical-align: baseline; white-space: pre-wrap;">Nommez l’échantillon en face de </span><span style="font-size: 12pt; font-family: Aptos; color: #000000; background-color: transparent; font-weight: bold; font-style: normal; font-variant: normal; text-decoration: none; vertical-align: baseline; white-space: pre-wrap;">Sample ID</span><span style="font-size: 12pt; font-family: Aptos; color: #000000; background-color: transparent; font-weight: 400; font-style: normal; font-variant: normal; text-decoration: none; vertical-align: baseline; white-space: pre-wrap;">.</span>
- <span style="font-size: 12pt; font-family: Aptos; color: #000000; background-color: transparent; font-weight: 400; font-style: normal; font-variant: normal; text-decoration: none; vertical-align: baseline; white-space: pre-wrap;">Définissez le nom du fichier sous lequel il sera enregistré en face de </span><span style="font-size: 12pt; font-family: Aptos; color: #000000; background-color: transparent; font-weight: bold; font-style: normal; font-variant: normal; text-decoration: none; vertical-align: baseline; white-space: pre-wrap;">Data File</span><span style="font-size: 12pt; font-family: Aptos; color: #000000; background-color: transparent; font-weight: 400; font-style: normal; font-variant: normal; text-decoration: none; vertical-align: baseline; white-space: pre-wrap;">.</span>
- <span style="font-size: 12pt; font-family: Aptos; color: #000000; background-color: transparent; font-weight: 400; font-style: normal; font-variant: normal; text-decoration: none; vertical-align: baseline; white-space: pre-wrap;">Choisissez l’emplacement où il sera enregistré en face de </span><span style="font-size: 12pt; font-family: Aptos; color: #000000; background-color: transparent; font-weight: bold; font-style: normal; font-variant: normal; text-decoration: none; vertical-align: baseline; white-space: pre-wrap;">Data path</span><span style="font-size: 12pt; font-family: Aptos; color: #000000; background-color: transparent; font-weight: 400; font-style: normal; font-variant: normal; text-decoration: none; vertical-align: baseline; white-space: pre-wrap;">.</span>

<span style="font-size: 12pt; font-family: Aptos; color: #000000; background-color: transparent; font-weight: bold; font-style: normal; font-variant: normal; text-decoration: none; vertical-align: baseline; white-space: pre-wrap;">Vérification des paramètres :</span>

- <span style="font-size: 12pt; font-family: Aptos; color: #000000; background-color: transparent; font-weight: 400; font-style: normal; font-variant: normal; text-decoration: none; vertical-align: baseline; white-space: pre-wrap;">Assurez-vous que le numéro en face de </span><span style="font-size: 12pt; font-family: Aptos; color: #000000; background-color: transparent; font-weight: bold; font-style: normal; font-variant: normal; text-decoration: none; vertical-align: baseline; white-space: pre-wrap;">Vial</span><span style="font-size: 12pt; font-family: Aptos; color: #000000; background-color: transparent; font-weight: 400; font-style: normal; font-variant: normal; text-decoration: none; vertical-align: baseline; white-space: pre-wrap;"> correspond à la position de votre échantillon dans l’autosampler. Si votre échantillon est en position 1, laissez le numéro 1.</span>
- <span style="font-size: 12pt; font-family: Aptos; color: #000000; background-color: transparent; font-weight: 400; font-style: normal; font-variant: normal; text-decoration: none; vertical-align: baseline; white-space: pre-wrap;">Gérez le volume d’injection de l’échantillon si nécessaire.</span>
- <span style="font-size: 12pt; font-family: Aptos; color: #000000; background-color: transparent; font-weight: 400; font-style: normal; font-variant: normal; text-decoration: none; vertical-align: baseline; white-space: pre-wrap;">Ne modifiez pas les autres paramètres.</span>

<span style="font-size: 12pt; font-family: Aptos; color: #000000; background-color: transparent; font-weight: bold; font-style: normal; font-variant: normal; text-decoration: none; vertical-align: baseline; white-space: pre-wrap;">Lancement de l'analyse :</span>

- <span style="font-size: 12pt; font-family: Aptos; color: #000000; background-color: transparent; font-weight: 400; font-style: normal; font-variant: normal; text-decoration: none; vertical-align: baseline; white-space: pre-wrap;">Une fois toutes les vérifications faites, appuyez sur </span><span style="font-size: 12pt; font-family: Aptos; color: #000000; background-color: transparent; font-weight: bold; font-style: normal; font-variant: normal; text-decoration: none; vertical-align: baseline; white-space: pre-wrap;">Start</span><span style="font-size: 12pt; font-family: Aptos; color: #000000; background-color: transparent; font-weight: 400; font-style: normal; font-variant: normal; text-decoration: none; vertical-align: baseline; white-space: pre-wrap;"> pour lancer l’analyse.</span>

4. ### <span style="font-size: 12pt; font-family: Aptos; color: #ff0000; background-color: transparent; font-weight: bold; font-style: normal; font-variant: normal; text-decoration: none; vertical-align: baseline; white-space: pre-wrap;">Pour lancer une séquence d’analyses :</span>

<span style="font-size: 12pt; font-family: Aptos; color: #000000; background-color: transparent; font-weight: bold; font-style: normal; font-variant: normal; text-decoration: none; vertical-align: baseline; white-space: pre-wrap;">Préparation des échantillons </span><span style="font-size: 12pt; font-family: Aptos; color: #000000; background-color: transparent; font-weight: 400; font-style: normal; font-variant: normal; text-decoration: none; vertical-align: baseline; white-space: pre-wrap;">: </span>

- <span style="font-size: 12pt; font-family: Aptos; color: #000000; background-color: transparent; font-weight: 400; font-style: normal; font-variant: normal; text-decoration: none; vertical-align: baseline; white-space: pre-wrap;">Placez vos échantillons à analyser les uns à la suite des autres, dans l’ordre numérique, sur l’autosampler.</span>

<span style="font-size: 12pt; font-family: Aptos; color: #000000; background-color: transparent; font-weight: bold; font-style: normal; font-variant: normal; text-decoration: none; vertical-align: baseline; white-space: pre-wrap;">Configuration de la séquence :</span>

- <span style="font-size: 12pt; font-family: Aptos; color: #000000; background-color: transparent; font-weight: 400; font-style: normal; font-variant: normal; text-decoration: none; vertical-align: baseline; white-space: pre-wrap;">Rendez-vous dans l’onglet </span><span style="font-size: 12pt; font-family: Aptos; color: #000000; background-color: transparent; font-weight: bold; font-style: normal; font-variant: normal; text-decoration: none; vertical-align: baseline; white-space: pre-wrap;">File / Sequence / Sequence Wizard</span><span style="font-size: 12pt; font-family: Aptos; color: #000000; background-color: transparent; font-weight: 400; font-style: normal; font-variant: normal; text-decoration: none; vertical-align: baseline; white-space: pre-wrap;">.</span>

[![image.png](https://wiki.fablab.sorbonne-universite.fr/BookStack/uploads/images/gallery/2024-06/scaled-1680-/Mfuimage.png)](https://wiki.fablab.sorbonne-universite.fr/BookStack/uploads/images/gallery/2024-06/Mfuimage.png)

- <span style="font-size: 12pt; font-family: Aptos; color: #000000; background-color: transparent; font-weight: 400; font-style: normal; font-variant: normal; text-decoration: none; vertical-align: baseline; white-space: pre-wrap;">En face de </span><span style="font-size: 12pt; font-family: Aptos; color: #000000; background-color: transparent; font-weight: bold; font-style: normal; font-variant: normal; text-decoration: none; vertical-align: baseline; white-space: pre-wrap;">Method</span><span style="font-size: 12pt; font-family: Aptos; color: #000000; background-color: transparent; font-weight: 400; font-style: normal; font-variant: normal; text-decoration: none; vertical-align: baseline; white-space: pre-wrap;">, sélectionnez votre méthode si ce n’est pas déjà fait, puis cliquez sur </span><span style="font-size: 12pt; font-family: Aptos; color: #000000; background-color: transparent; font-weight: bold; font-style: normal; font-variant: normal; text-decoration: none; vertical-align: baseline; white-space: pre-wrap;">Next</span><span style="font-size: 12pt; font-family: Aptos; color: #000000; background-color: transparent; font-weight: 400; font-style: normal; font-variant: normal; text-decoration: none; vertical-align: baseline; white-space: pre-wrap;">.</span>
- <span style="font-size: 12pt; font-family: Aptos; color: #000000; background-color: transparent; font-weight: 400; font-style: normal; font-variant: normal; text-decoration: none; vertical-align: baseline; white-space: pre-wrap;">Définissez le nom de votre séquence en face de </span><span style="font-size: 12pt; font-family: Aptos; color: #000000; background-color: transparent; font-weight: bold; font-style: normal; font-variant: normal; text-decoration: none; vertical-align: baseline; white-space: pre-wrap;">Sample ID</span><span style="font-size: 12pt; font-family: Aptos; color: #000000; background-color: transparent; font-weight: 400; font-style: normal; font-variant: normal; text-decoration: none; vertical-align: baseline; white-space: pre-wrap;"> et le nom de fichier de votre séquence en face de </span><span style="font-size: 12pt; font-family: Aptos; color: #000000; background-color: transparent; font-weight: bold; font-style: normal; font-variant: normal; text-decoration: none; vertical-align: baseline; white-space: pre-wrap;">Data File</span><span style="font-size: 12pt; font-family: Aptos; color: #000000; background-color: transparent; font-weight: 400; font-style: normal; font-variant: normal; text-decoration: none; vertical-align: baseline; white-space: pre-wrap;">.</span>
- <span style="font-size: 12pt; font-family: Aptos; color: #000000; background-color: transparent; font-weight: 400; font-style: normal; font-variant: normal; text-decoration: none; vertical-align: baseline; white-space: pre-wrap;">Cliquez sur la flèche bleue en face de </span><span style="font-size: 12pt; font-family: Aptos; color: #000000; background-color: transparent; font-weight: bold; font-style: normal; font-variant: normal; text-decoration: none; vertical-align: baseline; white-space: pre-wrap;">Data File</span><span style="font-size: 12pt; font-family: Aptos; color: #000000; background-color: transparent; font-weight: 400; font-style: normal; font-variant: normal; text-decoration: none; vertical-align: baseline; white-space: pre-wrap;"> et sélectionnez </span><span style="font-size: 12pt; font-family: Aptos; color: #000000; background-color: transparent; font-weight: bold; font-style: normal; font-variant: normal; text-decoration: none; vertical-align: baseline; white-space: pre-wrap;">Increment Number</span><span style="font-size: 12pt; font-family: Aptos; color: #000000; background-color: transparent; font-weight: 400; font-style: normal; font-variant: normal; text-decoration: none; vertical-align: baseline; white-space: pre-wrap;">.</span>
- <span style="font-size: 12pt; font-family: Aptos; color: #000000; background-color: transparent; font-weight: 400; font-style: normal; font-variant: normal; text-decoration: none; vertical-align: baseline; white-space: pre-wrap;">Entrez </span><span style="font-size: 12pt; font-family: Aptos; color: #000000; background-color: transparent; font-weight: bold; font-style: normal; font-variant: normal; text-decoration: none; vertical-align: baseline; white-space: pre-wrap;">3</span><span style="font-size: 12pt; font-family: Aptos; color: #000000; background-color: transparent; font-weight: 400; font-style: normal; font-variant: normal; text-decoration: none; vertical-align: baseline; white-space: pre-wrap;"> en face de </span><span style="font-size: 12pt; font-family: Aptos; color: #000000; background-color: transparent; font-weight: bold; font-style: normal; font-variant: normal; text-decoration: none; vertical-align: baseline; white-space: pre-wrap;">Number of unknown runs</span><span style="font-size: 12pt; font-family: Aptos; color: #000000; background-color: transparent; font-weight: 400; font-style: normal; font-variant: normal; text-decoration: none; vertical-align: baseline; white-space: pre-wrap;"> et cliquez sur </span><span style="font-size: 12pt; font-family: Aptos; color: #000000; background-color: transparent; font-weight: bold; font-style: normal; font-variant: normal; text-decoration: none; vertical-align: baseline; white-space: pre-wrap;">Next</span><span style="font-size: 12pt; font-family: Aptos; color: #000000; background-color: transparent; font-weight: 400; font-style: normal; font-variant: normal; text-decoration: none; vertical-align: baseline; white-space: pre-wrap;">.</span>

[![image.png](https://wiki.fablab.sorbonne-universite.fr/BookStack/uploads/images/gallery/2024-06/scaled-1680-/pa9image.png)](https://wiki.fablab.sorbonne-universite.fr/BookStack/uploads/images/gallery/2024-06/pa9image.png)

<span style="font-size: 12pt; font-family: Aptos; color: #000000; background-color: transparent; font-weight: 400; font-style: normal; font-variant: normal; text-decoration: none; vertical-align: baseline; white-space: pre-wrap;"><span style="border: none; display: inline-block; overflow: hidden; width: 408px; height: 305px;">  
</span></span>

- <span style="font-size: 12pt; font-family: Aptos; color: #000000; background-color: transparent; font-weight: 400; font-style: normal; font-variant: normal; text-decoration: none; vertical-align: baseline; white-space: pre-wrap;">Définissez le volume d’injection de la séquence et cliquez sur </span><span style="font-size: 12pt; font-family: Aptos; color: #000000; background-color: transparent; font-weight: bold; font-style: normal; font-variant: normal; text-decoration: none; vertical-align: baseline; white-space: pre-wrap;">Finish</span><span style="font-size: 12pt; font-family: Aptos; color: #000000; background-color: transparent; font-weight: 400; font-style: normal; font-variant: normal; text-decoration: none; vertical-align: baseline; white-space: pre-wrap;">.</span>
- <span style="font-size: 12pt; font-family: Aptos; color: #000000; background-color: transparent; font-weight: 400; font-style: normal; font-variant: normal; text-decoration: none; vertical-align: baseline; white-space: pre-wrap;">Enregistrez la séquence que vous venez de créer dans l’onglet </span><span style="font-size: 12pt; font-family: Aptos; color: #000000; background-color: transparent; font-weight: bold; font-style: normal; font-variant: normal; text-decoration: none; vertical-align: baseline; white-space: pre-wrap;">File</span><span style="font-size: 12pt; font-family: Aptos; color: #000000; background-color: transparent; font-weight: 400; font-style: normal; font-variant: normal; text-decoration: none; vertical-align: baseline; white-space: pre-wrap;"> / </span><span style="font-size: 12pt; font-family: Aptos; color: #000000; background-color: transparent; font-weight: bold; font-style: normal; font-variant: normal; text-decoration: none; vertical-align: baseline; white-space: pre-wrap;">Sequence</span><span style="font-size: 12pt; font-family: Aptos; color: #000000; background-color: transparent; font-weight: 400; font-style: normal; font-variant: normal; text-decoration: none; vertical-align: baseline; white-space: pre-wrap;"> / </span><span style="font-size: 12pt; font-family: Aptos; color: #000000; background-color: transparent; font-weight: bold; font-style: normal; font-variant: normal; text-decoration: none; vertical-align: baseline; white-space: pre-wrap;">Save as</span><span style="font-size: 12pt; font-family: Aptos; color: #000000; background-color: transparent; font-weight: 400; font-style: normal; font-variant: normal; text-decoration: none; vertical-align: baseline; white-space: pre-wrap;"> et nommez-la.</span>

[![image.png](https://wiki.fablab.sorbonne-universite.fr/BookStack/uploads/images/gallery/2024-06/scaled-1680-/d5Rimage.png)](https://wiki.fablab.sorbonne-universite.fr/BookStack/uploads/images/gallery/2024-06/d5Rimage.png)

<span style="font-size: 12pt; font-family: Aptos; color: #000000; background-color: transparent; font-weight: bold; font-style: normal; font-variant: normal; text-decoration: none; vertical-align: baseline; white-space: pre-wrap;">Lancement de la séquence :</span>

- <span style="font-size: 12pt; font-family: Aptos; color: #000000; background-color: transparent; font-weight: 400; font-style: normal; font-variant: normal; text-decoration: none; vertical-align: baseline; white-space: pre-wrap;">Rendez-vous dans l’onglet </span><span style="font-size: 12pt; font-family: Aptos; color: #000000; background-color: transparent; font-weight: bold; font-style: normal; font-variant: normal; text-decoration: none; vertical-align: baseline; white-space: pre-wrap;">Control</span><span style="font-size: 12pt; font-family: Aptos; color: #000000; background-color: transparent; font-weight: 400; font-style: normal; font-variant: normal; text-decoration: none; vertical-align: baseline; white-space: pre-wrap;"> et sélectionnez </span><span style="font-size: 12pt; font-family: Aptos; color: #000000; background-color: transparent; font-weight: bold; font-style: normal; font-variant: normal; text-decoration: none; vertical-align: baseline; white-space: pre-wrap;">Sequence Run</span><span style="font-size: 12pt; font-family: Aptos; color: #000000; background-color: transparent; font-weight: 400; font-style: normal; font-variant: normal; text-decoration: none; vertical-align: baseline; white-space: pre-wrap;">, ou cliquez directement sur la flèche verte dans la barre d’outils.</span>

[![image.png](https://wiki.fablab.sorbonne-universite.fr/BookStack/uploads/images/gallery/2024-06/scaled-1680-/VIvimage.png)](https://wiki.fablab.sorbonne-universite.fr/BookStack/uploads/images/gallery/2024-06/VIvimage.png)

- <span style="font-size: 12pt; font-family: Aptos; color: #000000; background-color: transparent; font-weight: 400; font-style: normal; font-variant: normal; text-decoration: none; vertical-align: baseline; white-space: pre-wrap;">Assurez-vous que votre séquence est bien sélectionnée en face de </span><span style="font-size: 12pt; font-family: Aptos; color: #000000; background-color: transparent; font-weight: bold; font-style: normal; font-variant: normal; text-decoration: none; vertical-align: baseline; white-space: pre-wrap;">Sequence name</span><span style="font-size: 12pt; font-family: Aptos; color: #000000; background-color: transparent; font-weight: 400; font-style: normal; font-variant: normal; text-decoration: none; vertical-align: baseline; white-space: pre-wrap;">.</span>
- <span style="font-size: 12pt; font-family: Aptos; color: #000000; background-color: transparent; font-weight: 400; font-style: normal; font-variant: normal; text-decoration: none; vertical-align: baseline; white-space: pre-wrap;">Cochez la case </span><span style="font-size: 12pt; font-family: Aptos; color: #000000; background-color: transparent; font-weight: bold; font-style: normal; font-variant: normal; text-decoration: none; vertical-align: baseline; white-space: pre-wrap;">Range</span><span style="font-size: 12pt; font-family: Aptos; color: #000000; background-color: transparent; font-weight: 400; font-style: normal; font-variant: normal; text-decoration: none; vertical-align: baseline; white-space: pre-wrap;"> et désignez l’ordre de placement des vials sur l’autosampler. Par exemple, si vous souhaitez analyser 5 échantillons placés de la position 1 à 5, entrez </span><span style="font-size: 12pt; font-family: Aptos; color: #000000; background-color: transparent; font-weight: bold; font-style: normal; font-variant: normal; text-decoration: none; vertical-align: baseline; white-space: pre-wrap;">1-5</span><span style="font-size: 12pt; font-family: Aptos; color: #000000; background-color: transparent; font-weight: 400; font-style: normal; font-variant: normal; text-decoration: none; vertical-align: baseline; white-space: pre-wrap;"> en face de </span><span style="font-size: 12pt; font-family: Aptos; color: #000000; background-color: transparent; font-weight: bold; font-style: normal; font-variant: normal; text-decoration: none; vertical-align: baseline; white-space: pre-wrap;">Range</span><span style="font-size: 12pt; font-family: Aptos; color: #000000; background-color: transparent; font-weight: 400; font-style: normal; font-variant: normal; text-decoration: none; vertical-align: baseline; white-space: pre-wrap;">.</span>
- <span style="font-size: 12pt; font-family: Aptos; color: #000000; background-color: transparent; font-weight: 400; font-style: normal; font-variant: normal; text-decoration: none; vertical-align: baseline; white-space: pre-wrap;">Cliquez sur </span><span style="font-size: 12pt; font-family: Aptos; color: #000000; background-color: transparent; font-weight: bold; font-style: normal; font-variant: normal; text-decoration: none; vertical-align: baseline; white-space: pre-wrap;">Start</span><span style="font-size: 12pt; font-family: Aptos; color: #000000; background-color: transparent; font-weight: 400; font-style: normal; font-variant: normal; text-decoration: none; vertical-align: baseline; white-space: pre-wrap;"> pour lancer la séquence d’analyses.</span>

4. ## <span style="font-size: 12pt; font-family: Aptos; color: #000000; background-color: transparent; font-weight: bold; font-style: normal; font-variant: normal; text-decoration: underline; -webkit-text-decoration-skip: none; text-decoration-skip-ink: none; vertical-align: baseline; white-space: pre-wrap;">Observation et interprétation des chromatogrammes</span>

<span style="font-size: 12pt; font-family: Aptos; color: #000000; background-color: transparent; font-weight: 400; font-style: normal; font-variant: normal; text-decoration: none; vertical-align: baseline; white-space: pre-wrap;">Juste après avoir lancé une analyse, il est possible d’observer les chromatogrammes aux longueurs d’ondes prédéfinis en temps réel. Pour cela, il suffit de cliquer sur les onglets « </span><span style="font-size: 12pt; font-family: Aptos; color: #000000; background-color: transparent; font-weight: bold; font-style: normal; font-variant: normal; text-decoration: none; vertical-align: baseline; white-space: pre-wrap;">DET 168 – 254nm</span><span style="font-size: 12pt; font-family: Aptos; color: #000000; background-color: transparent; font-weight: 400; font-style: normal; font-variant: normal; text-decoration: none; vertical-align: baseline; white-space: pre-wrap;"> » en bas de l’écran. Il est également possible de profiter de l’analyse en 3D du détecteur PDA et d’avoir une vue globale sur plusieurs graphes. Pour cela, il faut cliquer sur </span><span style="font-size: 12pt; font-family: Aptos; color: #000000; background-color: transparent; font-weight: bold; font-style: normal; font-variant: normal; text-decoration: none; vertical-align: baseline; white-space: pre-wrap;">View / PDA View / Mixed View</span><span style="font-size: 12pt; font-family: Aptos; color: #000000; background-color: transparent; font-weight: 400; font-style: normal; font-variant: normal; text-decoration: none; vertical-align: baseline; white-space: pre-wrap;">.</span>

<span style="font-size: 12pt; font-family: Aptos; color: #000000; background-color: transparent; font-weight: 400; font-style: normal; font-variant: normal; text-decoration: none; vertical-align: baseline; white-space: pre-wrap;">Une fois l’analyse terminée, on obtient un chromatogramme mal intégré. Afin de l’intégrer correctement, deux paramètres importants sont à prendre en compte :</span>

- <span style="font-size: 12pt; font-family: Aptos; color: #000000; background-color: transparent; font-weight: 400; font-style: normal; font-variant: normal; text-decoration: none; vertical-align: baseline; white-space: pre-wrap;">Fonction </span><span style="font-size: 12pt; font-family: Aptos; color: #000000; background-color: transparent; font-weight: bold; font-style: normal; font-variant: normal; text-decoration: none; vertical-align: baseline; white-space: pre-wrap;">Threshold</span><span style="font-size: 12pt; font-family: Aptos; color: #000000; background-color: transparent; font-weight: 400; font-style: normal; font-variant: normal; text-decoration: none; vertical-align: baseline; white-space: pre-wrap;"> : Cette fonction va permettre de définir la ligne de base et d’éliminer les pics que l’on ne souhaite pas intégrer. Après avoir cliqué sur le chromatogramme que l’on souhaite intégrer, Il faut sélectionner l’option Threshold dans la barre d’outils en bas (deuxième logo en partant de la gauche). Une fois sélectionné, il faut cliquer sur le début de la ligne de base, soit un peu après 0, puis cliquer une deuxième fois juste avant le premier pic que l’on souhaite intégrer. Il faut ensuite cliquer sur « </span><span style="font-size: 12pt; font-family: Aptos; color: #000000; background-color: transparent; font-weight: bold; font-style: normal; font-variant: normal; text-decoration: none; vertical-align: baseline; white-space: pre-wrap;">Analyze Now</span><span style="font-size: 12pt; font-family: Aptos; color: #000000; background-color: transparent; font-weight: 400; font-style: normal; font-variant: normal; text-decoration: none; vertical-align: baseline; white-space: pre-wrap;"> » dans la boîte de dialogue qui apparaît.</span>

- <span style="font-size: 12pt; font-family: Aptos; color: #000000; background-color: transparent; font-weight: 400; font-style: normal; font-variant: normal; text-decoration: none; vertical-align: baseline; white-space: pre-wrap;">Fonction </span><span style="font-size: 12pt; font-family: Aptos; color: #000000; background-color: transparent; font-weight: bold; font-style: normal; font-variant: normal; text-decoration: none; vertical-align: baseline; white-space: pre-wrap;">Width</span><span style="font-size: 12pt; font-family: Aptos; color: #000000; background-color: transparent; font-weight: 400; font-style: normal; font-variant: normal; text-decoration: none; vertical-align: baseline; white-space: pre-wrap;"> : Cette fonction va permettre de connaitre la largeur exacte d’un pic et donc d’intégrer efficacement le graphique. Pour cela, il faut cliquer sur la fonction Width dans la barre d’outils en bas (premier logo à gauche), cliquer au début du pic le plus intense puis à la fin de ce même pic. Il faut ensuite cliquer sur « </span><span style="font-size: 12pt; font-family: Aptos; color: #000000; background-color: transparent; font-weight: bold; font-style: normal; font-variant: normal; text-decoration: none; vertical-align: baseline; white-space: pre-wrap;">Analyze Now</span><span style="font-size: 12pt; font-family: Aptos; color: #000000; background-color: transparent; font-weight: 400; font-style: normal; font-variant: normal; text-decoration: none; vertical-align: baseline; white-space: pre-wrap;"> » dans la boîte de dialogue qui apparaît.</span>

# <span style="font-size: 13.999999999999998pt; font-family: Aptos; color: #000000; background-color: transparent; font-weight: bold; font-style: normal; font-variant: normal; text-decoration: underline; -webkit-text-decoration-skip: none; text-decoration-skip-ink: none; vertical-align: baseline; white-space: pre-wrap;">IV/ Maintenance de l’appareil :</span>

1. ## <span style="font-size: 12pt; font-family: Aptos; color: #000000; background-color: transparent; font-weight: bold; font-style: normal; font-variant: normal; text-decoration: underline; -webkit-text-decoration-skip: none; text-decoration-skip-ink: none; vertical-align: baseline; white-space: pre-wrap;">Amorçage des pompes : Bulles d’air dans la tuyauterie :</span>

<span style="font-size: 12pt; font-family: Aptos; color: #000000; background-color: transparent; font-weight: 400; font-style: normal; font-variant: normal; text-decoration: none; vertical-align: baseline; white-space: pre-wrap;">Avant de commencer une analyse, il est essentiel de vérifier qu'il n'y a pas de bulles d'air dans la tuyauterie des pompes A et B. Le système HPLC utilise normalement trois bouteilles de solvant : une contenant le solvant A (eau) à droite, une contenant le solvant </span><span style="font-size: 12pt; font-family: Aptos; color: #000000; background-color: transparent; font-weight: bold; font-style: normal; font-variant: normal; text-decoration: none; vertical-align: baseline; white-space: pre-wrap;">B</span><span style="font-size: 12pt; font-family: Aptos; color: #000000; background-color: transparent; font-weight: 400; font-style: normal; font-variant: normal; text-decoration: none; vertical-align: baseline; white-space: pre-wrap;"> (acétonitrile) à gauche, et une troisième servant de bouteille poubelle utilisée lors du désamorçage de la pompe. Si vous changez de solvant ou si vous apercevez des bulles d'air, il est impératif de procéder à un amorçage des pompes pour éliminer ces bulles. Voici les étapes à suivre pour amorcer les pompes, en prenant la pompe A comme exemple. Ces étapes devront être répétées pour la pompe B.</span>

<span style="font-size: 12pt; font-family: Aptos; color: #000000; background-color: transparent; font-weight: bold; font-style: normal; font-variant: normal; text-decoration: none; vertical-align: baseline; white-space: pre-wrap;">Préparation</span><span style="font-size: 12pt; font-family: Aptos; color: #000000; background-color: transparent; font-weight: 400; font-style: normal; font-variant: normal; text-decoration: none; vertical-align: baseline; white-space: pre-wrap;"> :</span>

- <span style="font-size: 12pt; font-family: Aptos; color: #000000; background-color: transparent; font-weight: 400; font-style: normal; font-variant: normal; text-decoration: none; vertical-align: baseline; white-space: pre-wrap;">Placez une seringue de 10 ml dans le Prime Port A, situé juste en dessous du levier d'amorçage A.</span>
- <span style="font-size: 12pt; font-family: Aptos; color: #000000; background-color: transparent; font-weight: 400; font-style: normal; font-variant: normal; text-decoration: none; vertical-align: baseline; white-space: pre-wrap;">Ouvrez le robinet de vidange en tournant complètement le bouchon dans le sens inverse des aiguilles d'une montre. Cela permet de protéger la colonne en changeant le chemin d’élution de la phase mobile, dirigeant ainsi le solvant directement vers la bouteille poubelle sans passer par la colonne.</span>

<span style="font-size: 12pt; font-family: Aptos; color: #000000; background-color: transparent; font-weight: bold; font-style: normal; font-variant: normal; text-decoration: none; vertical-align: baseline; white-space: pre-wrap;">Amorçage</span><span style="font-size: 12pt; font-family: Aptos; color: #000000; background-color: transparent; font-weight: 400; font-style: normal; font-variant: normal; text-decoration: none; vertical-align: baseline; white-space: pre-wrap;"> :</span>

- <span style="font-size: 12pt; font-family: Aptos; color: #000000; background-color: transparent; font-weight: 400; font-style: normal; font-variant: normal; text-decoration: none; vertical-align: baseline; white-space: pre-wrap;">Tournez le levier d'amorçage de la pompe A vers la position </span><span style="font-size: 12pt; font-family: Aptos; color: #000000; background-color: transparent; font-weight: bold; font-style: normal; font-variant: normal; text-decoration: none; vertical-align: baseline; white-space: pre-wrap;">Prime Lines</span><span style="font-size: 12pt; font-family: Aptos; color: #000000; background-color: transparent; font-weight: 400; font-style: normal; font-variant: normal; text-decoration: none; vertical-align: baseline; white-space: pre-wrap;">.</span>
- <span style="font-size: 12pt; font-family: Aptos; color: #000000; background-color: transparent; font-weight: 400; font-style: normal; font-variant: normal; text-decoration: none; vertical-align: baseline; white-space: pre-wrap;">Aspirez le solvant dans les tuyaux en tirant lentement sur le piston de la seringue. Continuez à aspirer jusqu'à ce qu'il n'y ait plus de bulles d'air entre la bouteille de solvant et la seringue.</span>
- <span style="font-size: 12pt; font-family: Aptos; color: #000000; background-color: transparent; font-weight: 400; font-style: normal; font-variant: normal; text-decoration: none; vertical-align: baseline; white-space: pre-wrap;">Remplissez ensuite la seringue de solvant.</span>
- <span style="font-size: 12pt; font-family: Aptos; color: #000000; background-color: transparent; font-weight: 400; font-style: normal; font-variant: normal; text-decoration: none; vertical-align: baseline; white-space: pre-wrap;">Tournez le levier d'amorçage vers la position </span><span style="font-size: 12pt; font-family: Aptos; color: #000000; background-color: transparent; font-weight: bold; font-style: normal; font-variant: normal; text-decoration: none; vertical-align: baseline; white-space: pre-wrap;">Prime Pump</span><span style="font-size: 12pt; font-family: Aptos; color: #000000; background-color: transparent; font-weight: 400; font-style: normal; font-variant: normal; text-decoration: none; vertical-align: baseline; white-space: pre-wrap;"> et appuyez sur le piston de la seringue pour forcer le solvant à sortir à travers la ligne de drainage vers la bouteille de déchets.</span>
- <span style="font-size: 12pt; font-family: Aptos; color: #000000; background-color: transparent; font-weight: 400; font-style: normal; font-variant: normal; text-decoration: none; vertical-align: baseline; white-space: pre-wrap;">Lorsque plus aucune bulle d'air n'est observée dans les tuyaux, arrêtez d'appuyer sur la seringue et tournez le levier d'amorçage vers la position </span><span style="font-size: 12pt; font-family: Aptos; color: #000000; background-color: transparent; font-weight: bold; font-style: normal; font-variant: normal; text-decoration: none; vertical-align: baseline; white-space: pre-wrap;">Operate</span><span style="font-size: 12pt; font-family: Aptos; color: #000000; background-color: transparent; font-weight: 400; font-style: normal; font-variant: normal; text-decoration: none; vertical-align: baseline; white-space: pre-wrap;">.</span>

<span style="font-size: 12pt; font-family: Aptos; color: #000000; background-color: transparent; font-weight: bold; font-style: normal; font-variant: normal; text-decoration: none; vertical-align: baseline; white-space: pre-wrap;">Finalisation</span><span style="font-size: 12pt; font-family: Aptos; color: #000000; background-color: transparent; font-weight: 400; font-style: normal; font-variant: normal; text-decoration: none; vertical-align: baseline; white-space: pre-wrap;"> :</span>

- <span style="font-size: 12pt; font-family: Aptos; color: #000000; background-color: transparent; font-weight: 400; font-style: normal; font-variant: normal; text-decoration: none; vertical-align: baseline; white-space: pre-wrap;">Accédez au panneau de contrôle </span><span style="font-size: 12pt; font-family: Aptos; color: #000000; background-color: transparent; font-weight: bold; font-style: normal; font-variant: normal; text-decoration: none; vertical-align: baseline; white-space: pre-wrap;">Direct Control</span><span style="font-size: 12pt; font-family: Aptos; color: #000000; background-color: transparent; font-weight: 400; font-style: normal; font-variant: normal; text-decoration: none; vertical-align: baseline; white-space: pre-wrap;"> depuis 32 Karat et configurez la pompe A à 100% et la pompe B à 0%, puis réglez le flux à 2 ml/min.</span>
- <span style="font-size: 12pt; font-family: Aptos; color: #000000; background-color: transparent; font-weight: 400; font-style: normal; font-variant: normal; text-decoration: none; vertical-align: baseline; white-space: pre-wrap;">Faites couler la phase mobile pendant 2 à 3 minutes pour vous assurer qu'il n'y a plus de bulles.</span>
- <span style="font-size: 12pt; font-family: Aptos; color: #000000; background-color: transparent; font-weight: 400; font-style: normal; font-variant: normal; text-decoration: none; vertical-align: baseline; white-space: pre-wrap;">Répétez exactement les mêmes étapes depuis </span><span style="font-size: 12pt; font-family: Aptos; color: #000000; background-color: transparent; font-weight: bold; font-style: normal; font-variant: normal; text-decoration: none; vertical-align: baseline; white-space: pre-wrap;">Préparation</span><span style="font-size: 12pt; font-family: Aptos; color: #000000; background-color: transparent; font-weight: 400; font-style: normal; font-variant: normal; text-decoration: none; vertical-align: baseline; white-space: pre-wrap;"> avec la pompe B.</span>

<span style="font-size: 12pt; font-family: Aptos; color: #000000; background-color: transparent; font-weight: 400; font-style: normal; font-variant: normal; text-decoration: none; vertical-align: baseline; white-space: pre-wrap;">Une fois les deux pompes amorcées, vous pouvez refermer le robinet de vidange en tournant complètement le bouchon dans le sens horaire, afin de rétablir le chemin d’élution de la phase mobile vers la colonne. En suivant ces étapes, vous assurerez un bon fonctionnement de votre système HPLC sans présence de bulles d'air dans les lignes de solvant.</span>

<span style="font-size: 12pt; font-family: Aptos; color: #000000; background-color: transparent; font-weight: 400; font-style: normal; font-variant: normal; text-decoration: none; vertical-align: baseline; white-space: pre-wrap;"><span style="border: none; display: inline-block; overflow: hidden; width: 200px; height: 266px;">![Une image contenant intérieur, Équipement médical, machine, fils électriques

Description générée automatiquement](https://lh7-us.googleusercontent.com/docsz/AD_4nXeA8OtC5ytX72F8tkHGMNyLRmj5H0hAJrtx-flxhGyH3IsdD3ajUivuxbdhrgL4B8nAYFDkc_31gum_qsEIrmH5hoIexbyNHWsB_hy1XKXz5yXkT5tmfcHeMXJCbkhFESe4I4CoipD7cXXXO7j41ufy_Er46K94qZGhL8oA?key=Bh6HJVxnw55dhOaHFSChLA)</span></span>

2. ## <span style="font-size: 12pt; font-family: Aptos; color: #000000; background-color: transparent; font-weight: bold; font-style: normal; font-variant: normal; text-decoration: underline; -webkit-text-decoration-skip: none; text-decoration-skip-ink: none; vertical-align: baseline; white-space: pre-wrap;">Changement de colonne :</span>

<span style="font-size: 12pt; font-family: Aptos; color: #000000; background-color: transparent; font-weight: 400; font-style: normal; font-variant: normal; text-decoration: none; vertical-align: baseline; white-space: pre-wrap;">Le changement de colonnes en HPLC est une opération délicate qui nécessite des précautions spécifiques pour garantir la performance de la colonne et la précision des analyses futures. Voici les étapes à suivre et les précautions à prendre pour changer de colonne de manière sûre et efficace.</span>

<span style="font-size: 12pt; font-family: Aptos; color: #000000; background-color: transparent; font-weight: bold; font-style: normal; font-variant: normal; text-decoration: none; vertical-align: baseline; white-space: pre-wrap;">Arrêt du Flux de la Phase Mobile</span><span style="font-size: 12pt; font-family: Aptos; color: #000000; background-color: transparent; font-weight: 400; font-style: normal; font-variant: normal; text-decoration: none; vertical-align: baseline; white-space: pre-wrap;"> :</span>

- <span style="font-size: 12pt; font-family: Aptos; color: #000000; background-color: transparent; font-weight: 400; font-style: normal; font-variant: normal; text-decoration: none; vertical-align: baseline; white-space: pre-wrap;">Avant de déconnecter la colonne, assurez-vous que le flux de la phase mobile est complètement arrêté. Cela évite les éclaboussures et réduit le risque de contamination.</span>

<span style="font-size: 12pt; font-family: Aptos; color: #000000; background-color: transparent; font-weight: bold; font-style: normal; font-variant: normal; text-decoration: none; vertical-align: baseline; white-space: pre-wrap;">Déconnexion de la Colonne</span><span style="font-size: 12pt; font-family: Aptos; color: #000000; background-color: transparent; font-weight: 400; font-style: normal; font-variant: normal; text-decoration: none; vertical-align: baseline; white-space: pre-wrap;"> :</span>

- <span style="font-size: 12pt; font-family: Aptos; color: #000000; background-color: transparent; font-weight: 400; font-style: normal; font-variant: normal; text-decoration: none; vertical-align: baseline; white-space: pre-wrap;">Déconnectez soigneusement la colonne des lignes d’entrée et de sortie. Veillez à ne pas endommager les filetages ni les connexions.</span>
- <span style="font-size: 12pt; font-family: Aptos; color: #000000; background-color: transparent; font-weight: 400; font-style: normal; font-variant: normal; text-decoration: none; vertical-align: baseline; white-space: pre-wrap;">Notez l'orientation de la colonne (entrée et sortie) pour faciliter le remontage ou le stockage correct.</span>

<span style="font-size: 12pt; font-family: Aptos; color: #000000; background-color: transparent; font-weight: bold; font-style: normal; font-variant: normal; text-decoration: none; vertical-align: baseline; white-space: pre-wrap;">Rinçage de la Colonne (si nécessaire)</span><span style="font-size: 12pt; font-family: Aptos; color: #000000; background-color: transparent; font-weight: 400; font-style: normal; font-variant: normal; text-decoration: none; vertical-align: baseline; white-space: pre-wrap;"> :</span>

- <span style="font-size: 12pt; font-family: Aptos; color: #000000; background-color: transparent; font-weight: 400; font-style: normal; font-variant: normal; text-decoration: none; vertical-align: baseline; white-space: pre-wrap;">Si la colonne doit être stockée pour une période prolongée ou si vous avez utilisé une phase mobile contenant des tampons, rincez-la d’abord avec de l’eau déionisée, puis avec un solvant organique (comme l'acétonitrile ou le méthanol) pour éliminer tous les résidus.</span>

<span style="font-size: 12pt; font-family: Aptos; color: #000000; background-color: transparent; font-weight: bold; font-style: normal; font-variant: normal; text-decoration: none; vertical-align: baseline; white-space: pre-wrap;">Bouchonnage de la Colonne</span><span style="font-size: 12pt; font-family: Aptos; color: #000000; background-color: transparent; font-weight: 400; font-style: normal; font-variant: normal; text-decoration: none; vertical-align: baseline; white-space: pre-wrap;"> :</span>

- <span style="font-size: 12pt; font-family: Aptos; color: #000000; background-color: transparent; font-weight: bold; font-style: normal; font-variant: normal; text-decoration: none; vertical-align: baseline; white-space: pre-wrap;">Précaution essentielle</span><span style="font-size: 12pt; font-family: Aptos; color: #000000; background-color: transparent; font-weight: 400; font-style: normal; font-variant: normal; text-decoration: none; vertical-align: baseline; white-space: pre-wrap;"> : Fermez immédiatement les extrémités de la colonne avec des bouchons hermétiques pour éviter que la colonne ne sèche. L’exposition à l’air peut entraîner l’évaporation du solvant, ce qui peut causer des dommages permanents à la phase stationnaire.</span>
- <span style="font-size: 12pt; font-family: Aptos; color: #000000; background-color: transparent; font-weight: 400; font-style: normal; font-variant: normal; text-decoration: none; vertical-align: baseline; white-space: pre-wrap;">Assurez-vous que les bouchons sont bien serrés et que la colonne est correctement scellée.</span>

<span style="font-size: 12pt; font-family: Aptos; color: #000000; background-color: transparent; font-weight: bold; font-style: normal; font-variant: normal; text-decoration: none; vertical-align: baseline; white-space: pre-wrap;">Stockage de la Colonne</span><span style="font-size: 12pt; font-family: Aptos; color: #000000; background-color: transparent; font-weight: 400; font-style: normal; font-variant: normal; text-decoration: none; vertical-align: baseline; white-space: pre-wrap;"> :</span>

- <span style="font-size: 12pt; font-family: Aptos; color: #000000; background-color: transparent; font-weight: 400; font-style: normal; font-variant: normal; text-decoration: none; vertical-align: baseline; white-space: pre-wrap;">Stockez la colonne dans un endroit frais et sec, à l’abri de la lumière directe et des variations de température.</span>
- <span style="font-size: 12pt; font-family: Aptos; color: #000000; background-color: transparent; font-weight: 400; font-style: normal; font-variant: normal; text-decoration: none; vertical-align: baseline; white-space: pre-wrap;">Étiquetez la colonne avec des informations pertinentes telles que le type de colonne, le dernier solvant utilisé, et la date du dernier usage pour une référence future.</span>

<span style="font-size: 12pt; font-family: Aptos; color: #000000; background-color: transparent; font-weight: bold; font-style: normal; font-variant: normal; text-decoration: none; vertical-align: baseline; white-space: pre-wrap;">Préparation de la Nouvelle Colonne</span><span style="font-size: 12pt; font-family: Aptos; color: #000000; background-color: transparent; font-weight: 400; font-style: normal; font-variant: normal; text-decoration: none; vertical-align: baseline; white-space: pre-wrap;"> :</span>

- <span style="font-size: 12pt; font-family: Aptos; color: #000000; background-color: transparent; font-weight: 400; font-style: normal; font-variant: normal; text-decoration: none; vertical-align: baseline; white-space: pre-wrap;">Avant de connecter une nouvelle colonne, vérifiez les recommandations du fabricant concernant le solvant d’équilibrage et les conditions de démarrage.</span>

<span style="font-size: 12pt; font-family: Aptos; color: #000000; background-color: transparent; font-weight: bold; font-style: normal; font-variant: normal; text-decoration: none; vertical-align: baseline; white-space: pre-wrap;">Connexion de la Nouvelle Colonne</span><span style="font-size: 12pt; font-family: Aptos; color: #000000; background-color: transparent; font-weight: 400; font-style: normal; font-variant: normal; text-decoration: none; vertical-align: baseline; white-space: pre-wrap;"> :</span>

- <span style="font-size: 12pt; font-family: Aptos; color: #000000; background-color: transparent; font-weight: 400; font-style: normal; font-variant: normal; text-decoration: none; vertical-align: baseline; white-space: pre-wrap;">Connectez la colonne en respectant l'orientation indiquée (entrée et sortie). Serrez les connexions fermement mais sans forcer pour éviter d'endommager les filetages.</span>

<span style="font-size: 12pt; font-family: Aptos; color: #000000; background-color: transparent; font-weight: bold; font-style: normal; font-variant: normal; text-decoration: none; vertical-align: baseline; white-space: pre-wrap;">Équilibrage de la Colonne</span><span style="font-size: 12pt; font-family: Aptos; color: #000000; background-color: transparent; font-weight: 400; font-style: normal; font-variant: normal; text-decoration: none; vertical-align: baseline; white-space: pre-wrap;"> :</span>

- <span style="font-size: 12pt; font-family: Aptos; color: #000000; background-color: transparent; font-weight: 400; font-style: normal; font-variant: normal; text-decoration: none; vertical-align: baseline; white-space: pre-wrap;">Rincez la nouvelle colonne avec le solvant de démarrage recommandé pour éliminer les conservateurs et pour équilibrer la colonne avant l’analyse.</span>
- <span style="font-size: 12pt; font-family: Aptos; color: #000000; background-color: transparent; font-weight: 400; font-style: normal; font-variant: normal; text-decoration: none; vertical-align: baseline; white-space: pre-wrap;">Laissez le solvant circuler à un débit faible pendant quelques minutes jusqu’à ce que la pression se stabilise et que la ligne de base soit stable.</span>

# Réalisation d'un protocole HPLC

### <span style="background-color: rgb(248, 202, 198);">Introduction</span>

##### <span style="background-color: rgb(194, 224, 244);">Principe</span>

La chromatographie est un procédé qui permet de déterminer les différents composant d'un mélange. Il existe plusieurs procédés de chromatographie, et l'une des plus performantes s'appelle CLHP (Chromatographie en phase Liquide à Haute Performance) ou <span style="text-decoration: underline;">HPLC</span> en anglais (High Performance *ou Pressure* Liquid Chromatography). La méthode HPLC se fait à <span style="text-decoration: underline;">haute pression</span> **\[1\]**.

Une <span style="text-decoration: underline;">phase mobile</span>, composée d’acétonitrile, d'eau ou autre, pousse le mélange à analyser dans une "colonne" (voir sur l'image ci-dessous). Dans cette colonne, il y a une <span style="text-decoration: underline;">phase stationnaire</span> : des grains de très petite taille. En fonction des propriétés des différents composants, et avec un choix judicieux de phase mobile et de phase stationnaire, les composants du mélange sont plus ou moins ralentis au passage de la colonne, et donc sortent de celles-ci à des instants différents **\[2\]**.

Le spectrographe en sortie affichera alors les spectres d'absorption de "chaque" espèce du mélange. Les pics sont alors plus fins (la résolution est augmentée), et le seuil de détection est plus bas que si le mélange avait été placé directement dans un spectrographe **\[2\]**.

[![WhatsApp Image 2024-12-16 at 15.20.12.jpeg](https://wiki.fablab.sorbonne-universite.fr/BookStack/uploads/images/gallery/2024-12/scaled-1680-/4IQwhatsapp-image-2024-12-16-at-15-20-12.jpeg)](https://wiki.fablab.sorbonne-universite.fr/BookStack/uploads/images/gallery/2024-12/4IQwhatsapp-image-2024-12-16-at-15-20-12.jpeg)Photo prise de la machine au fablab

##### <span style="background-color: rgb(194, 224, 244);">Explication</span>

Pour se familiariser avec l'utilisation de la machine à HPLC (chromatographie en phase liquide haute performance ou haute pression) de l'entreprise Beckmann Coulter avec une colonne C18 (ou phase inverse, revert phase, RP), on essaie de retranscrire un protocole simple, reposant sur le matériel que nous avons.

Nos conditions sont les suivantes :

- le protocole doit être simple
- la phase mobile doit être soit de l'eau soit de l'acétronitrile
- la colonne doit mesurer 250 mm \* 4.60 mm (c'est la colonne que nous avons au fablab)

### <span style="background-color: rgb(248, 202, 198);">Protocole</span>  


Le protocole choisi permet de déterminer la concentration en caféine dans les suppléments alimentaires pour perdre du poids **\[3\]**.

##### <span style="background-color: rgb(194, 224, 244);">Réactifs</span>

- Caféine comme référence standard
- Acétonitrile
- Eau ultra pure
- Échantillons tests – supplément alimentaire à base de caféine

##### <span style="background-color: rgb(194, 224, 244);">Matériels</span>

- Varian Pro Star HPLC system
- Détecteur UV
- Colonne C18, 4.6 mm
- Thermostat
- Bain à ultrason
- Seringue Hamilton conçue pour injection manuelle dans les ports HPLC (25 ml)

##### <span style="background-color: rgb(194, 224, 244);">Conditions de chromatographie  
</span>

- Phase mobile <span style="background-color: rgb(191, 237, 210);">65%</span> d'eau et <span style="background-color: rgb(191, 237, 210);">35%</span> acétonitrile
- Détection UV : 274 nm
- Débit : 1 ml/min
- Colonne : C18
- Température thermostat : 25°C

<span style="background-color: rgb(236, 202, 250);">Préparation des solutions standards</span>

Dilution dans une solution d’acétonitrile/eau (respectivement <span style="background-color: rgb(191, 237, 210);">35/65</span>) en ultrasonication pendant 15 min dans un bain à ultrason.

<span style="background-color: rgb(236, 202, 250);">Préparation des échantillons tests</span>

1. Extraction avec de l'acétonitrile/eau, une ultrasonication dans un bain à ultrasons pendant 15 minutes.
2. Peser la capsule pour avoir son poids exacte. Réduire la capsule alimentaire à analyser sous forme de poudre (si on n'utilise de la poudre à café, peser simplement une dose de poudre).
3. Dans un bécher de 50 ml, dissoudre la poudre obtenue dans la phase mobile acétonitrile/eau (<span style="background-color: rgb(191, 237, 210);">35/65</span>). Filtrer sous Buchner.
4. Récupérer le filtrat et le diluer dans la phase mobile en proportion <span style="background-color: rgb(191, 237, 210);">100/200</span> (filtrat/phase liquide). Injecter 20 ml de la solution dans l'appareil HPLC à l'aide d'une seringue Hamilton de 25 ml
5. Filtration deux fois pour toutes les solutions et préfiltration pour éliminer les grosses particules des solutions. Filtration plus fine avec des filtres à seringue (taille des pores 0,45 μm).
6. Analyse de tous les échantillons trois fois.

##### <span style="background-color: rgb(194, 224, 244);">Résultats</span>

Les résultats présentés ci-dessous sont ceux de l'étude :[![Chromatogram-of-standard-solution-of-caffeine-in-concentration-60-mcg-ml.jpg](https://wiki.fablab.sorbonne-universite.fr/BookStack/uploads/images/gallery/2024-12/scaled-1680-/chromatogram-of-standard-solution-of-caffeine-in-concentration-60-mcg-ml.jpg)](https://wiki.fablab.sorbonne-universite.fr/BookStack/uploads/images/gallery/2024-12/chromatogram-of-standard-solution-of-caffeine-in-concentration-60-mcg-ml.jpg)**\[3\]**

### <span style="background-color: rgb(248, 202, 198);">Bibliographie</span>

#### <span style="background-color: rgb(194, 224, 244);">Sources</span>

1. [Quelles sont les différentes phases en Chromatographie? AirLiquide](https://fr.airliquide.com/solutions/calibration-et-analyse/chromatographie/quelles-sont-les-differentes-phases-en-chromatographie)
2. [Chromatographie en phase liquide à haute performance, Wikipédia](https://fr.wikipedia.org/wiki/Chromatographie_en_phase_liquide_%C3%A0_haute_performance)
3. L'article utilisé est celui de Stanislava Ivanova, Kalin Ivanov, Melissa Bekyar et de Pavlina Kostova, publié en mai 2020, intitulé [HPLC Method for Determination of Caffeine in Food Supplements for Weight Loss](https://www.researchgate.net/publication/341152830_HPLC_Method_for_Determination_of_Caffeine_in_Food_Supplements_for_Weight_Loss), sur le site [ResearchGate](https://www.researchgate.net/). Voici le <span style="background-color: rgb(191, 237, 210);">pdf</span> du l'étude : [Caffeine-NM2020.pdf](https://wiki.fablab.sorbonne-universite.fr/BookStack/attachments/1230)

# Inventaire HPLC

<table border="1" id="bkmrk-marque-ref-%28part-no%29" style="border-collapse: collapse; width: 119.753%; height: 422.735px;"><colgroup><col style="width: 12.4845%;"></col><col style="width: 12.4845%;"></col><col style="width: 12.4845%;"></col><col style="width: 12.4845%;"></col><col style="width: 12.4845%;"></col><col style="width: 12.4845%;"></col><col style="width: 12.4845%;"></col><col style="width: 12.4845%;"></col></colgroup><tbody><tr style="height: 35.375px;"><td height="19" style="height: 14.25pt; width: 79pt;" width="105">Marque</td><td height="19" style="height: 14.25pt; width: 65pt;" width="86">Ref (Part No)</td><td height="19" style="height: 14.25pt; width: 65pt;" width="86">Quantité</td><td height="19" style="height: 14.25pt; width: 65pt;" width="87">Description</td><td height="19" style="height: 14.25pt; width: 65pt;" width="86">Type de colonne</td><td height="19" style="height: 14.25pt; width: 65pt;" width="86">Matériel</td><td height="19" style="height: 14.25pt; width: 65pt;" width="86">Usage</td><td height="19" style="height: 14.25pt; width: 65pt;" width="86">lien</td></tr><tr style="height: 29.7969px;"><td height="68" style="height: 51.0pt;">Phenomenex</td><td height="68" style="height: 51.0pt;">00G-4252-e0</td><td align="right" height="68" style="height: 51.0pt;">2</td><td class="xl69" height="68" style="height: 51.0pt; width: 65pt;" width="87">Luna® 5 µm C18(2) 100 Å, LC Column 250 x 4.6 mm, Ea</td><td class="xl69" height="68" style="height: 51.0pt; width: 65pt;" width="86">Reversed Phase</td><td class="xl69" height="68" style="height: 51.0pt; width: 65pt;" width="86">Fully Porous Silica</td><td class="xl69" height="68" style="height: 51.0pt; width: 65pt;" width="86">Separation of hydrophobic compounds</td><td height="68" style="height: 51.0pt;">https://www.phenomenex.com.cn/products/part/00g-4252-e0?fsr=1</td></tr><tr style="height: 29.7969px;"><td height="85" style="height: 63.75pt;">Beckman</td><td align="right" height="85" style="height: 63.75pt;">235329</td><td align="right" height="85" style="height: 63.75pt;">3</td><td class="xl69" height="85" style="height: 63.75pt; width: 65pt;" width="87">ULTRASPHERE ODS 235329 5µ 4.6mm X 25cm HPLC COLUMN</td><td class="xl69" height="85" style="height: 63.75pt; width: 65pt;" width="86">Reversed Phase</td><td height="85" style="height: 63.75pt;"> </td><td height="85" style="height: 63.75pt;"> </td><td height="85" style="height: 63.75pt;">http://www.phenomenex.co.kr/storage/ecatalogue/z1264.pdf</td></tr><tr style="height: 29.7969px;"><td height="85" style="height: 63.75pt;">Beckman</td><td align="right" height="85" style="height: 63.75pt;">237390</td><td align="right" height="85" style="height: 63.75pt;">2</td><td class="xl69" height="85" style="height: 63.75pt; width: 65pt;" width="87">ULTRASPHERE ODS 235329 5µ 2.0m X 15cm HPLC COLUMN</td><td class="xl69" height="85" style="height: 63.75pt; width: 65pt;" width="86">Reversed Phase</td><td height="85" style="height: 63.75pt;"> </td><td height="85" style="height: 63.75pt;"> </td><td height="85" style="height: 63.75pt;"> </td></tr><tr style="height: 29.7969px;"><td height="85" style="height: 63.75pt;">Beckman</td><td align="right" height="85" style="height: 63.75pt;">727404</td><td align="right" height="85" style="height: 63.75pt;">1</td><td class="xl69" height="85" style="height: 63.75pt; width: 65pt;" width="87">SPHEROGEL MICRO-PTH 3µ 2mm X 15cm HPLC COLUMN</td><td class="xl69" height="85" style="height: 63.75pt; width: 65pt;" width="86">SEC</td><td height="85" style="height: 63.75pt;"> </td><td height="85" style="height: 63.75pt;"> </td><td height="85" style="height: 63.75pt;">y'en<span style="mso-spacerun: yes;"> </span>a pas</td></tr><tr style="height: 29.7969px;"><td height="34" style="height: 25.5pt;">Waters</td><td align="right" height="34" style="height: 25.5pt;">84175</td><td align="right" height="34" style="height: 25.5pt;">4</td><td class="xl69" height="34" style="height: 25.5pt; width: 65pt;" width="87">µ Porasil, 7.8 \* 300 mm</td><td class="xl69" height="34" style="height: 25.5pt; width: 65pt;" width="86">Phase Normale</td><td height="34" style="height: 25.5pt;"> </td><td height="34" style="height: 25.5pt;"> </td><td height="34" style="height: 25.5pt;">https://www.waters.com/nextgen/fr/fr/shop/columns/wat084175--porasil-silica-prep-column-125a-10--m-78-mm-x-300-mm-1-pk.html</td></tr><tr style="height: 29.7969px;"><td height="51" style="height: 38.25pt;">Waters</td><td align="right" height="51" style="height: 38.25pt;">86344</td><td align="right" height="51" style="height: 38.25pt;">1</td><td class="xl69" height="51" style="height: 38.25pt; width: 65pt;" width="87">Novapak C18 3.9 mm \* 15 cm</td><td class="xl69" height="51" style="height: 38.25pt; width: 65pt;" width="86">Reversed Phase</td><td height="51" style="height: 38.25pt;"> </td><td class="xl69" height="51" style="height: 38.25pt; width: 65pt;" width="86">Mobile phase 68:325(acytonitrile water)</td><td height="51" style="height: 38.25pt;">https://www.waters.com/nextgen/fr/fr/shop/columns/wat086344-nova-pak-c18-column-60a-4--m-39-mm-x-150-mm-1-pk.html</td></tr><tr style="height: 29.7969px;"><td height="51" style="height: 38.25pt;">Beckman</td><td align="right" height="51" style="height: 38.25pt;">142301</td><td align="right" height="51" style="height: 38.25pt;">1</td><td class="xl69" height="51" style="height: 38.25pt; width: 65pt;" width="87">Q HyperD 10, 10µm 4.6 \* 100 mm</td><td class="xl69" height="51" style="height: 38.25pt; width: 65pt;" width="86">Ion Exchange ?</td><td height="51" style="height: 38.25pt;"> </td><td height="51" style="height: 38.25pt;"> </td><td height="51" style="height: 38.25pt;"> </td></tr><tr style="height: 29.7969px;"><td height="51" style="height: 38.25pt;">Macherey-nagel</td><td align="right" height="51" style="height: 38.25pt;">3010140</td><td align="right" height="51" style="height: 38.25pt;">1</td><td class="xl69" height="51" style="height: 38.25pt; width: 65pt;" width="87">VP 250 /21 Nucleosil 7 C18</td><td class="xl69" height="51" style="height: 38.25pt; width: 65pt;" width="86">Reversed Phase</td><td height="51" style="height: 38.25pt;"> </td><td height="51" style="height: 38.25pt;"> </td><td height="51" style="height: 38.25pt;">https://www.mn-net.com/fr/colonne-hplc-vp-preparative-nucleodur-c18-htec-7-m-250x21-mm-762566.210</td></tr><tr style="height: 29.7969px;"><td height="51" style="height: 38.25pt;">Macherey-nagel</td><td height="51" style="height: 38.25pt;">721870.46</td><td align="right" height="51" style="height: 38.25pt;">1</td><td class="xl69" height="51" style="height: 38.25pt; width: 65pt;" width="87">CC 250-4.6 Nucleosil 100-5</td><td class="xl69" height="51" style="height: 38.25pt; width: 65pt;" width="86">Reversed Phase</td><td height="51" style="height: 38.25pt;"> </td><td height="51" style="height: 38.25pt;"> </td><td height="51" style="height: 38.25pt;">https://www.mn-net.com/fr/colonne-hplc-ec-analytique-nucleosil-100-5-c18-5-m-250x4.6-mm-720014.46</td></tr><tr style="height: 29.7969px;"><td height="51" style="height: 38.25pt;">Macherey-nagel</td><td height="51" style="height: 38.25pt;">721662.40</td><td align="right" height="51" style="height: 38.25pt;">4</td><td class="xl69" height="51" style="height: 38.25pt; width: 65pt;" width="87">Nucleosil 100-5 C18 5µm 4mm 25cm</td><td class="xl69" height="51" style="height: 38.25pt; width: 65pt;" width="86">Reversed Phase</td><td height="51" style="height: 38.25pt;"> </td><td class="xl69" height="51" style="height: 38.25pt; width: 65pt;" width="86">Mobile phase 80:20(acytonitrile water)</td><td height="51" style="height: 38.25pt;">https://www.mn-net.com/fr/colonne-hplc-ec-analytique-nucleosil-100-5-c18-5-m-125x4-mm-720002.40</td></tr><tr style="height: 29.7969px;"><td height="68" style="height: 51.0pt;">TOSOHAAS</td><td align="right" height="68" style="height: 51.0pt;">8540</td><td align="right" height="68" style="height: 51.0pt;">1</td><td class="xl69" height="68" style="height: 51.0pt; width: 65pt;" width="87">TSK Gel G 2000 SWXL 5µm 7.8mm 30 cm</td><td class="xl69" height="68" style="height: 51.0pt; width: 65pt;" width="86">SEC</td><td class="xl69" height="68" style="height: 51.0pt; width: 65pt;" width="86"> </td><td height="68" style="height: 51.0pt;"> </td><td height="68" style="height: 51.0pt;"> </td></tr><tr style="height: 29.7969px;"><td height="51" style="height: 38.25pt;">TOSOH</td><td align="right" height="51" style="height: 38.25pt;">8542</td><td align="right" height="51" style="height: 38.25pt;">1</td><td class="xl69" height="51" style="height: 38.25pt; width: 65pt;" width="87">TSK Gel G4000 SWXL 8um 7.8 mm 30 cm</td><td class="xl69" height="51" style="height: 38.25pt; width: 65pt;" width="86">SEC</td><td class="xl69" height="51" style="height: 38.25pt; width: 65pt;" width="86"> </td><td height="51" style="height: 38.25pt;"> </td><td height="51" style="height: 38.25pt;">https://www.separations.us.tosohbioscience.com/HPLC\_Columns/id-8327/TSKgel\_G3000SWxl</td></tr><tr style="height: 29.7969px;"><td height="51" style="height: 38.25pt;">Macherey-nagel</td><td height="51" style="height: 38.25pt;">721870.40</td><td align="right" height="51" style="height: 38.25pt;">1</td><td class="xl69" height="51" style="height: 38.25pt; width: 65pt;" width="87">CC 250-4 Nucleosil 100-5</td><td class="xl69" height="51" style="height: 38.25pt; width: 65pt;" width="86">Reversed Phase</td><td height="51" style="height: 38.25pt;"> </td><td class="xl69" height="51" style="height: 38.25pt; width: 65pt;" width="86">Mobile phase N-heptane</td><td height="51" style="height: 38.25pt;">https://www.mn-net.com/fr/colonne-hplc-ec-analytique-nucleosil-100-5-c18-5-m-250x4-mm-720014.40</td></tr></tbody></table>