Pour plus d'informations sur ce modèle, vous pouvez vous rendre sur le site du fabricant [ici](https://fr.vwr.com/store/product/34973691/vwr-auto-i-lite-i-compteur-automatique-de-colonies "Lien fabricant Autolite")
Cet appareil présente des avantages :Permet une estimation rapide du nombre de colonies d'un échantillon
Permet d'effectuer cette estimation avec les mêmes paramètres sur un grand nombre d'échantillons
Permet d'obtenir des résultats déjà formatés
Mais aussi des inconvénients :Ne fonctionne que pour les colonies contrastées
Ne produit qu'une aide au comptage, et non un comptage parfaitement précis
Tous ces paramètres sont à prendre en compte au moment des mesures. # Guide d'utilisation de la machine [](https://wiki.fablab.sorbonne-universite.fr/BookStack/uploads/images/gallery/2024-01/img-0178.jpg)Si vous avez besoin de plus de renseignements que ceux présents sur cette page, vous pouvez consulter le manuel d'utilisateur en anglais [ici](https://fr.vwr.com/assetsvc/asset/fr_FR/id/35416263/contents/manual-vwr-colony-counter-auto-lite-en-200521.pdf "Manuel d'utilisation")
#### 1. Allumage de l'appareil - Brancher la prise d'alimentation de l'appareil - Brancher la machine à l'ordinateur via son câble USB - Brancher la clé USB produit (violette) sur l'ordinateur pour faire démarrer le logiciel. - Ouvrir le logiciel avec clic droit **exécuter en tant qu’administrateur** en demandant gentiment le code au Fabmanager - Éclairer la zone en sélectionnant un des 3 modes d’éclairage à l’aide de l’unique bouton noir sur la face avant - Placer la boîte de pétri fermée #### 2. Comptage : ##### a. d'une nouvelle série - Créer une nouvelle série [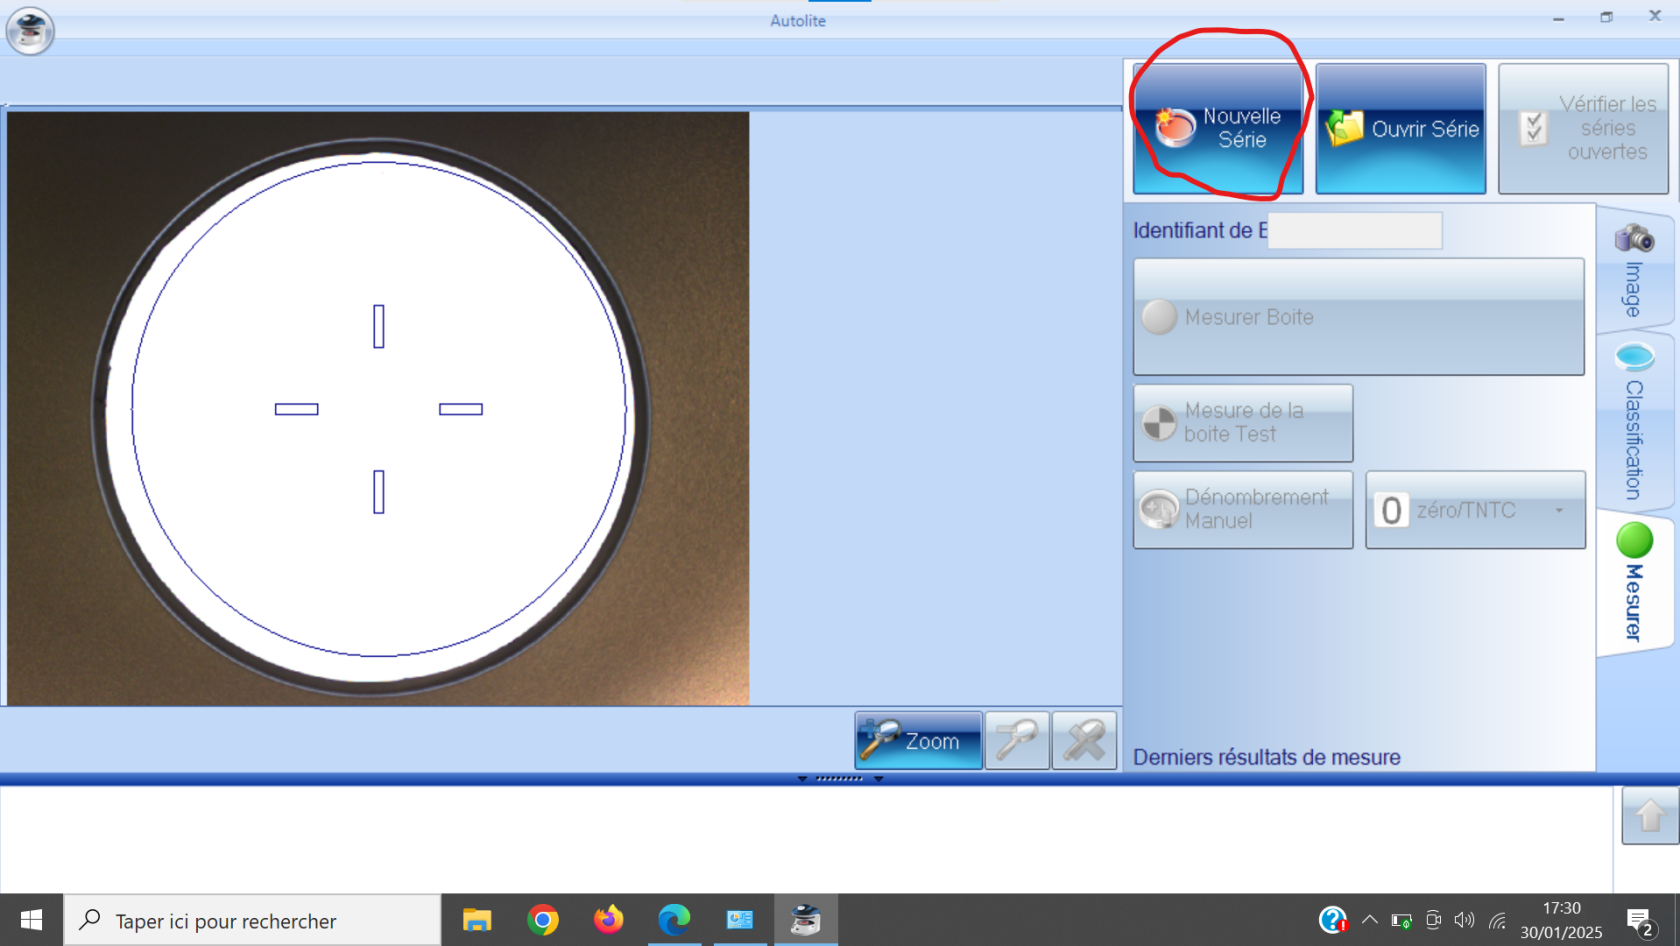](https://wiki.fablab.sorbonne-universite.fr/BookStack/uploads/images/gallery/2025-01/eF4capture-decran-2025-01-30-161600.png) - Sélectionner le type de lot approprié : ''Boîte ensemencée en masse'', ''Boîte ensemencée en spirale'' avec ou sans dilution [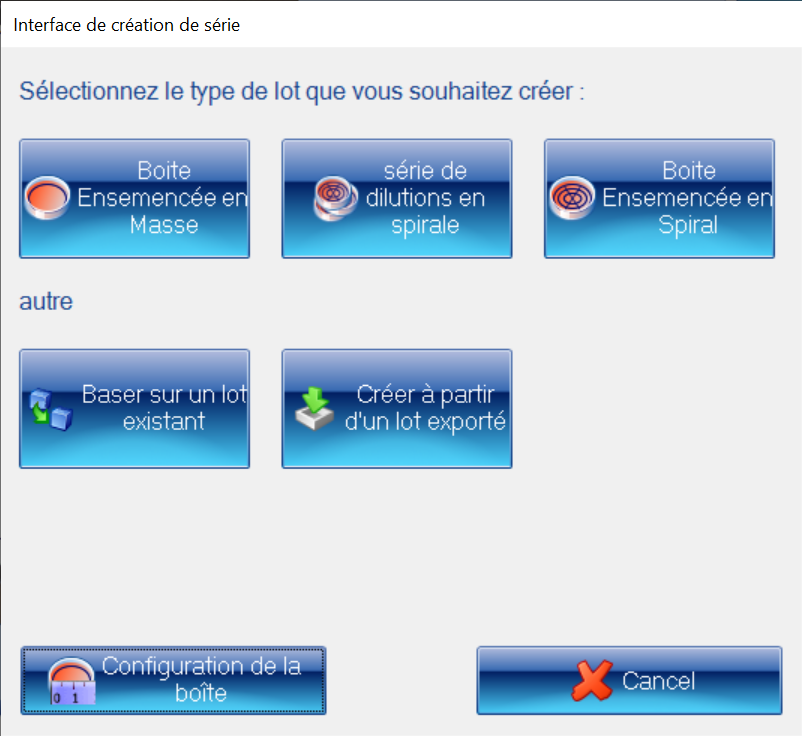](https://wiki.fablab.sorbonne-universite.fr/BookStack/uploads/images/gallery/2025-01/capture-decran-2025-01-30-173257.png) - Calibrer l’échelle dans ''Configuration de la boite'' avec une distance connue (avec une règle ou avec le diamètre de la boite) ainsi que les facteurs de dilution en spirale ou la taille maximale des colonies [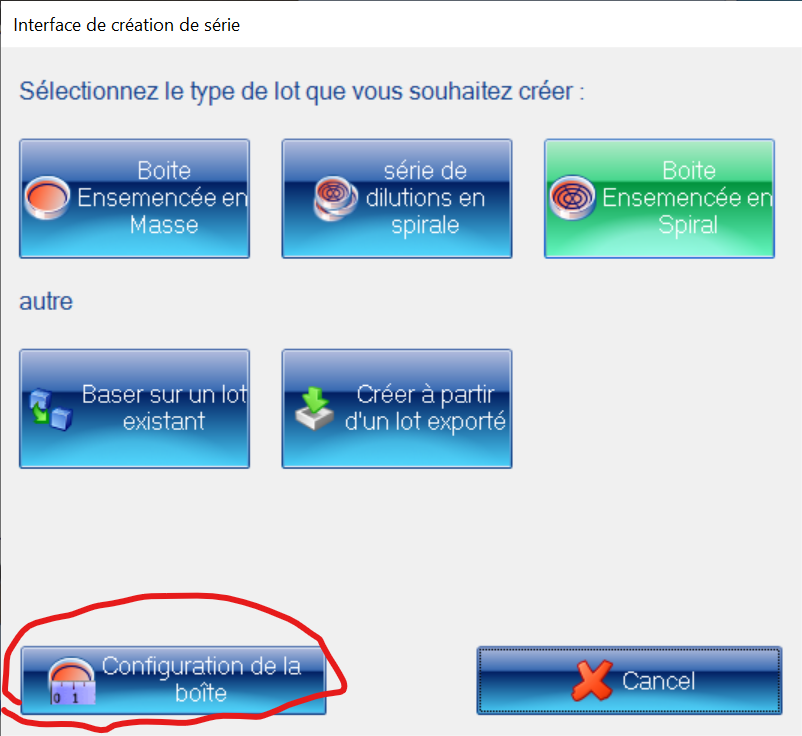](https://wiki.fablab.sorbonne-universite.fr/BookStack/uploads/images/gallery/2025-01/capture-decran-2025-01-30-173140.png)[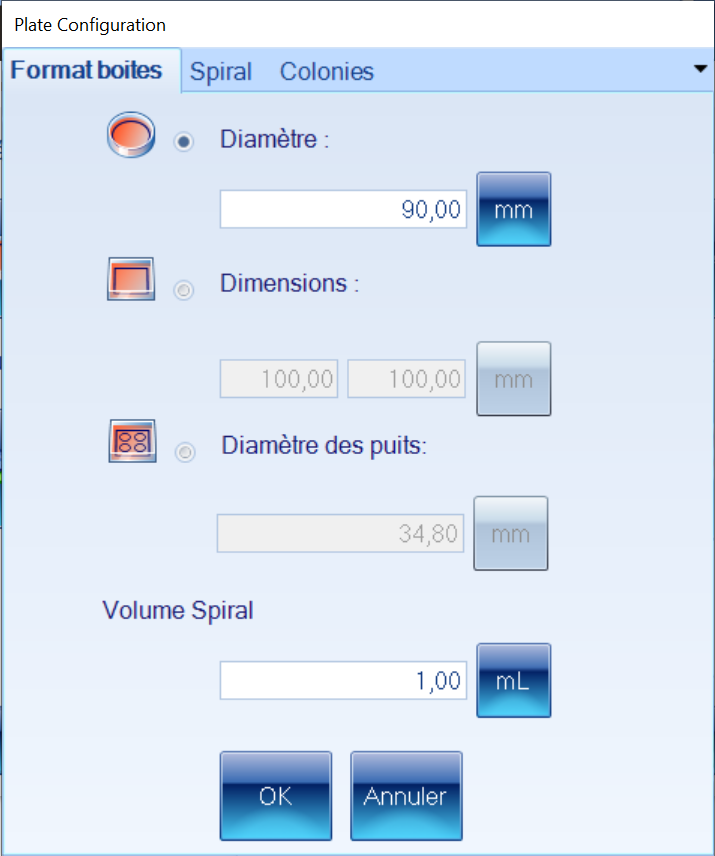](https://wiki.fablab.sorbonne-universite.fr/BookStack/uploads/images/gallery/2025-01/capture-decran-2025-01-30-173209.png) - Régler l'exposition avec le curseur dans l'onglet ''Image'' [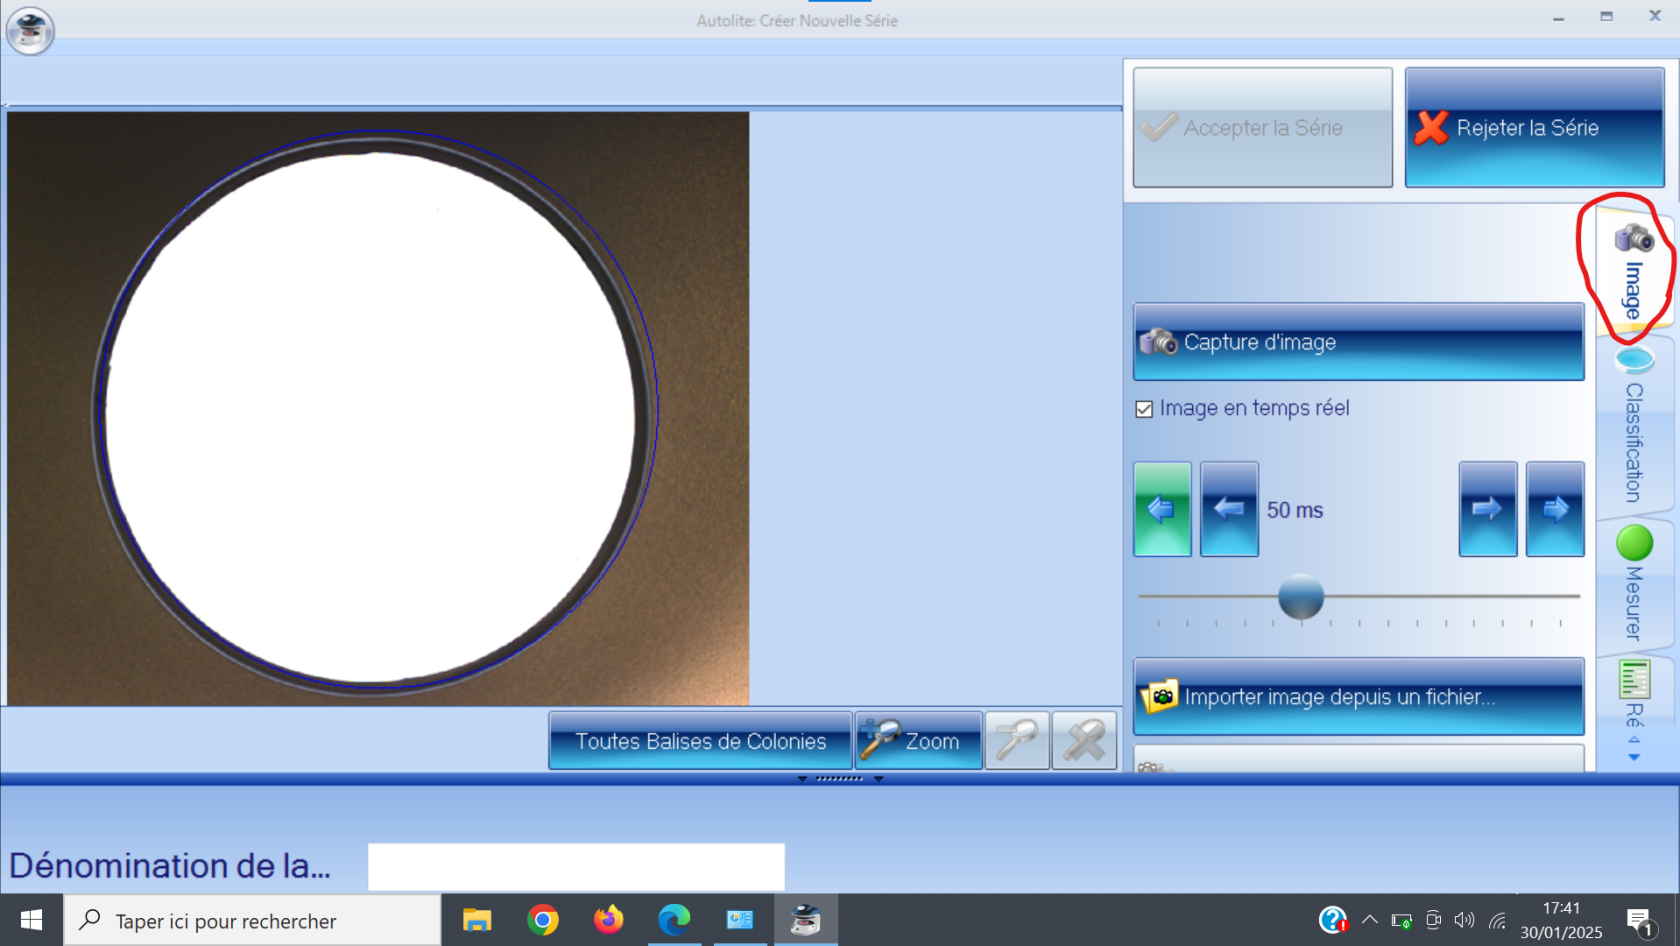](https://wiki.fablab.sorbonne-universite.fr/BookStack/uploads/images/gallery/2025-01/rsbcapture-decran-2025-01-30-174123.png) - Régler le cadre de la boite dans l'onglet "Classification" [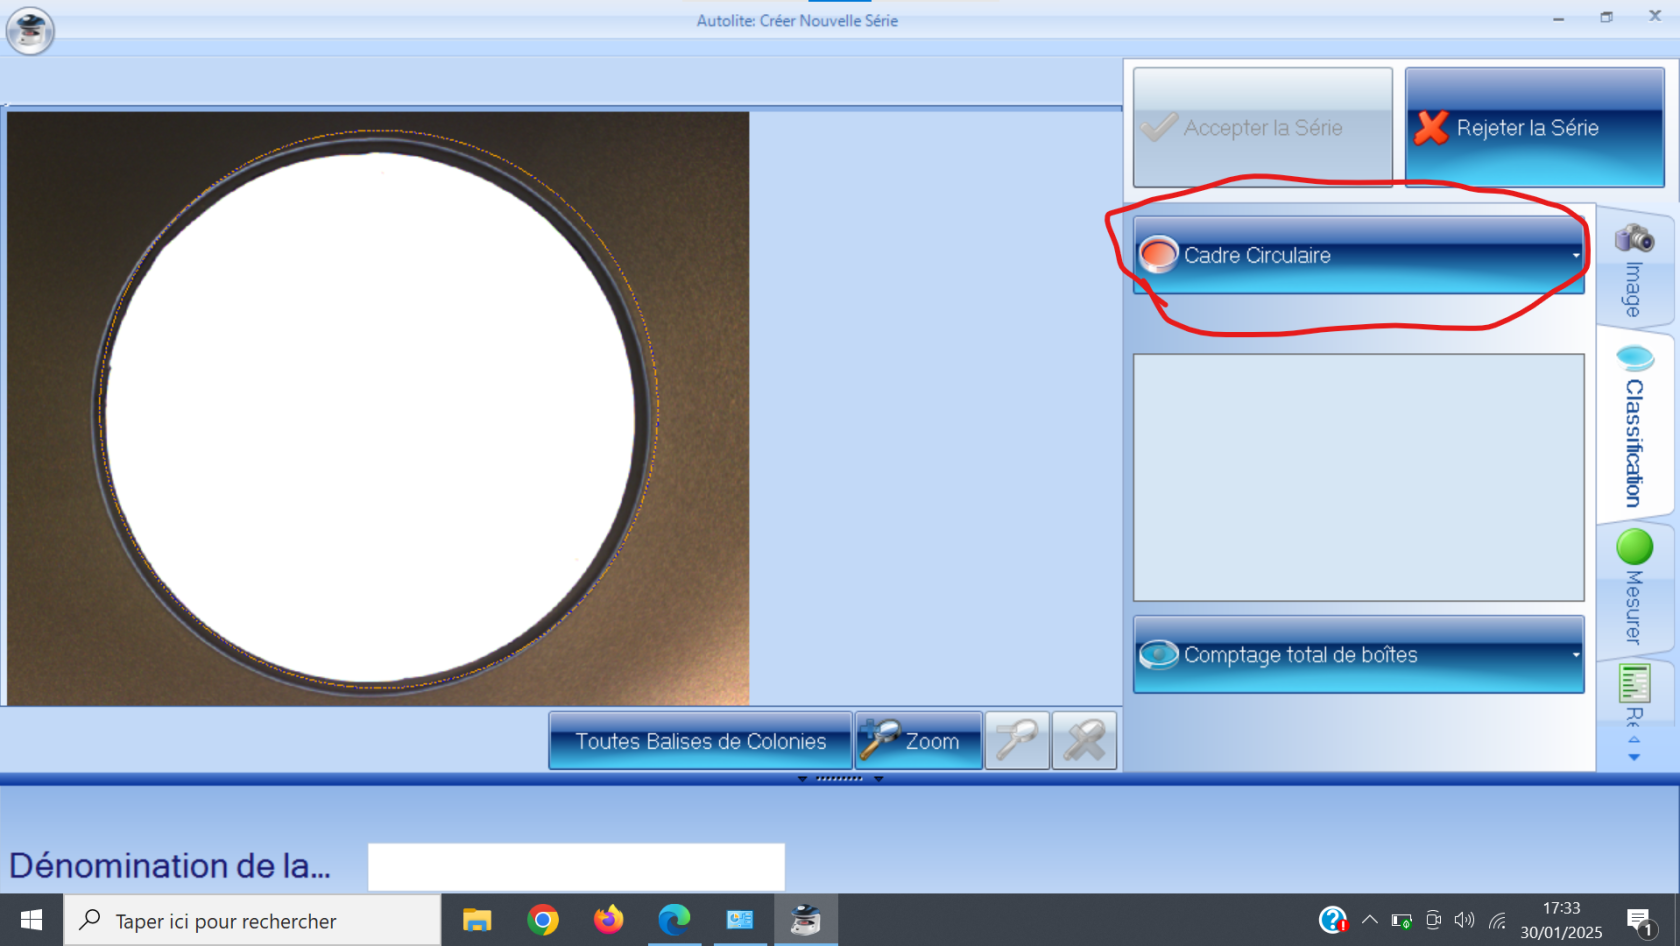](https://wiki.fablab.sorbonne-universite.fr/BookStack/uploads/images/gallery/2025-01/capture-decran-2025-01-30-173321.png)[](https://wiki.fablab.sorbonne-universite.fr/BookStack/uploads/images/gallery/2025-01/capture-decran-2025-01-30-173209.png) - Cliquer sur “Comptage total de boîtes” dans l'onglet ''Classification'' pour choisir si les colonies sont plus/moins claires que le fond (utiliser le disque noir si besoin pour augmenter le contraste. [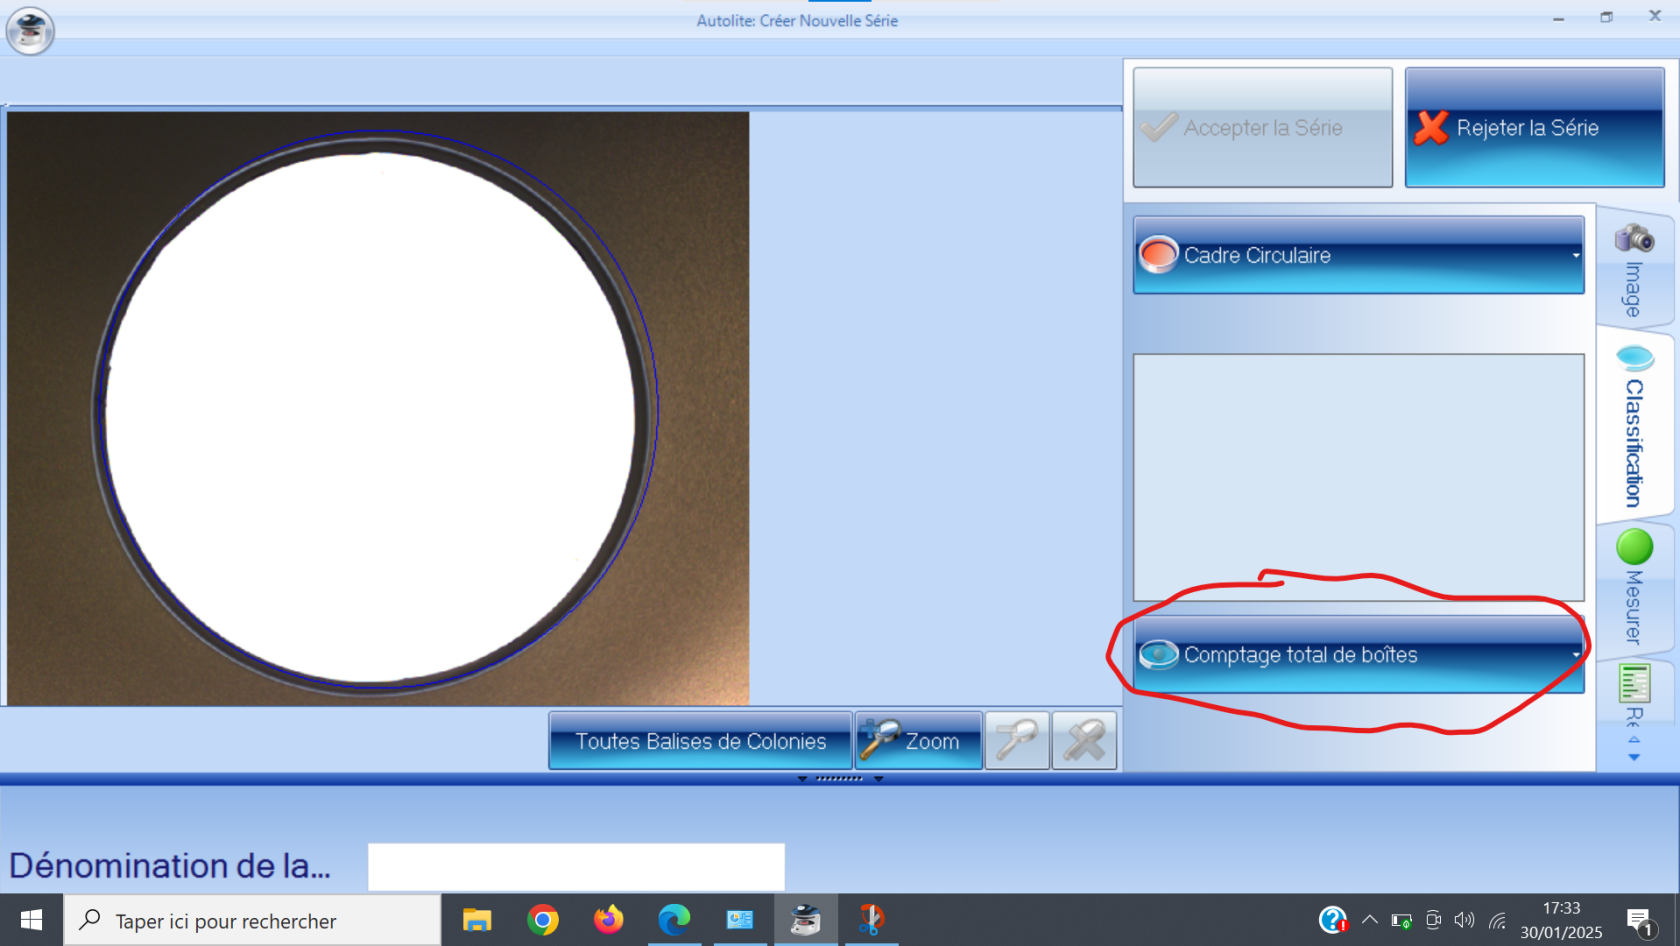](https://wiki.fablab.sorbonne-universite.fr/BookStack/uploads/images/gallery/2025-01/capture-decran-2025-01-30-173409.png) -Une fois la création de la série validée, vous ne pourrez plus modifier ce paramètre
- Ajuster la sensibilité et la taille minimum des colonies mesurées dans la même fenêtre avec les curseurs-> Vous pouvez alors visualiser les colonies marquées par le logiciel, et choisir la couleur ou les balises permettant de repérer les colonies [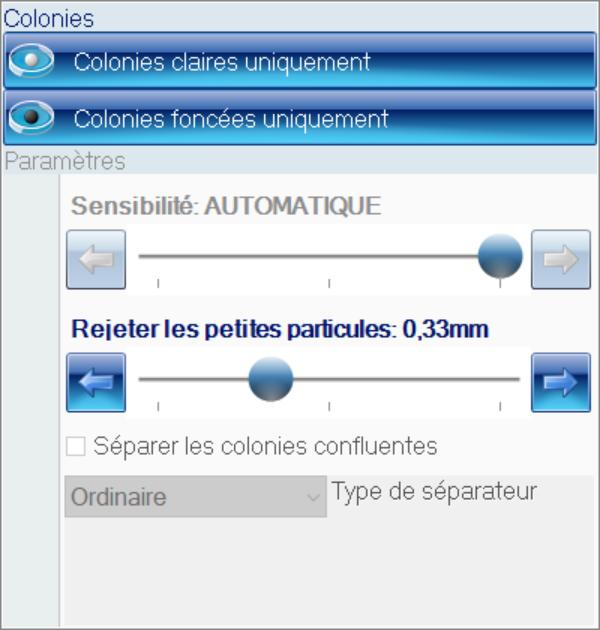](https://wiki.fablab.sorbonne-universite.fr/BookStack/uploads/images/gallery/2025-01/capture-decran-2025-01-30-173353.png) Pour être précis, il faut baisser le curseur "Rejeter les petites particules: 0,33mm". Dans la négative, des petites particules (bactéries) inférieures à 0,33mm, ne seront pas prises en compte dans notre étude. - Nommer votre boîte de Pétri de référence dans l'onglet ''Mesurer'' [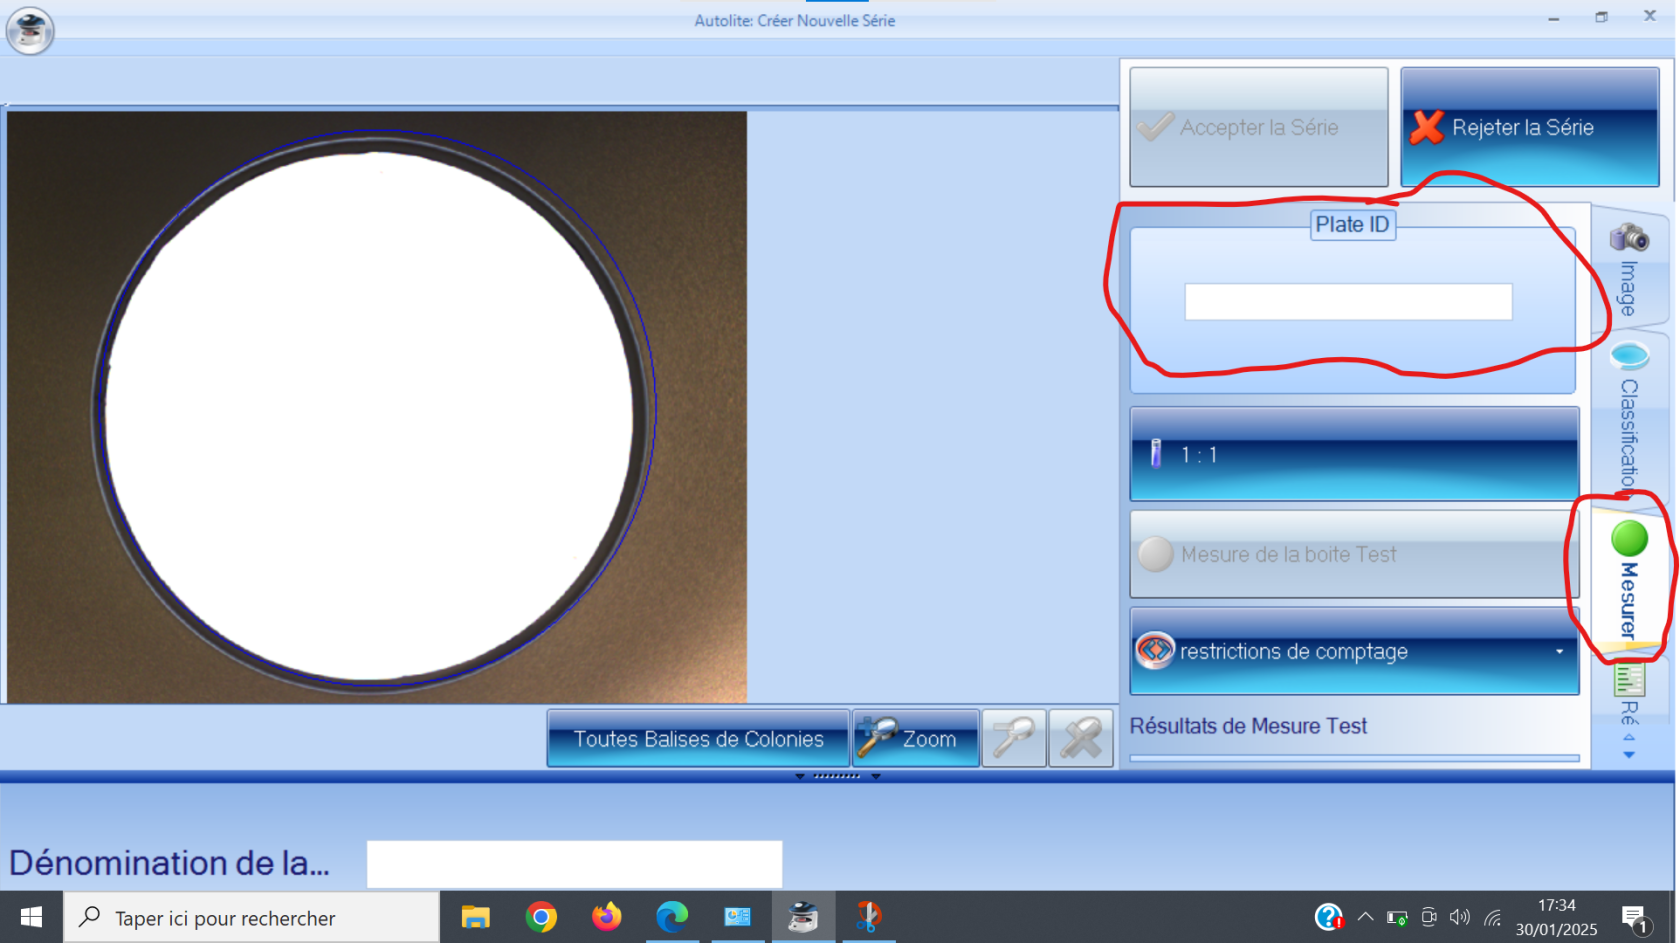](https://wiki.fablab.sorbonne-universite.fr/BookStack/uploads/images/gallery/2025-01/capture-decran-2025-01-30-173454.png) - Modifier le facteur de dilution selon vos besoins dans la case ''Plate ID''[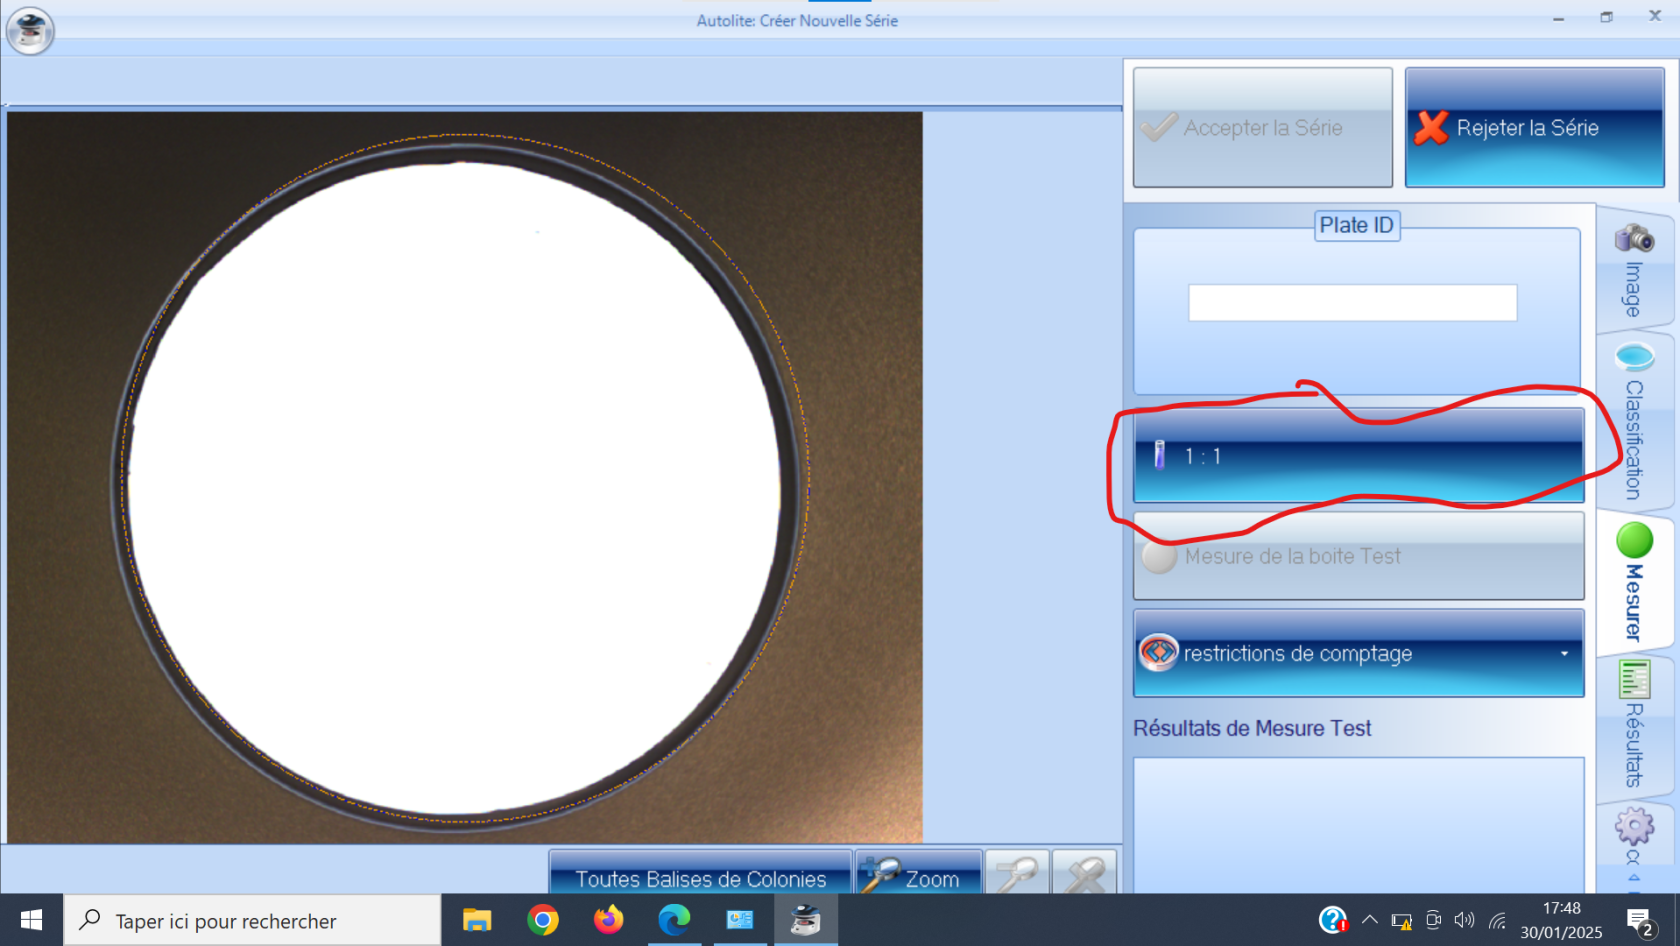](https://wiki.fablab.sorbonne-universite.fr/BookStack/uploads/images/gallery/2025-01/capture-decran-2025-01-30-174910.png) - Effectuer une mesure test pour vérifier que le logiciel identifie bien toutes les colonies en appuyant sur l'icône ''Mesure de la boîte Test" [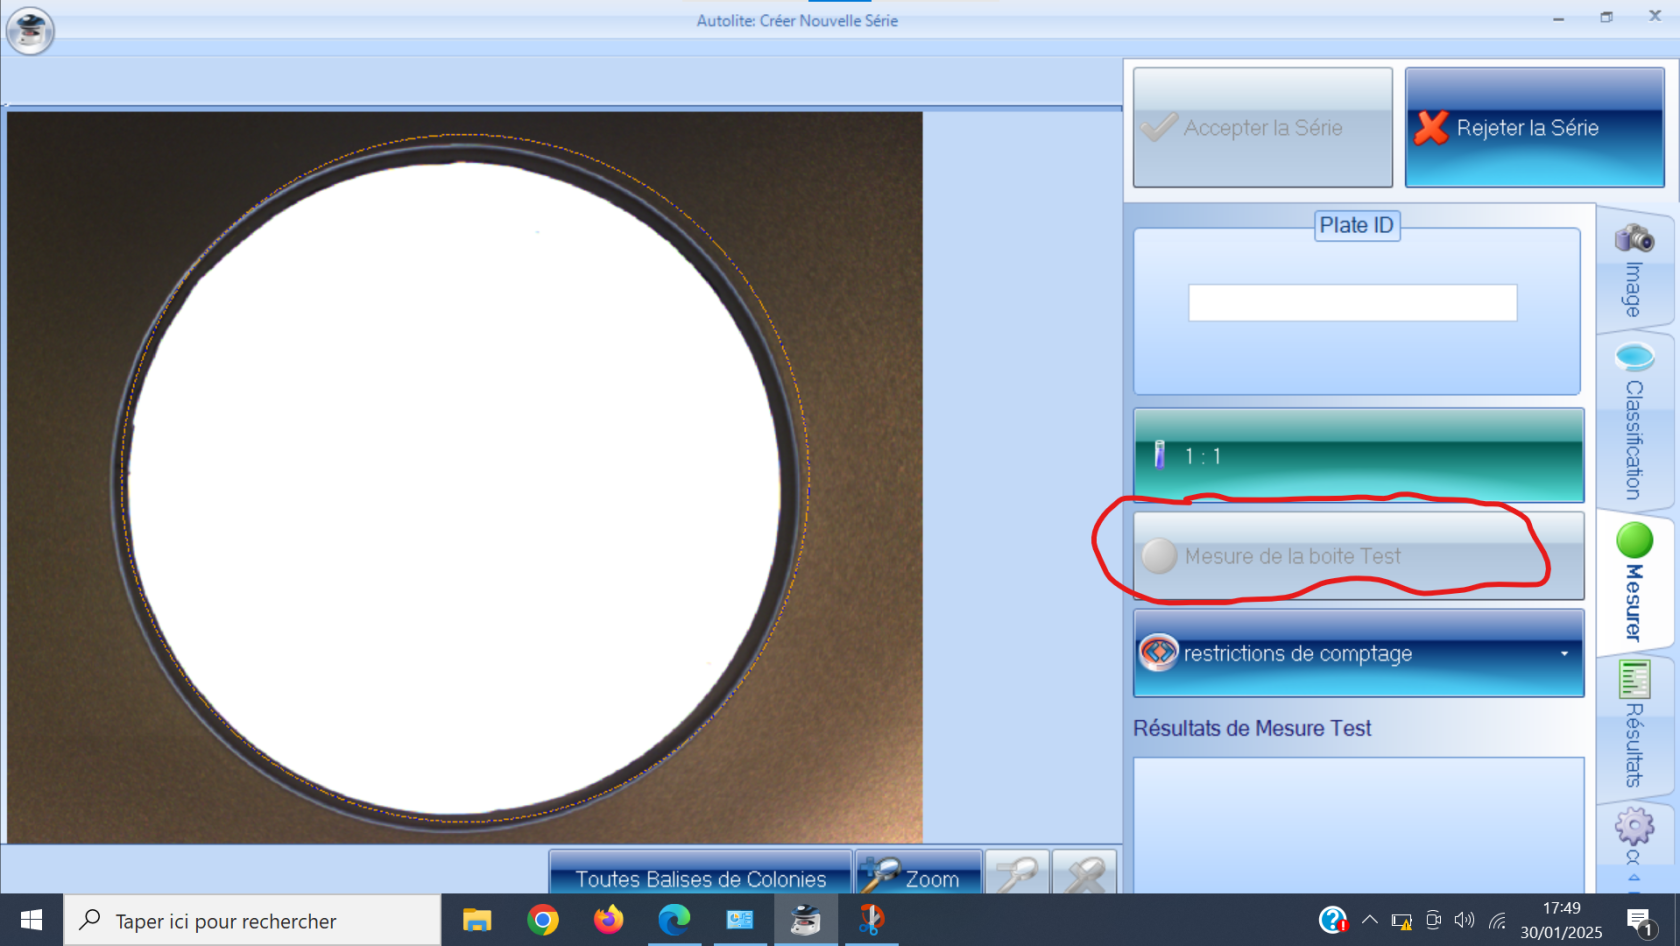](https://wiki.fablab.sorbonne-universite.fr/BookStack/uploads/images/gallery/2025-01/capture-decran-2025-01-30-174954.png) - Dans l'onglet ''Résultats'', vous pouvez sélectionner les paramètres retenus [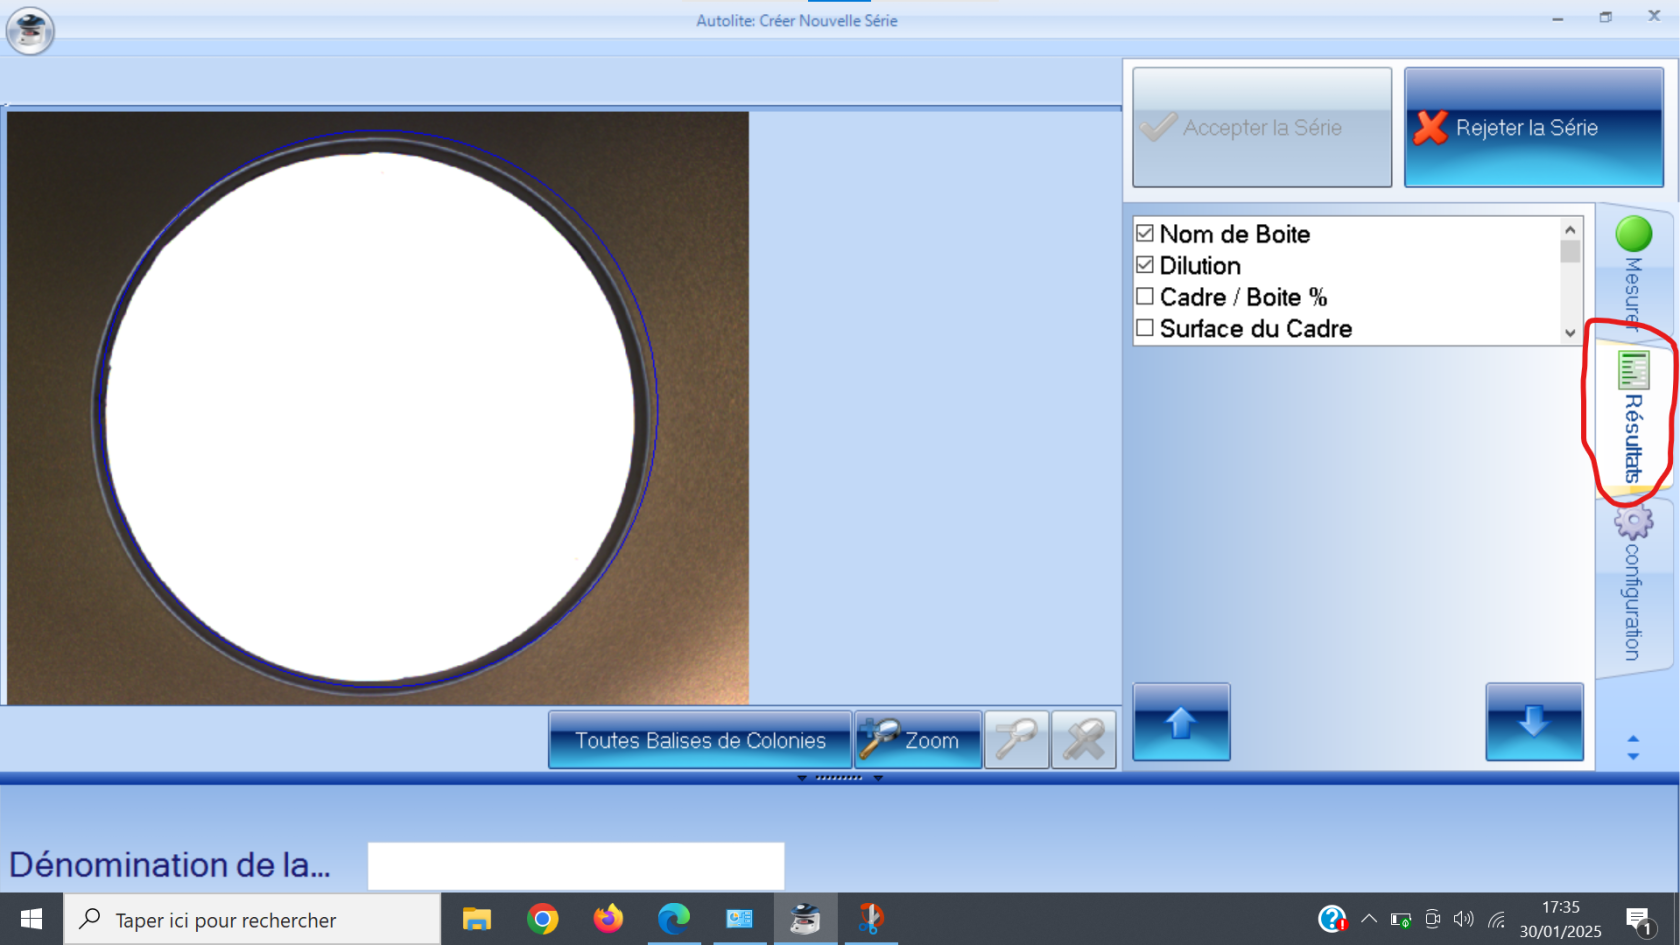](https://wiki.fablab.sorbonne-universite.fr/BookStack/uploads/images/gallery/2025-01/capture-decran-2025-01-30-173543.png) - Dans l'onglet ''Configuration'', vous pouvez définir le mode de dénomination des différentes boîtes : par incrémentation, par code-barre ou d'après une liste d'échantillons pré-existante [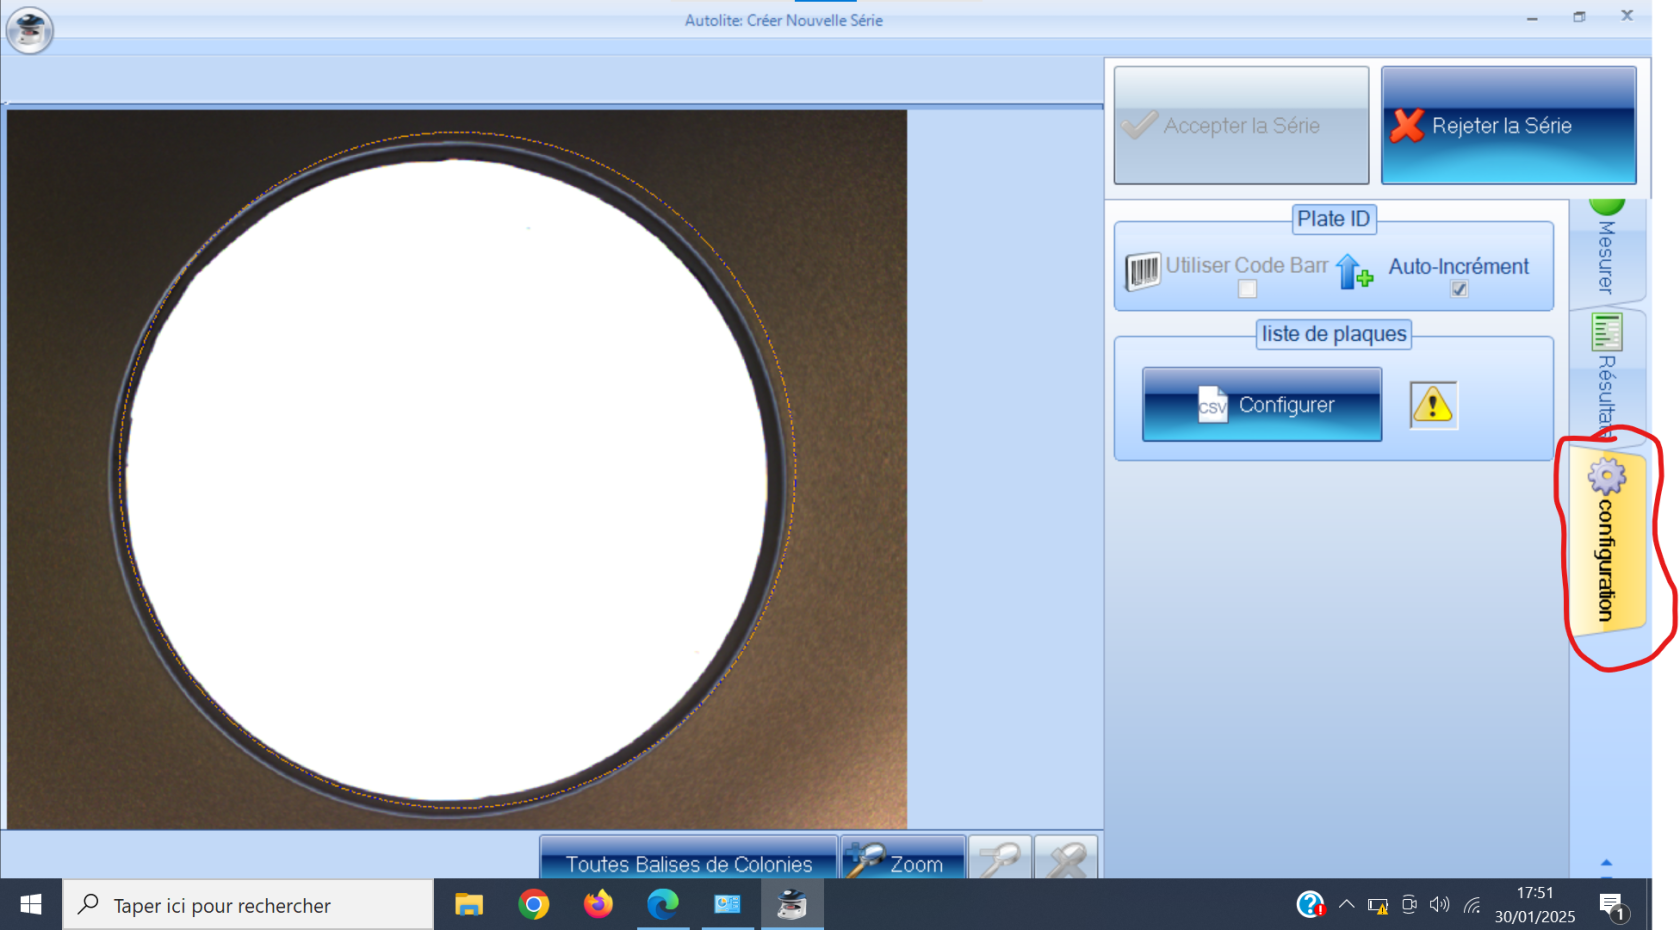](https://wiki.fablab.sorbonne-universite.fr/BookStack/uploads/images/gallery/2025-01/capture-decran-2025-01-30-175147.png) - Pour finaliser la création de la série, lui donner un nom dans le rectangle ''Dénomination de la série''Sans nom, vous ne pourrez pas créer votre série
- Cliquer sur ''Accepter la série'' ##### b. d'une série préexistante - Cliquer sur ''Ouvrir série" - Sélectionner la série de votre choix - Reprendre le comptage où vous l'aviez laissé - **A la fin de l'utilisation** : fermer votre série dans le gestionnaire de série et aller dans réglage --> quitter Autolite #### 3. Résultats Si vous le souhaitez, le logiciel peut conformer pour vous les résultats sous la forme d'un compte-rendu. Pour cela : - Aller dans le menu ''Autolite'' en haut à gauche - Sélectionner ''Exporter les données'' - Choisir le dossier d'arrivée et exporter vos données # Guide d'installation du software Avant d'utiliser le programme Auto Lite, il faut d'abord procéder à l'installation du software. Pour ce faire, quelques prérequis: - Être connecté sur un profil administrateur sur le PC - La clé USB "YOUR IMAGING SOFTWARE" [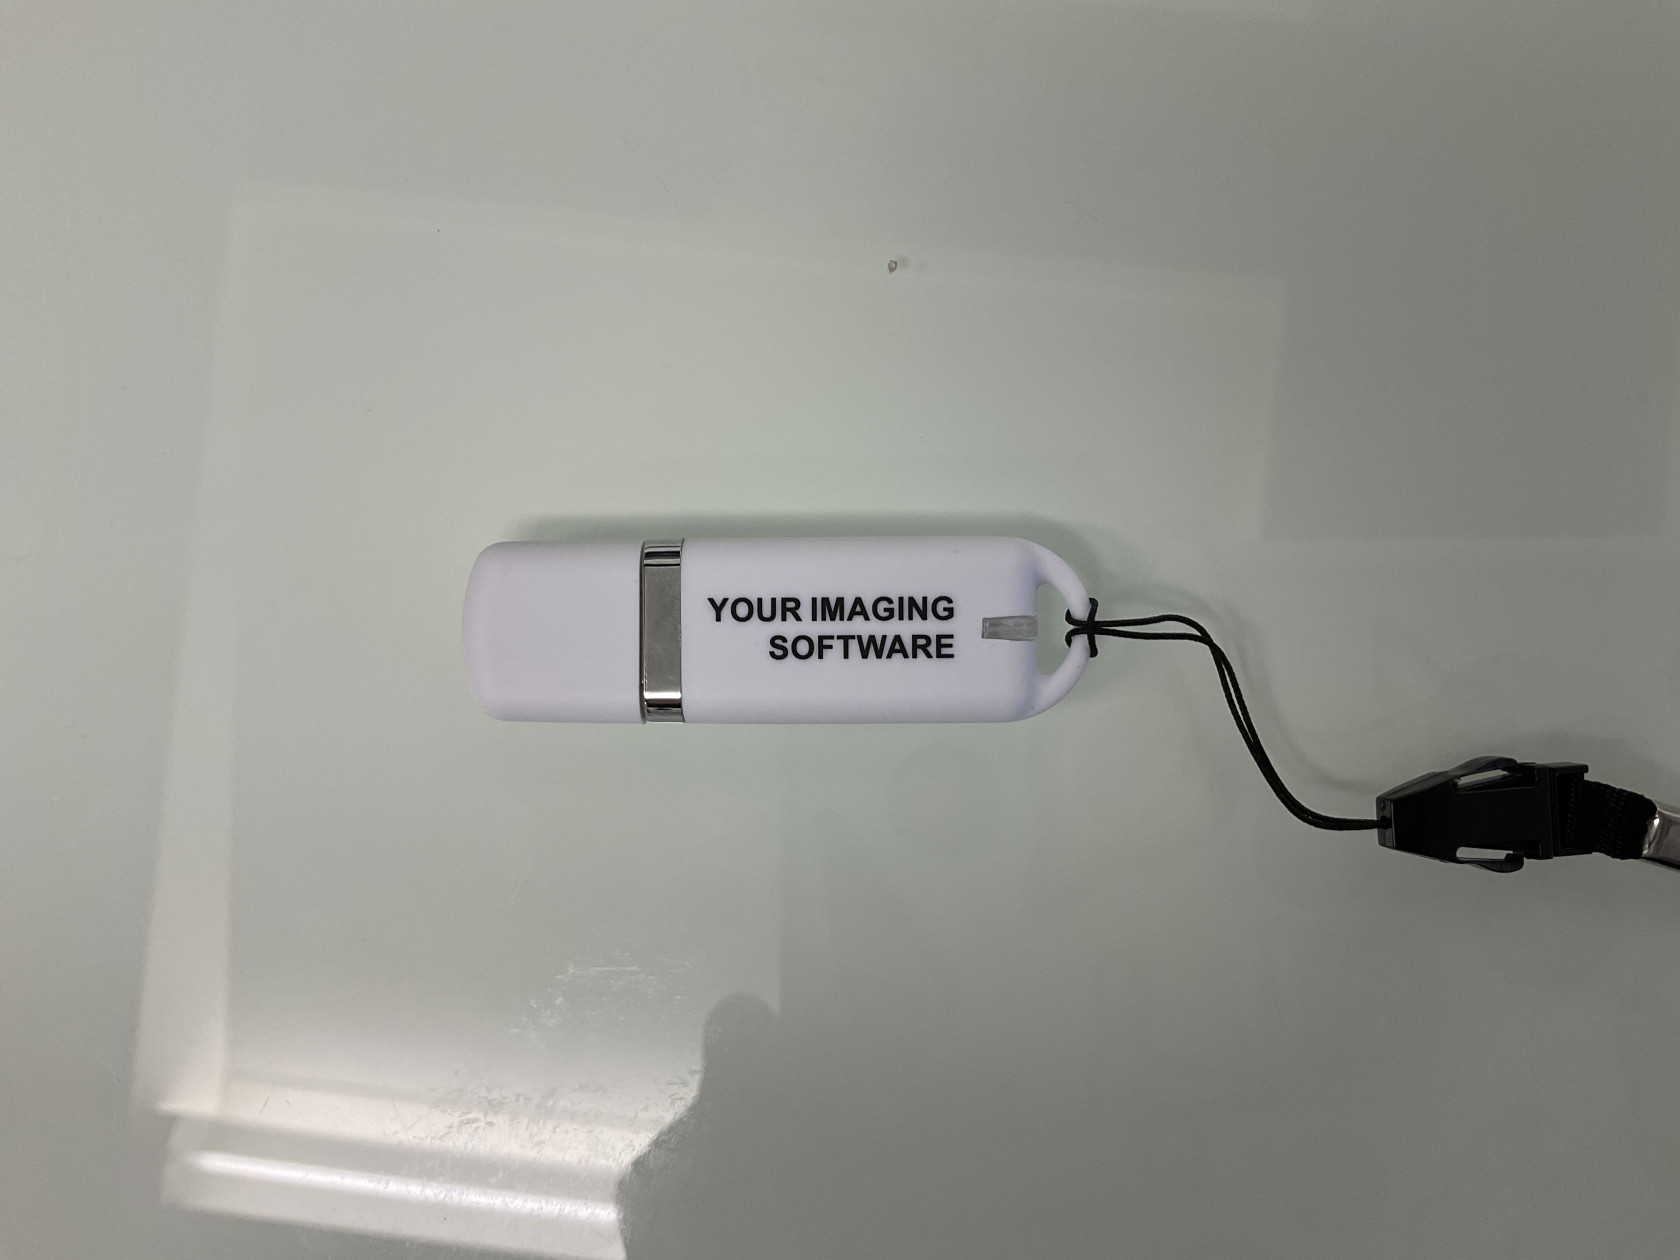](https://wiki.fablab.sorbonne-universite.fr/BookStack/uploads/images/gallery/2025-01/img-0606.jpeg) - La clé USB d'authentification [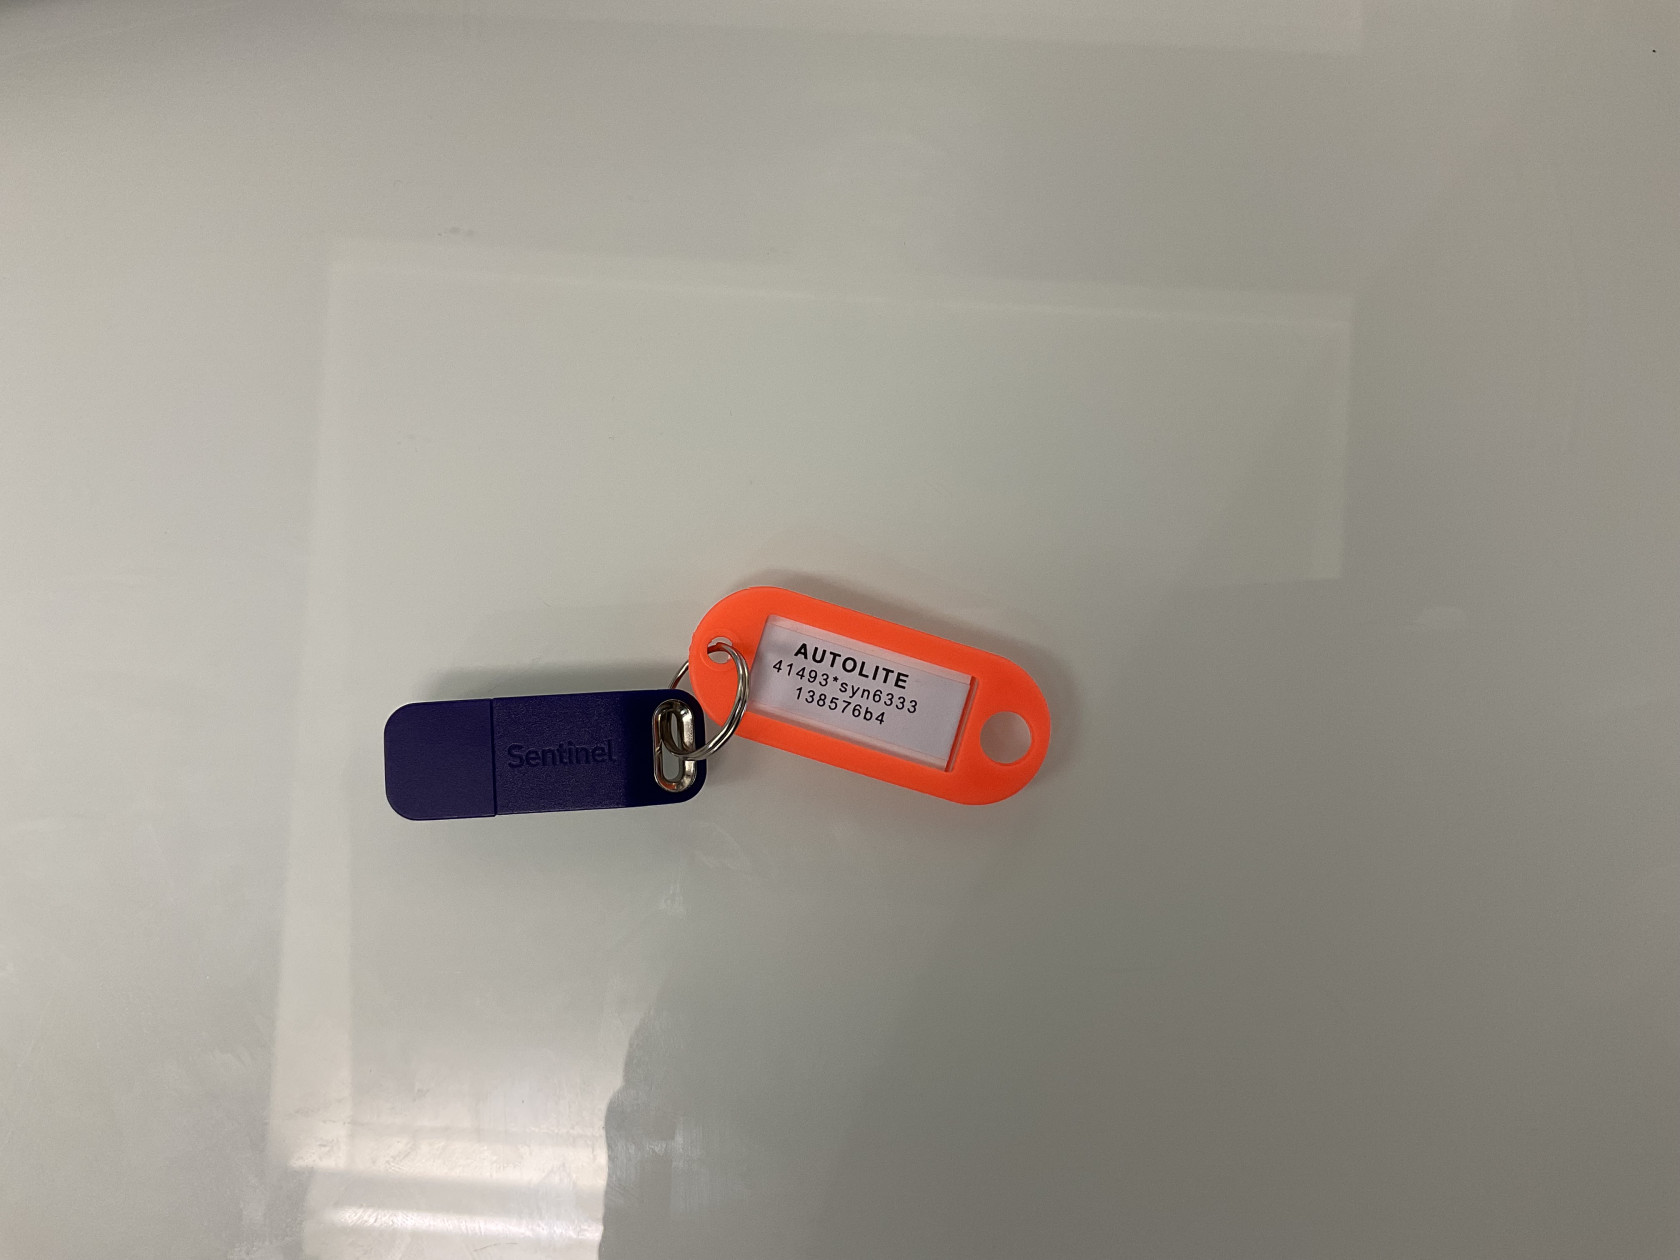](https://wiki.fablab.sorbonne-universite.fr/BookStack/uploads/images/gallery/2025-01/img-0607.jpeg) Insérer la clé USB "YOUR IMAGING SOFTWARE", la trouver dans l'explorateur des fichiers: I/ Vérifier l'installation de Microsoft .NET Framework: - Aller dans AutoLite-1-3-14>Support>Framework, ouvrir l'exécutable "SetupFramework". Si le programme est déjà installé, le message "Microsoft .NET Framework 4.0 is already installed" s'affichera. Dans le cas échéant suivre les instructions à l'écran et compléter l'installation. II/ Installer SQL Server: - Aller dans AutoLite-1-3-14>Support>Database, ouvrir l'exécutable "SetupA3SqlServer": - S'il y a seulement un utilisateur sur le PC, choisir l'option "SQL LocalDB" sur la première page de l'assistant d'installation. Suivre les instructions à l'écran pour terminer l'installation. - Si l'on souhaite donner accès au programme à plusieurs profils utilisateurs sur le même ordinateur, choisir l'option "SQL Server Express" sur la première page de l'assistant d'installation. Suivre les instructions à l'écran pour terminer l'installation. - Redémarrer l'ordinateur. III/ Installer le programme Auto Lite: - Ouvrir le dossier AutoLite-1-3-14, ouvrir l'exécutable "Setup". Suivre les instructions à l'écran. - Redémarrer l'ordinateur. IV/ Ajout des autorisations pour les profils utilisateurs concernés: - Ouvrir le panneau de configuration. - Aller dans Panneau de configuration>Système et sécurité>Outils d’administration, puis ouvrir "Gestion de l'Ordinateur". - Trouver l'onglet "Utilisateurs et groupes locaux" dans la colonne tout à gauche de la fenêtre qui s'ouvre, puis choisir "Groupes". [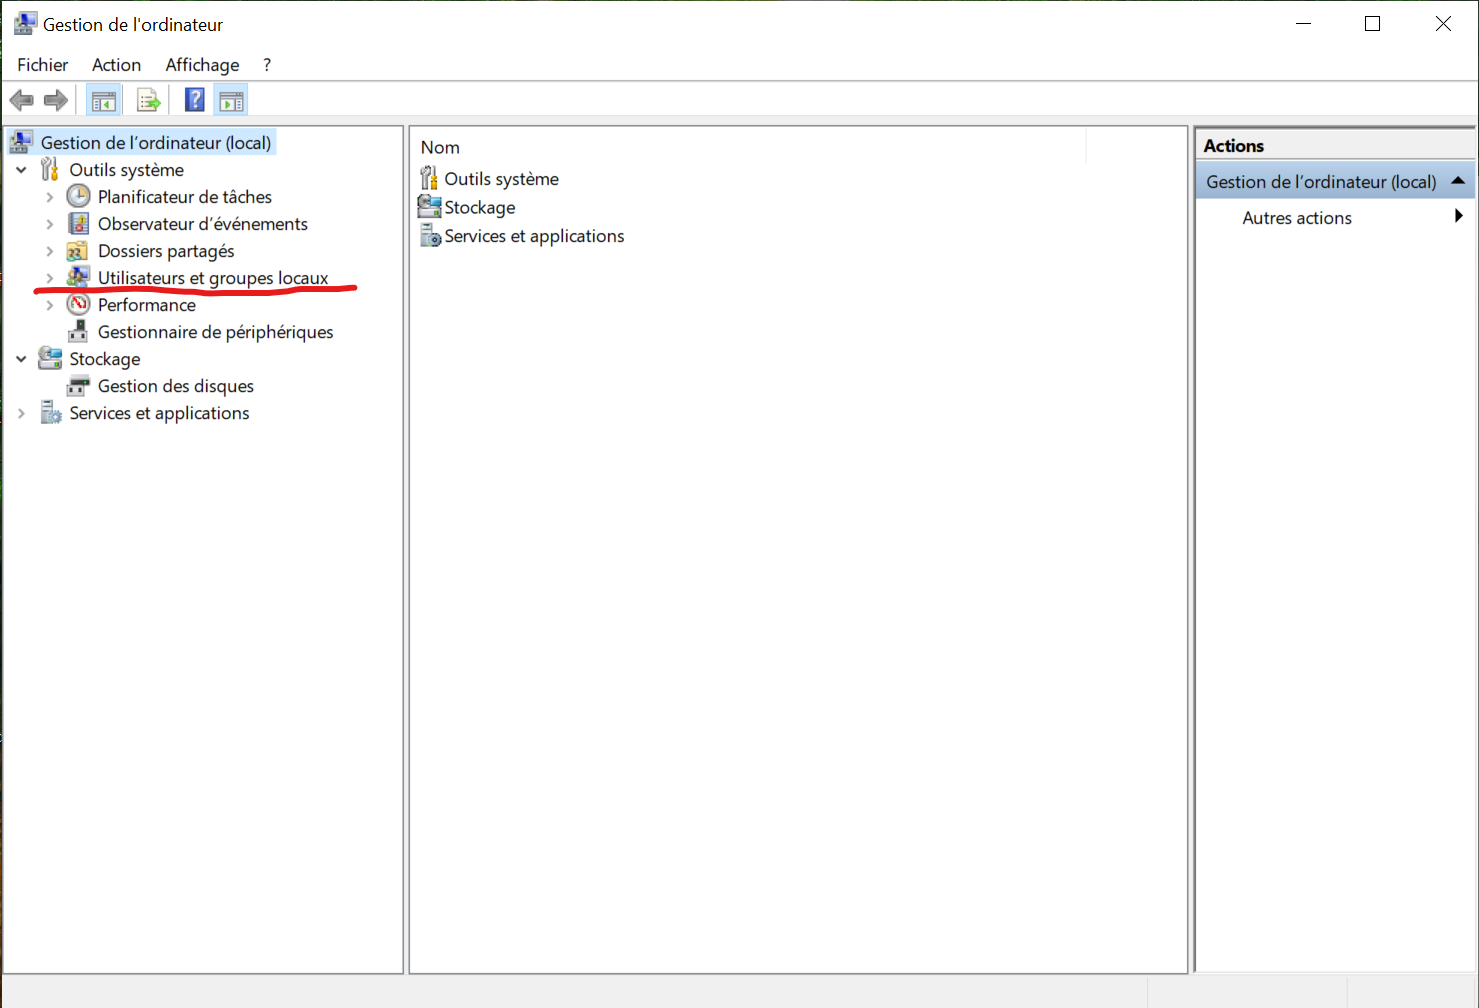](https://wiki.fablab.sorbonne-universite.fr/BookStack/uploads/images/gallery/2025-01/capture-decran-2025-01-30-161357.png)[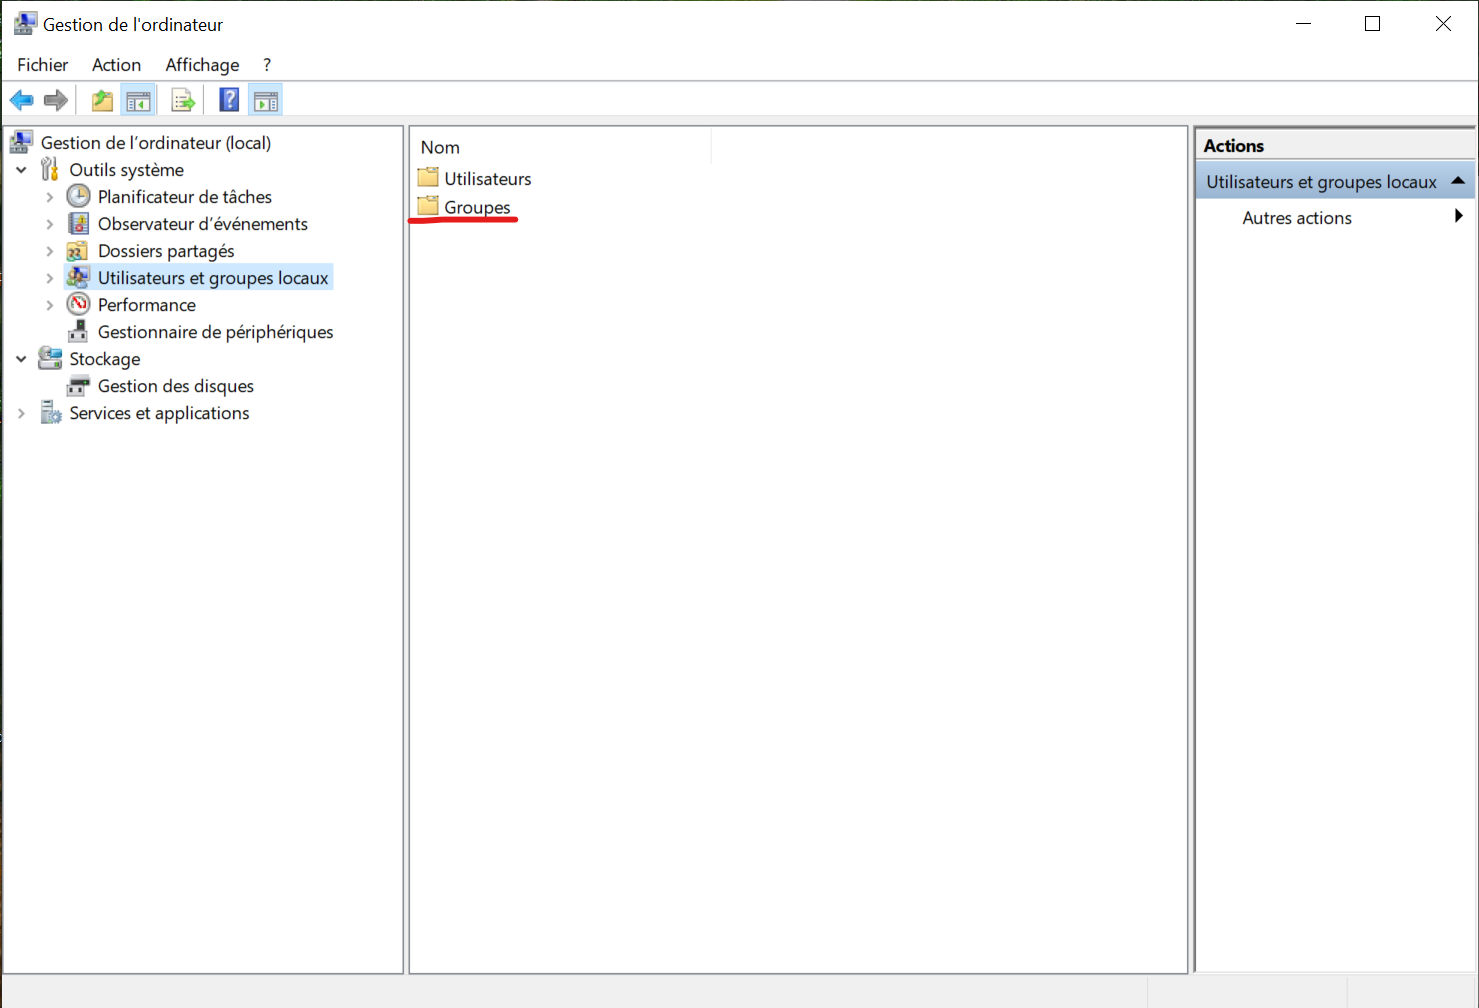](https://wiki.fablab.sorbonne-universite.fr/BookStack/uploads/images/gallery/2025-01/capture-decran-2025-01-30-161437.png) - Trouver "Autolite Users", et l'ouvrir. [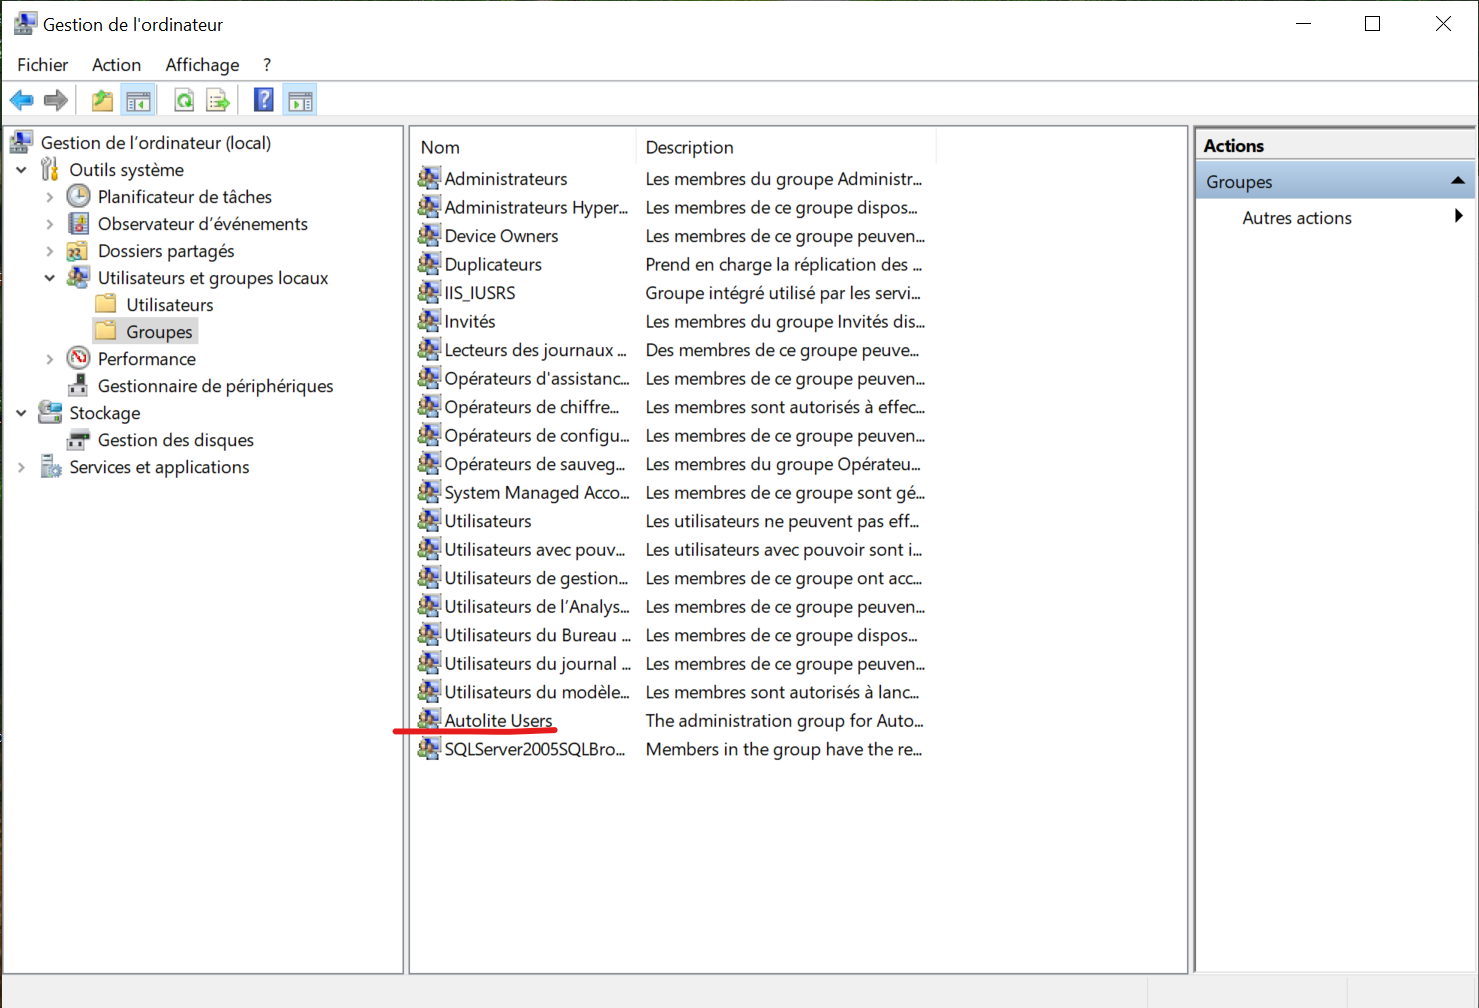](https://wiki.fablab.sorbonne-universite.fr/BookStack/uploads/images/gallery/2025-01/capture-decran-2025-01-30-161503.png) - Dans la fenêtre qui s'ouvre, cliquer sur "Ajouter" [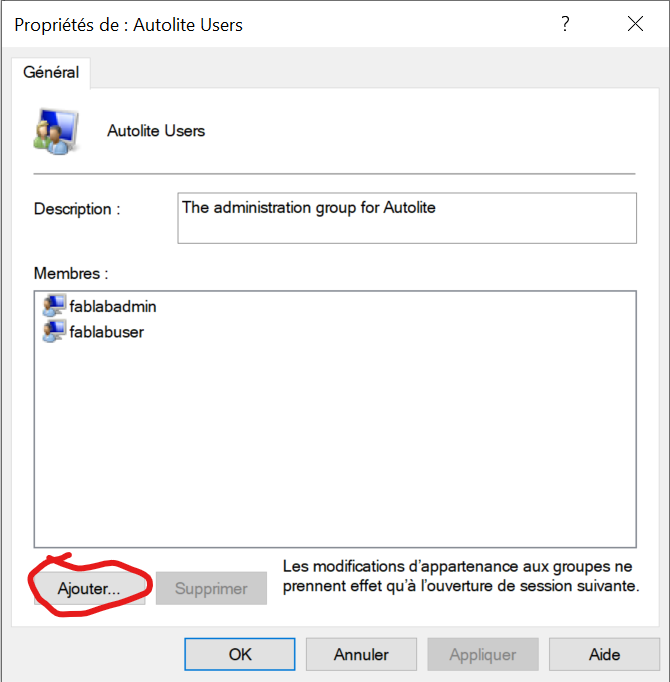](https://wiki.fablab.sorbonne-universite.fr/BookStack/uploads/images/gallery/2025-01/capture-decran-2025-01-30-161526.png) - Dans la nouvelle fenêtre ainsi ouverte, entrer le nom du profil utilisateur concerné, ou les noms si l'on souhaite donner accès au programme à plusieurs utilisateurs (exemple: fablabuser sur les ordinateurs du fablab), puis cliquer sur "Vérifier les noms" [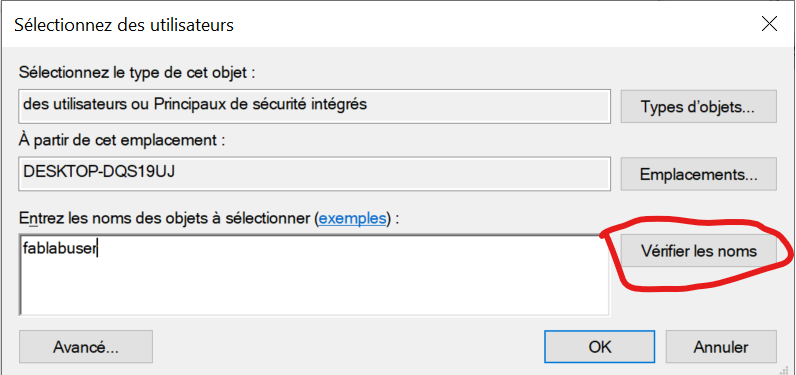](https://wiki.fablab.sorbonne-universite.fr/BookStack/uploads/images/gallery/2025-01/capture-decran-2025-01-30-161600.png) - Cliquer sur "Appliquer", puis sur OK. V/ Lancement du programme - Brancher l'appareil au secteur - Le brancher à l'ordinateur via le cable USB. - Insérer la clé USB de licence, le programme ne s'ouvre pas le cas échéant. - Lancer Auto Lite.