# Minuterie numérique programmable Chacon
##### [](https://wiki.fablab.sorbonne-universite.fr/BookStack/uploads/images/gallery/2024-11/capture-decran-2024-11-04-140301.png)**[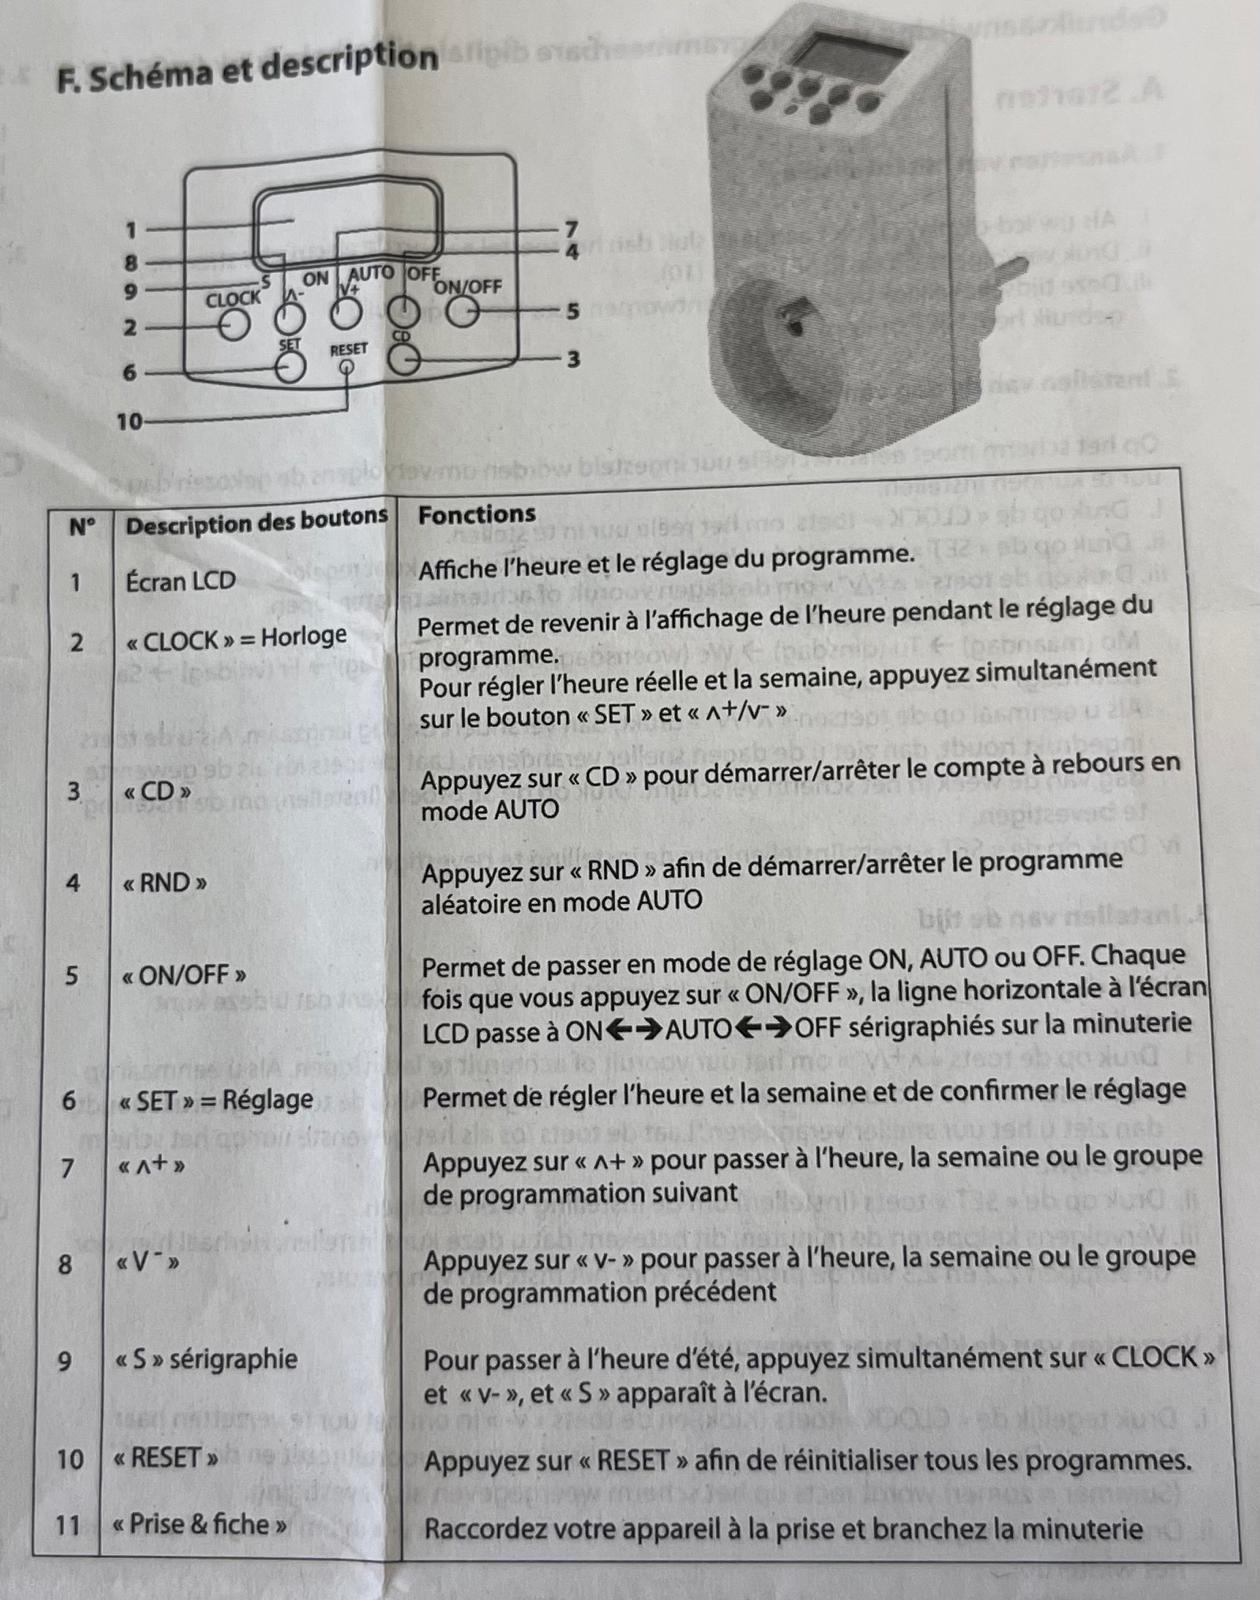](https://wiki.fablab.sorbonne-universite.fr/BookStack/uploads/images/gallery/2024-11/chacon.jpg)**
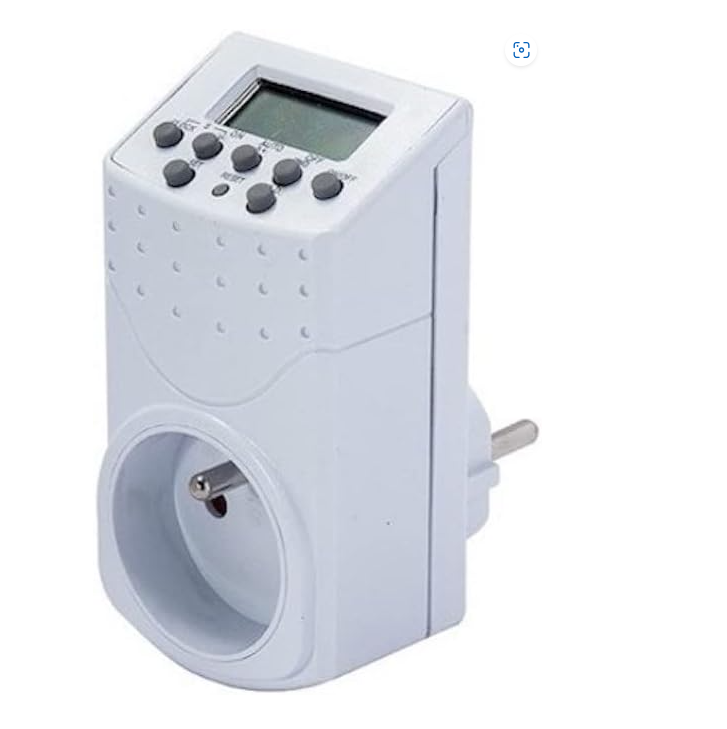
##### Une minuterie numérique programmable permet de planifier l'allumage et l'extinction d'appareils à des horaires définis.
### **Mode d'emploi:**
#### **A. Démarrage :**
#### **1-Allumage écran:**
##### i. Si l'écran LCD ne s'allume pas , branchez votre appareil sur le courant.
##### ii. Ensuite , appuyez sur la bouton "RESET"
##### **2-Réglage du jour de la semaine**
##### **L'écran doit être en mode affichage de l'heure réelle pour passer en mode réglage du jour et de l'heure:**
##### **i**. Appuyez sur le bouton « CLOCK » pour afficher l'heure réelle
##### **ii.** Appuyez sur le bouton « SET » jusqu'à ce que l'affichage de la semaine clignote pour passer au réglage
##### **iii.** Appuyez sur les boutons « ^+/v» pour choisir les jours suivants et précédents.
#####
**La séquence de l'affichage est la suivante :**
Mo (lundi) → Tu (mardi) → We (mercredi) → Th (jeudi) → Fr (vendredi) → Sa (samedi) → Su
##### →(dimanche)
##### En appuyant une fois sur les boutons « ^+/v », le jour avancera ou reculera lentement.
#####
Si vous maintenez le bouton enfoncé, l'affichage des jours de la semaine défilera rapidement. Relâchez le bouton quand le jour de la semaine désiré s'affiche à l'écran.
#####
**iv.** Appuyez ensuite sur le bouton « SET » pour confirmer le réglage.
##### **3-Réglage de l'heure**
##### Une fois le jour de la semaine réglé, l'heure s'affiche en clignotant, ceci indique que vous pouvez la régler.
#####
**i.** Appuyez sur les boutons « ^+/v » pour faire avancer ou reculer l'heure lentement. Si vous maintenez le bouton enfoncé, l'affichage des heures de la semaine défilera rapidement.
Relâchez le bouton dès que l'heure désirée s'affiche à l'écran.
#####
**ii.** Appuyez sur le bouton « SET » pour confirmer le réglage.
#####
**iii.** Ce sont ensuite les minutes qui se mettront à clignoter. Répétez la procédure de réglage de l'heure indiquée aux paragraphes 2.2 et 2.3.
##### **4-Passez à l'heure d'été**
##### **i.** Appuyez simultanément sur le bouton « CLOCK » et « v » pour passer à l'heure d'été.
La lettre « S » (Summer = été) s'affichera à droite de l'écran pour confirmation.
#####
**ii.** Répétez l'opération pour repasser à l'heure d'hiver.
##### **5-Affichage de l'heure**
##### **i**. Il existe deux types d'affichage d'heure :
1. Affichage 12 heures : l'écran LCD affiche de 00:00 à 12:00 ainsi qu'une mention AM ou PM.
2. Affichage 24 heures : l'écran LCD affiche de 00:00 à 23:59 sans mention AM ou PM
##### **ii.** Pour changer le type d'affichage, appuyez sur le bouton « CLOCK» et maintenez-le enfoncé jusqu'à ce que l'affichage à l'écran LCD change.
#####
**iii.** Appuyez sur le bouton « CLOCK » pour revenir à l'affichage d'origine.
#### **B. Sélection du programme :**
##### L'écran doit être en mode affichage de l'heure « CLOCK ».pour passer en mode programmation.
##### **1-Choisir le n° de programme**
##### **i.** Appuyez sur le bouton « AUTO» pour sélectionner le programme.
##### **ii.** Appuyez sur le bouton « +» pour choisir le n° du programme et son état:
1. « On » = mise sous tension
2. « OFF » = mise hors tension
3. « AUTO»= mise sous tension et hors tension automatiquement en fonction des heures programmées
**iii.** Appuyez sur le bouton « SET » pour confirmer le réglage des jours.
##### **2-Choisir les jours du programme**
##### **i.** La semaine clignote pour sélectionner les jours.
##### **ii.** Appuyez sur le bouton « ^+» pour choisir le jour.
**iii.** Appuyez sur le bouton « SET » pour confirmer le réglage des jours.
#####
##### **3-Choisir l'heure du programme**
##### **i.** L'heure se met à clignoter pour être configurée.
**ii.** Appuyez sur les boutons « ^+/v-» pour avancer ou reculer l'heure.
##### **iii.** Appuyez sur le bouton « SET » pour confirmer le réglage.
**iv.** Les minutes se mettent ensuite à clignoter. Répétez la même opération que pour le réglage de l'heure.
#### **B. Compte à rebours :**
##### L'écran doit être en mode affichage de l'heure réelle « CLOCK » pour programmer le compte à rebours.
##### **1-programmation du compte à rebours**
##### **i.** Appuyez sur le bouton « V-» pour programmer le compte à rebours
##### « d ON» ou « d OFF » s'affichera dans le coin en bas à gauche de l'écran.
« d»= compte à rebours
«ON » = compte à rebours jusqu'à l'heure de mise sous tension
« OFF » = compte à rebours jusqu'à l'heure de mise hors tension
##### **ii.** Appuyez sur le bouton « SET » jusqu'à ce que « ON/OFF » clignote.
**iii**. Appuyez sur le bouton « ^+/v » pour sélectionner l'état ON ou OFF du compte à rebours.
**iv.** Appuyez sur « SET » pour confirmer le réglage.
##### **2-choisir l'heure du compte a rebours**
##### L'affichage de l'heure clignote.
**i.** Appuyez sur le bouton « ^+/v- » pour choisir l'heure.
##### **ii.** Appuyez sur le bouton « SET » pour valider l'opération.
##### L'affichage des minutes clignote.
**i.** Appuyez sur le bouton « ^+/v- » pour choisir les minutes.
##### **ii.** Appuyez sur le bouton « SET » pour valider l'opération,
L'affichage des secondes clignote.
**i.** Appuyez sur le bouton « ^+/V » pour choisir les secondes.
##### **ii.** Appuyez sur le bouton « SET » pour valider l'opération.
##### **3-Démarrez le compte à rebours**
##### **i.** Branchez ensuite la minuterie à la prise et placez la minuterie en made « AUTO »
##### **ii.** Appuyez sur le bouton « CD » pour démarrer le compte à rebours
##### **iii.** Appuyez une nouvelle fois sur le bouton « CD» pour arrêter le compte à rebours
#### **C. Réglage de la fonction aléatoire :**
##### La fonction aléatoire allume et éteint votre appareil de façon irrégulière:
#####
**i.** Fonction aléatoire
1. Temps minimum pour un appareil éteint : 26 minutes
2. Temps maximum pour un appareil éteint: 42 minutes
3. Temps minimum pour un appareil allumé: 10 minutes
4. Temps maximum pour un appareil allumé : 26 minutes
##### **ii**. Branchez la minuterie dans la prise et placez-la en mode « AUTO » afin de
démarrer/arrêter la fonction aléatoire.
**iii.** Appuyez sur le bouton « RND » pour activer la fonction aléatoire.
**iv.** L'appareil demeurera éteint pendant 26 à 42 minutes et s'allumera ensuite pendant
10 à 26 minutes.
##### **v.** Appuyez à nouveau sur le bouton "RND" pour arrêter la fonction aléatoire.